Sauerkraut For Canning

img_3869

For the first time ever I turned cabbage into sauerkraut!  I’ve wanted to do this for a long time but was apprehensive about safely fermenting anything.  I must admit I was actually afraid.  Like I was the first time I used my pressure cooker.  This fermenting isn’t for the faint of heart.  I have a bit of a weak stomach and every day, once the cabbage starts to ferment, you need to skim the scum from the top.  I bought myself a special scum skimmer from Amazon to do the skimming.

image

Once during the fermentation process I was out of town for five days.  I kept thinking about the I Love Lucy episode where Lucy puts too much detergent into the washing machine and it is overflowing everywhere.  I had visions of scum and bubbles running over the sides of the crock and onto my kitchen floor.  That did not happen.   But fermenting cabbage was the first thing I smelled when I walked in the door.  No doubt about what the smell was.  I had to put Vicks under my nose and put on my heavy rubber gloves to do the skimming that day.  But the longer the cabbage worked the less it smelled until finally, after nearly five weeks, there was no scum and virtually no smell at all.  Today I took the towel off the top of the crock, removed the weight and the plate, and removed the cheesecloth.  My five heads of cabbage have turned into a crock full of beautiful, perfect sauerkraut!

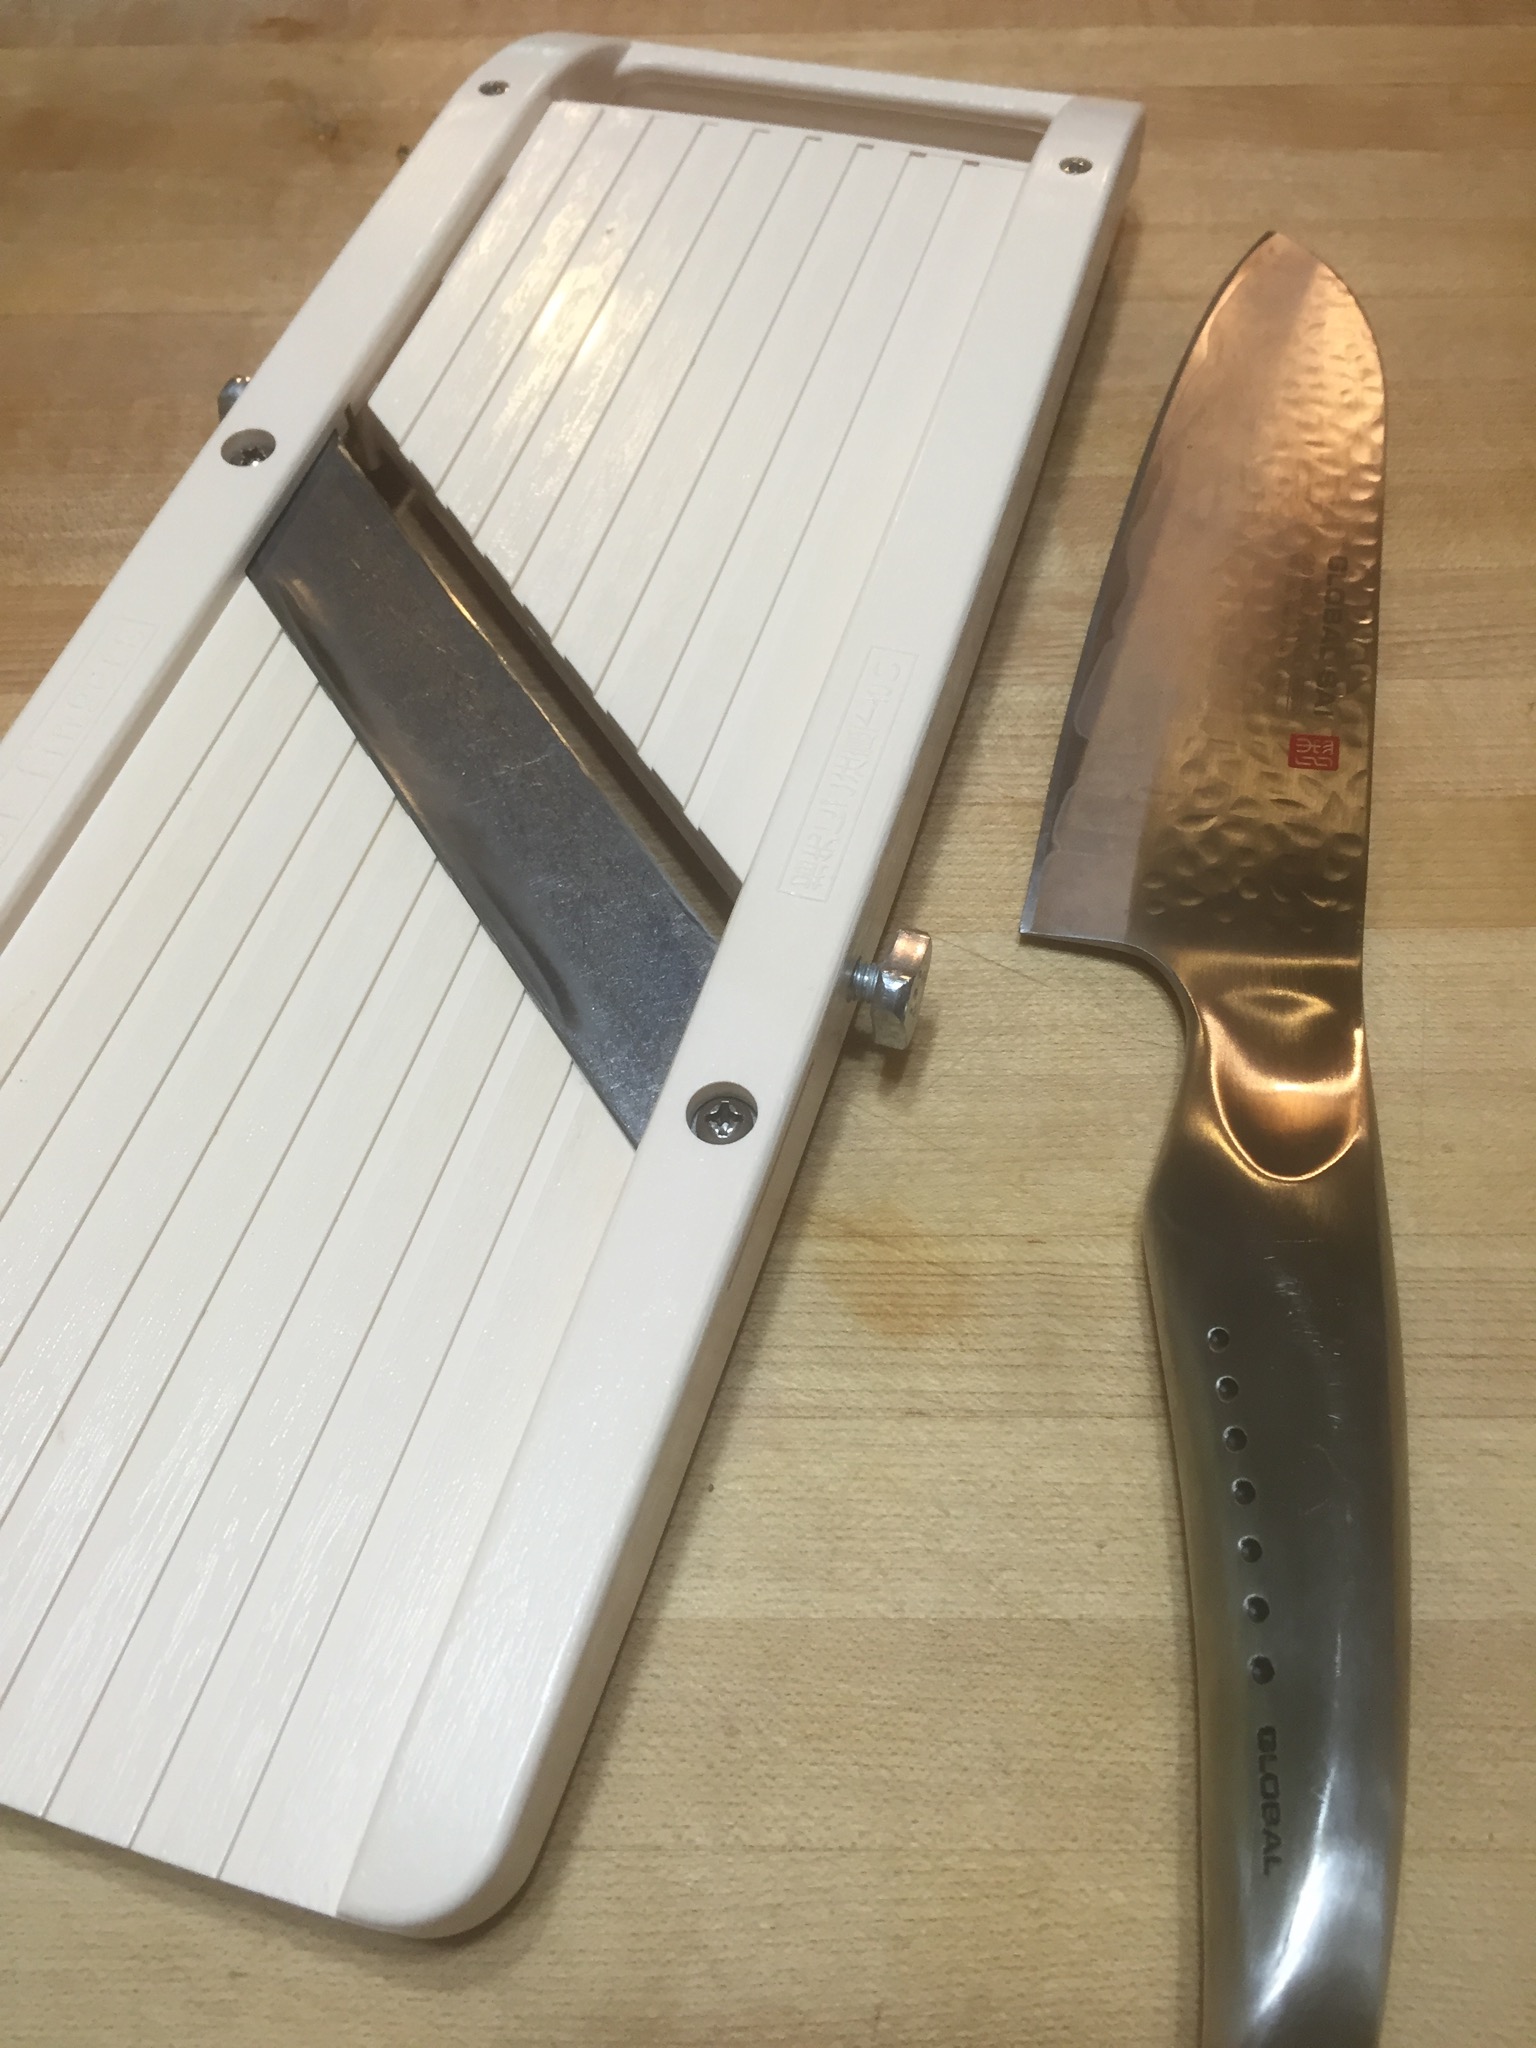
Making your own sauerkraut does not require any special skills,  The only ingredients you need are cabbage and salt.  The only tools you need are a very sharp knife or mandolin, a large glass or ceramic crock of some sort, a scale to weigh the cabbage to get the salt to cabbage ratio correct, and a scum skimmer.  You have to be patient.  And it’s probably easier if you don’t have a really weak stomach.

Ingredients:

Cabbage – the large heads you get at the end of the growing season

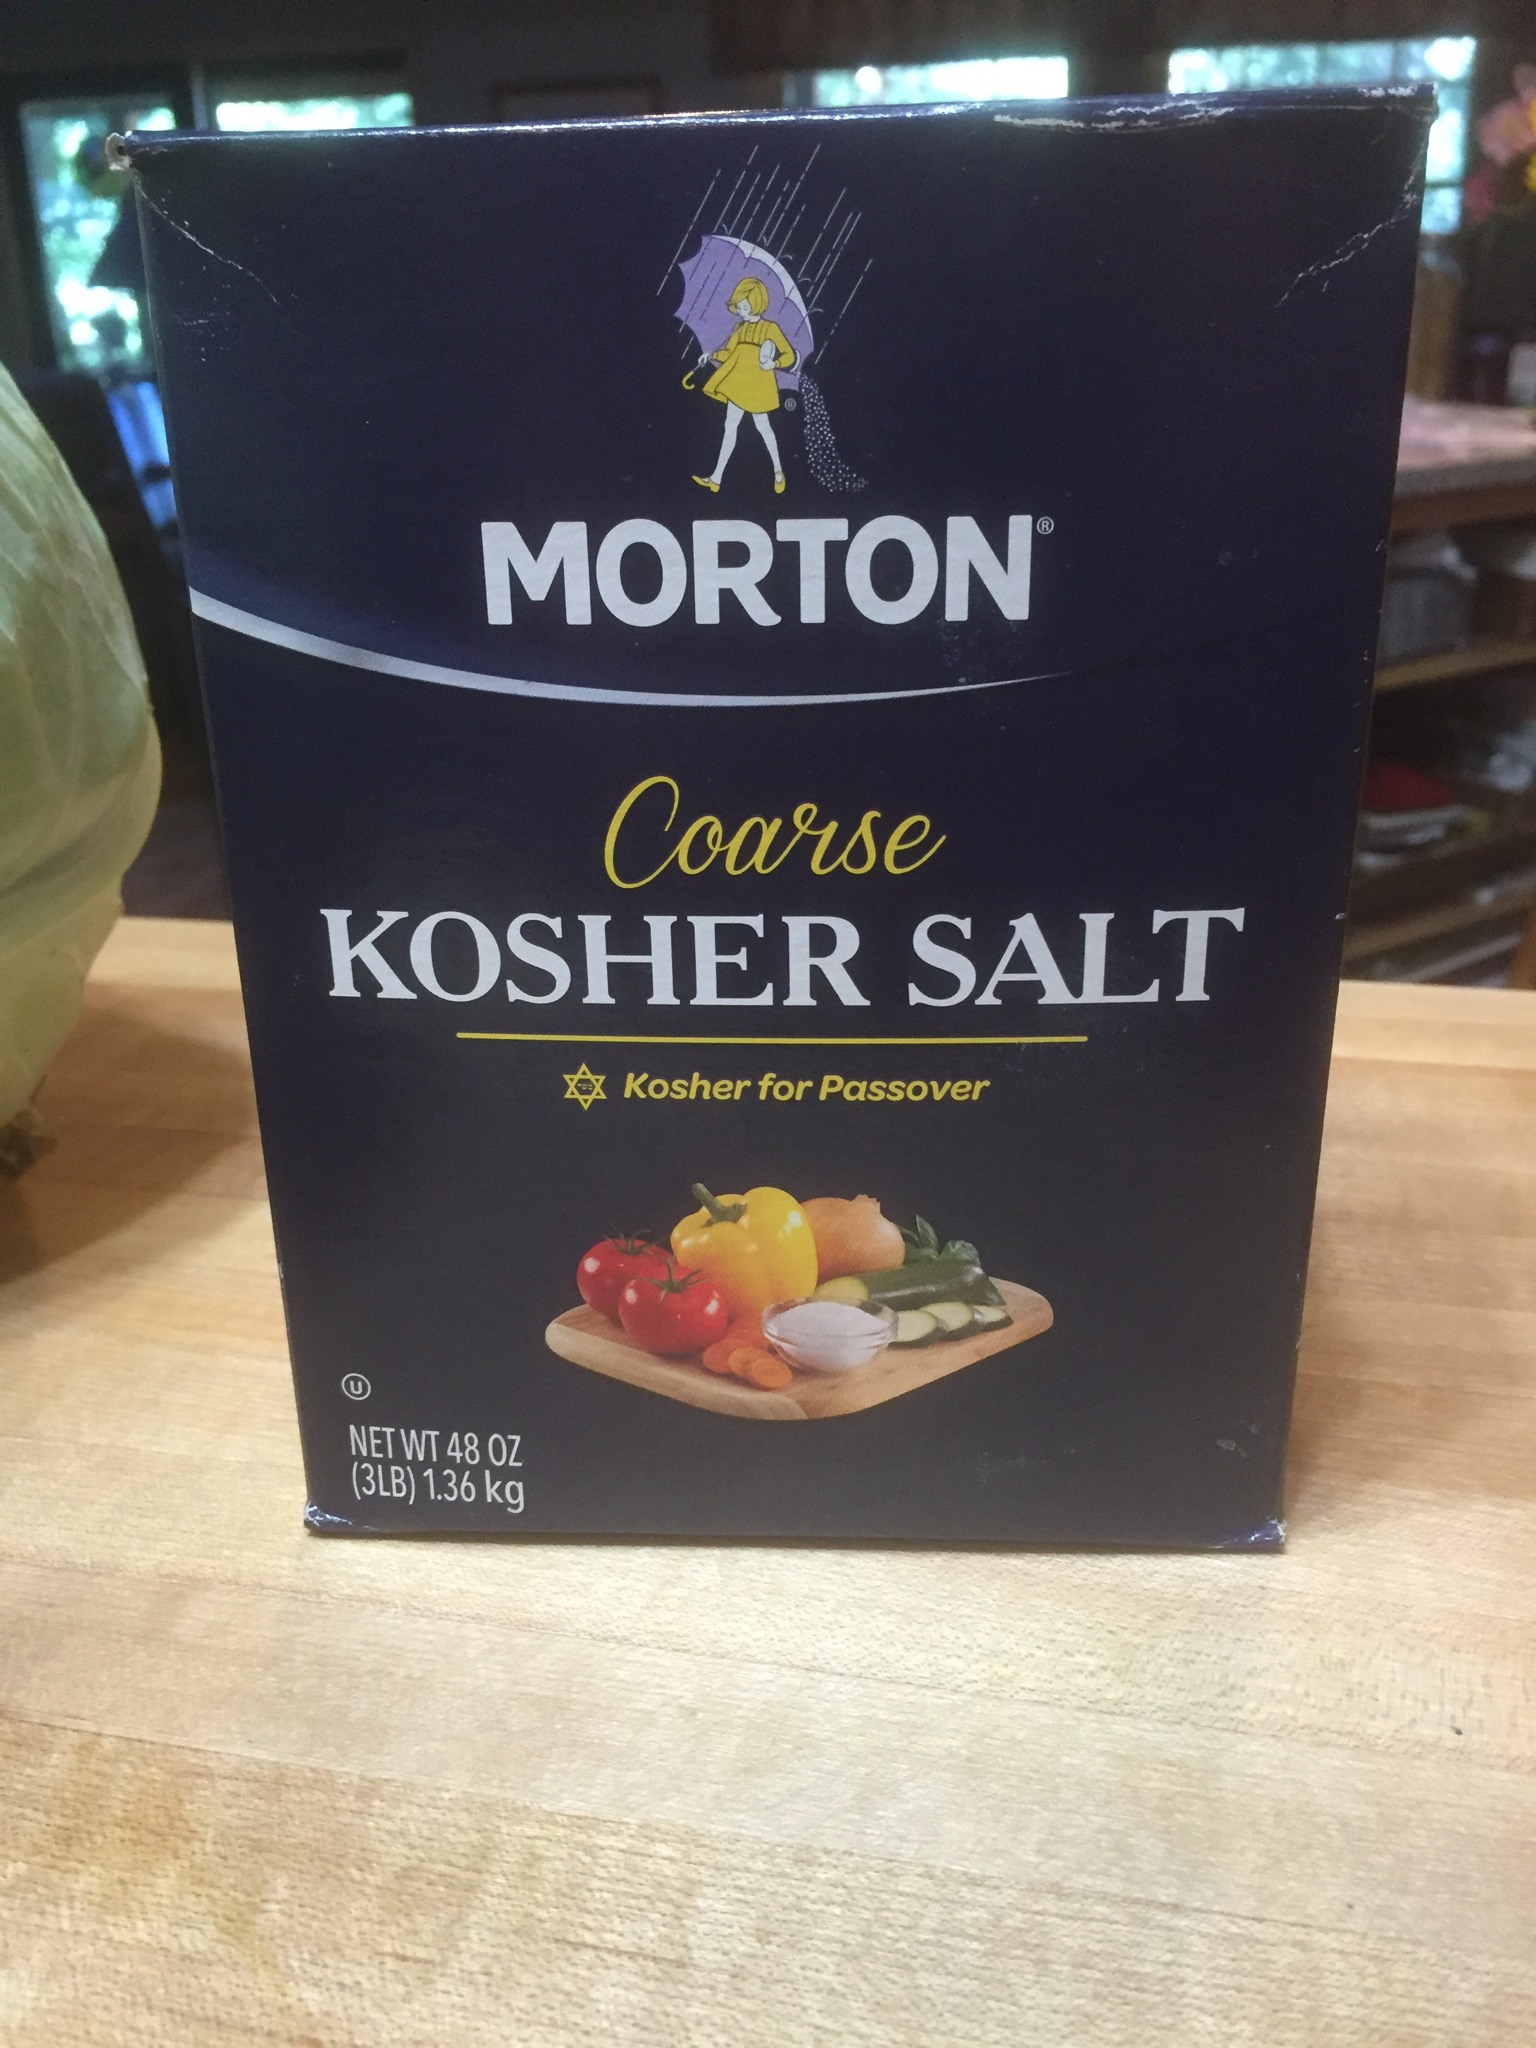
Kosher or Pickling salt

img_0117 img_0118

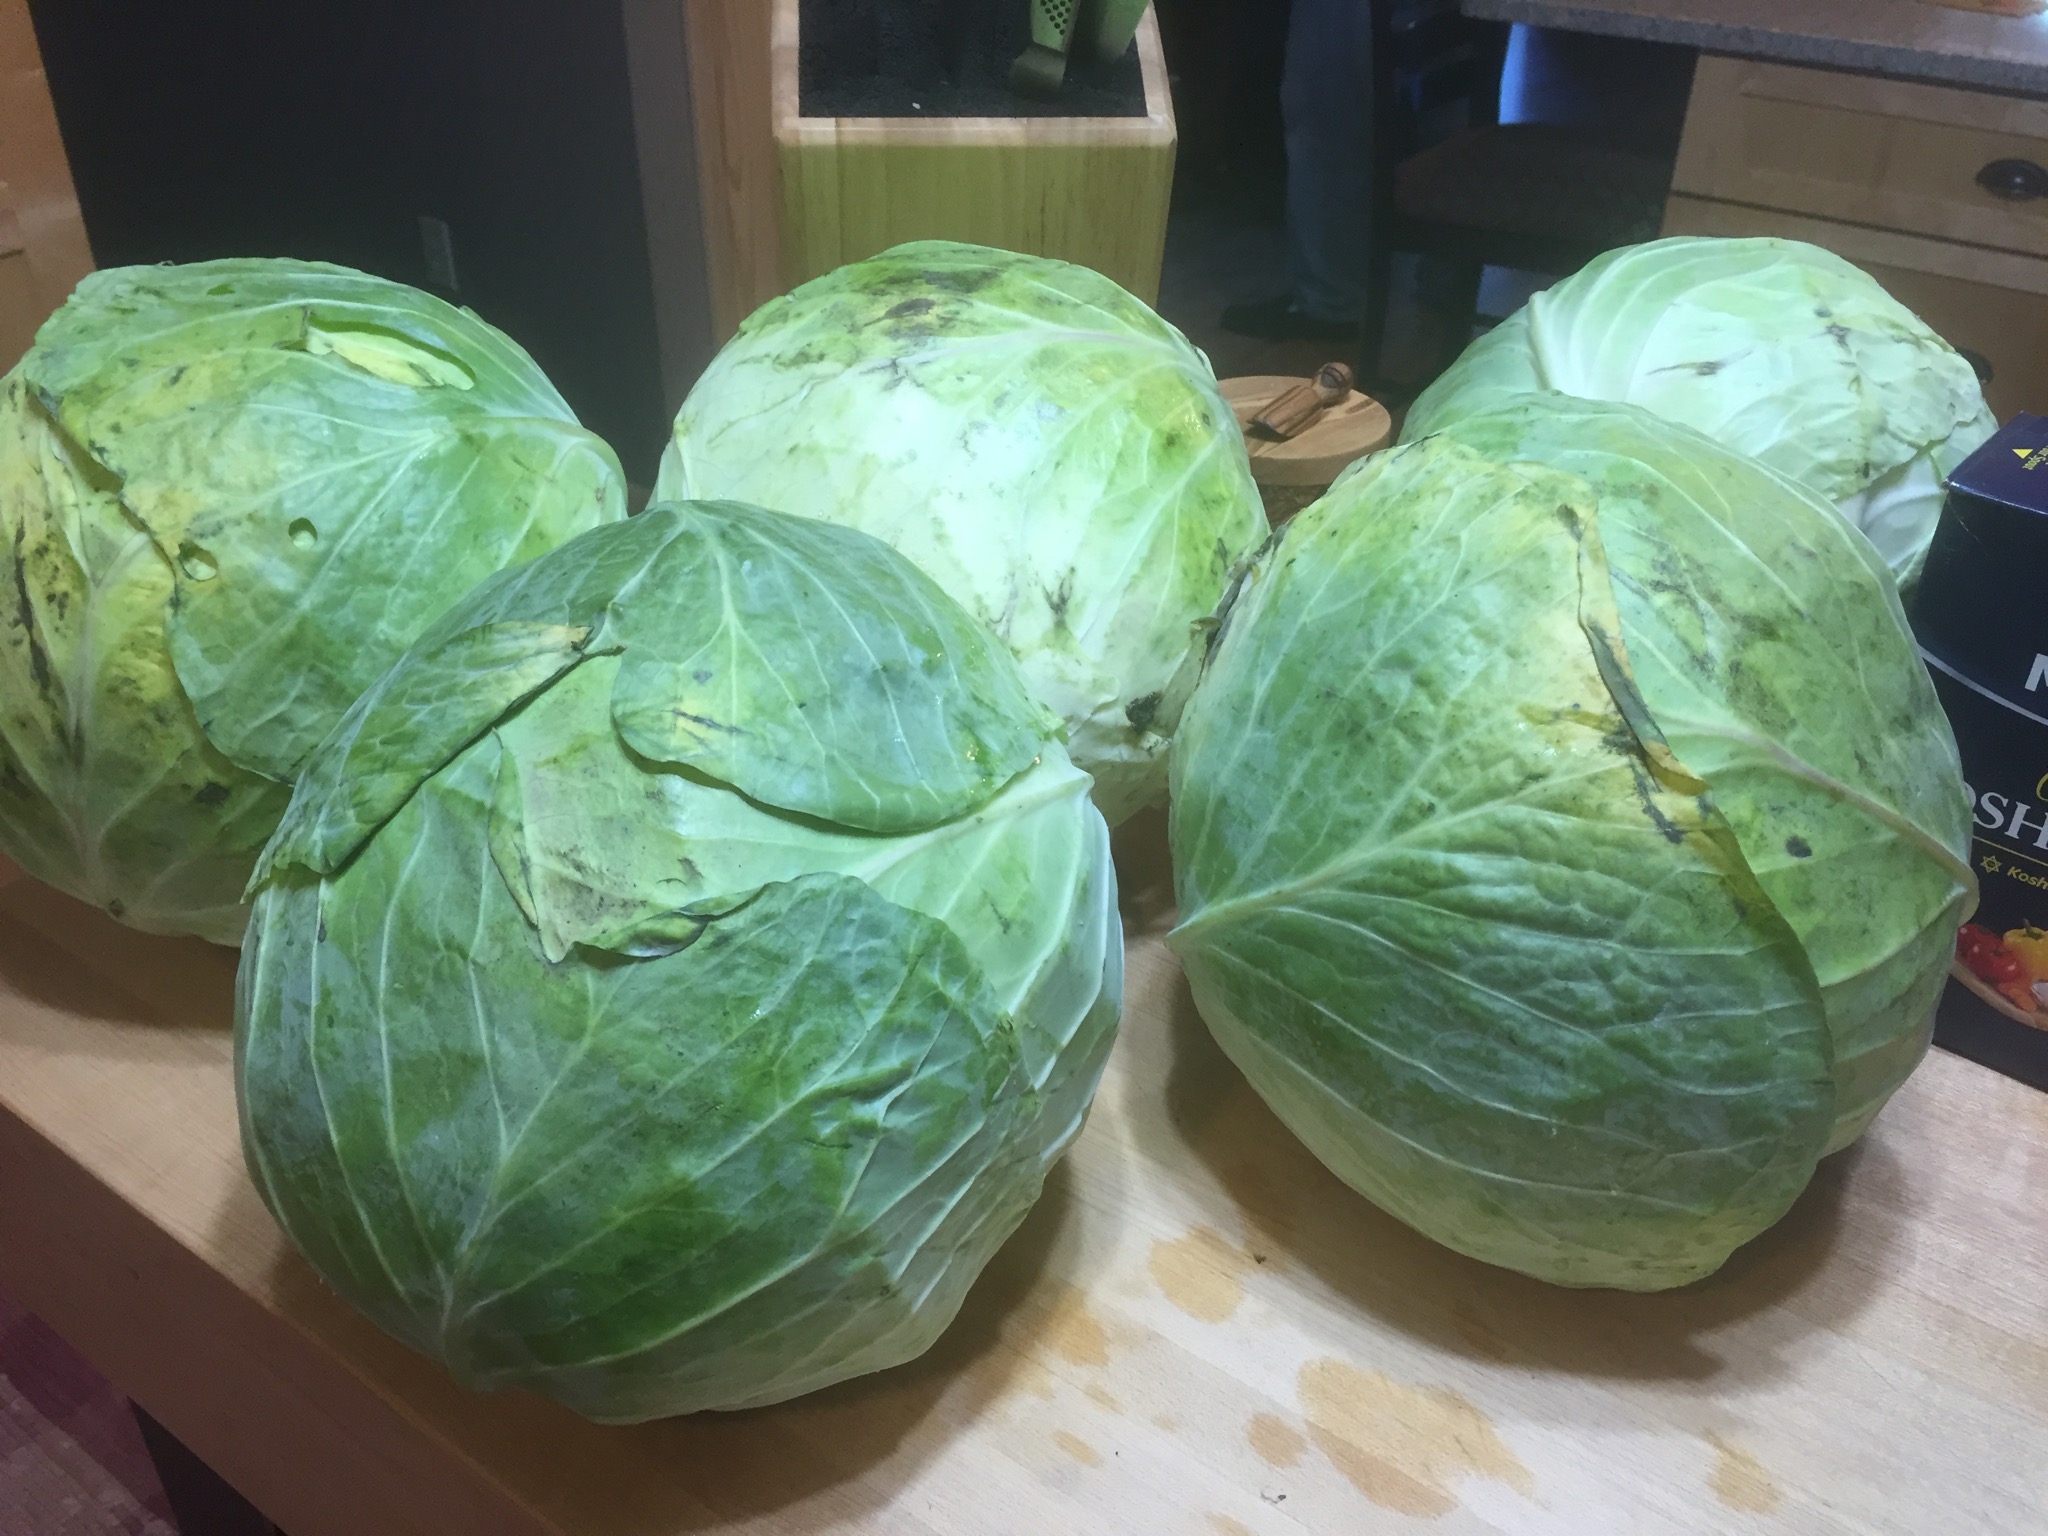
I used 5 large firm heads of cabbage.  Peel and discard the outer leaves.  Cut the cabbage in half and then into quarters and remove the core.

img_0120

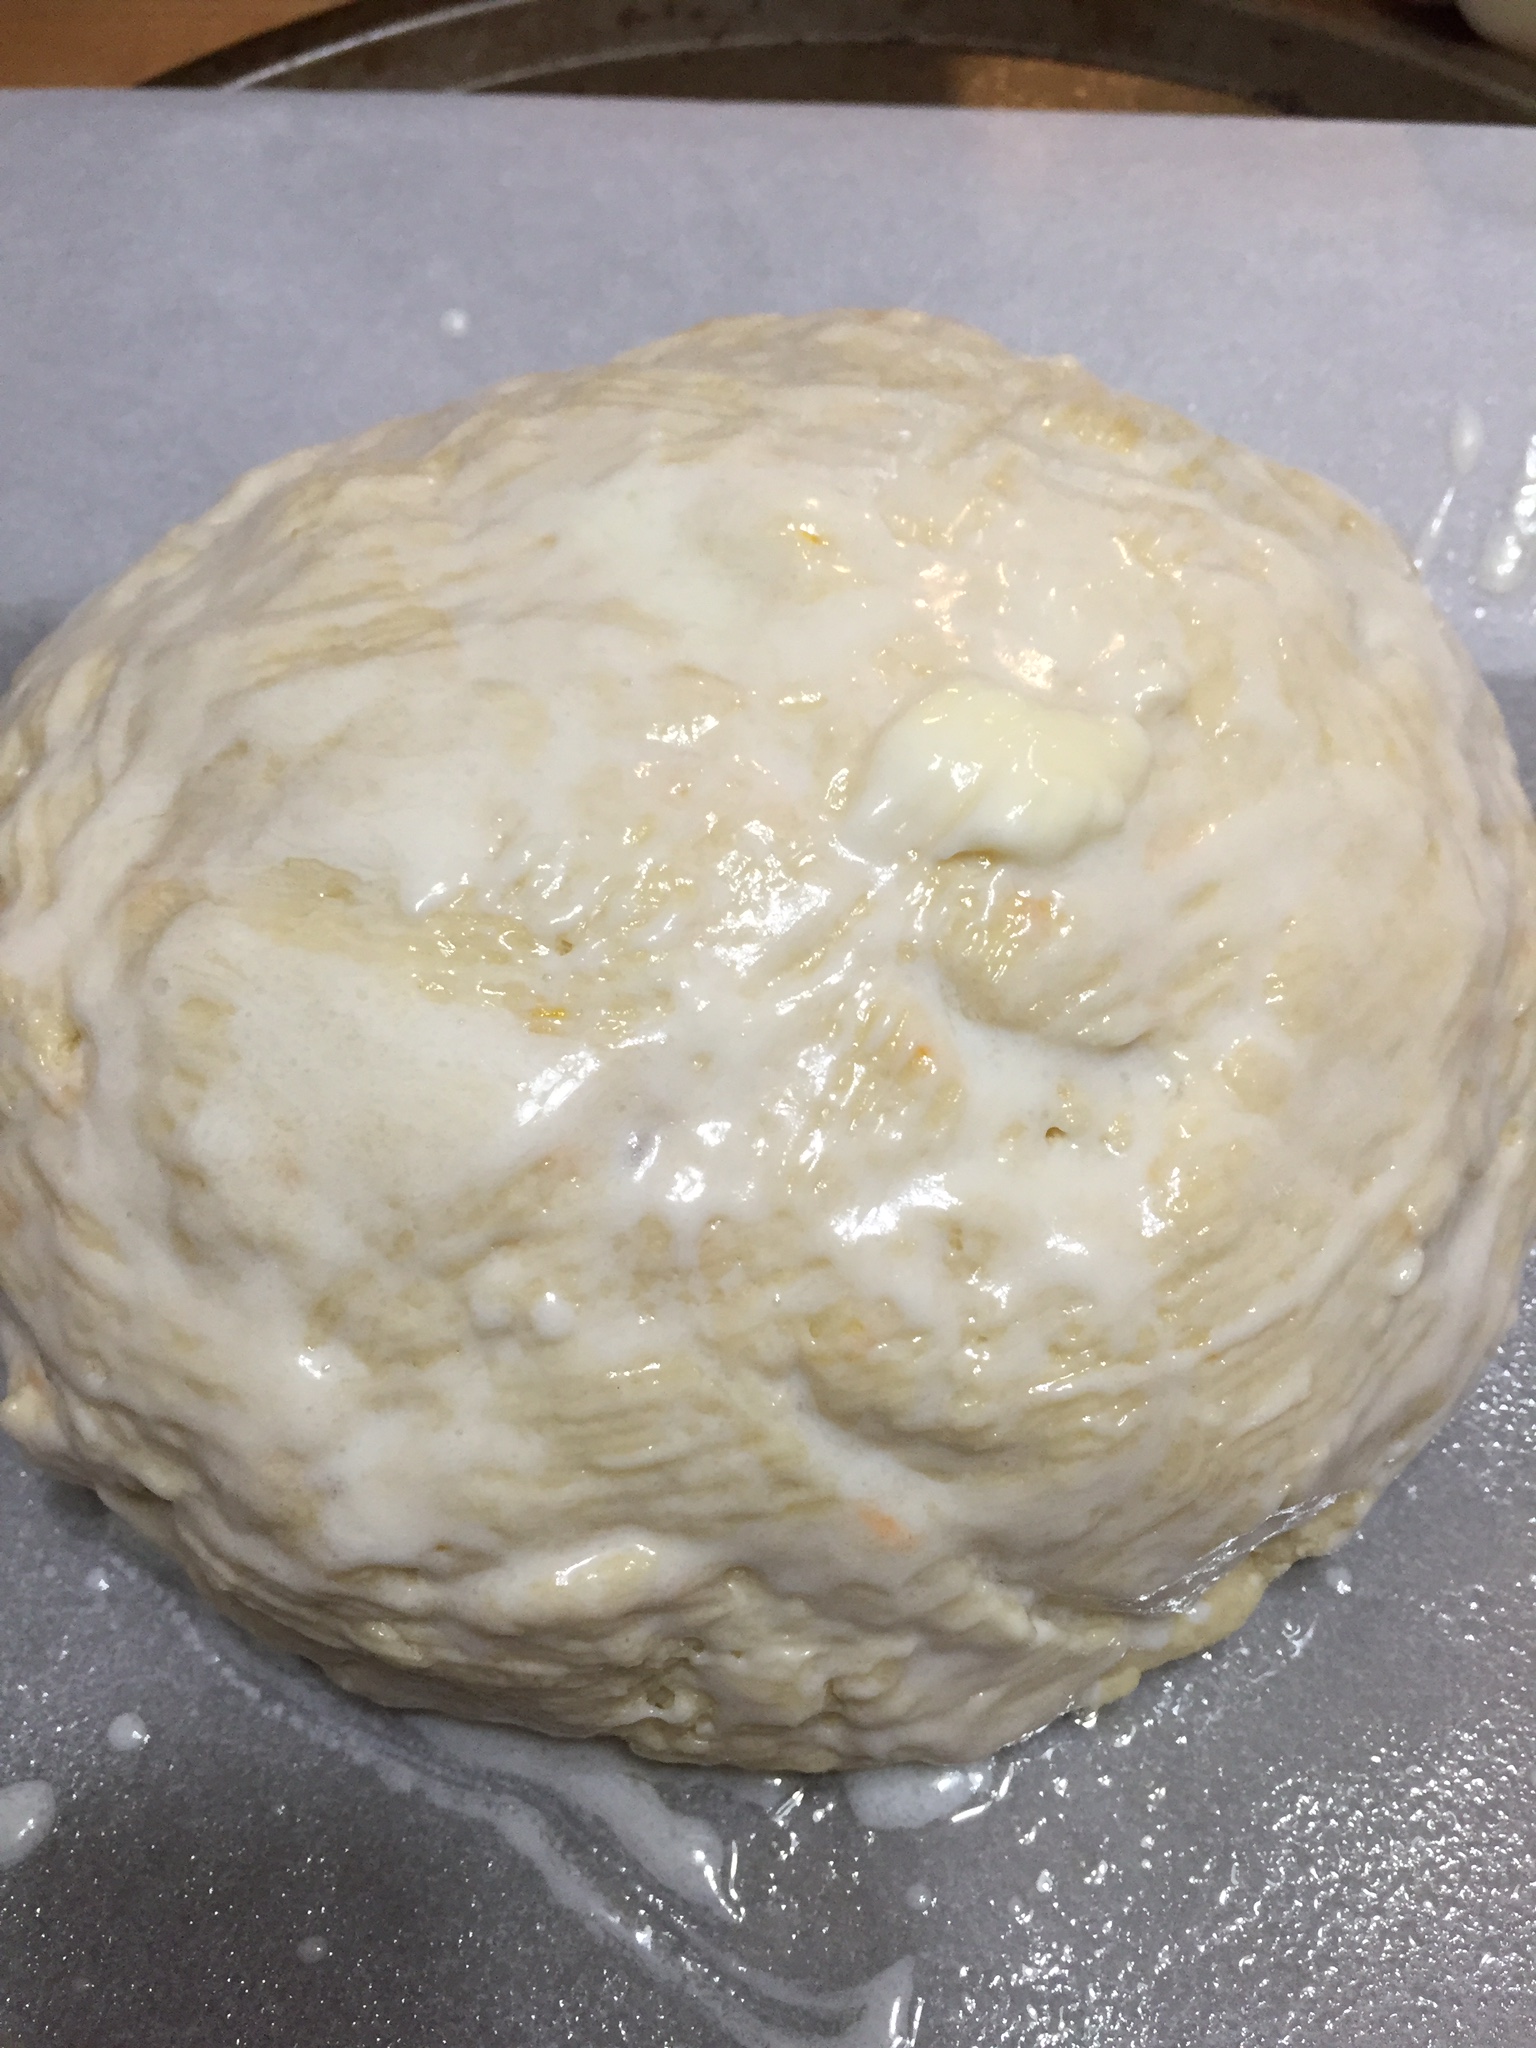
Using a sharp knife and or a mandolin shred the cabbage to about the thickness of a dime.  Weigh out 5 pounds of shredded cabbage and, in a large bowl, add 3 T of salt to the cabbage.  Let it stand until it starts to wilt and then pack it into the crock.  While you’re waiting for the first 5 pounds to wilt continue shredding.

img_0119 img_0121 img_0122

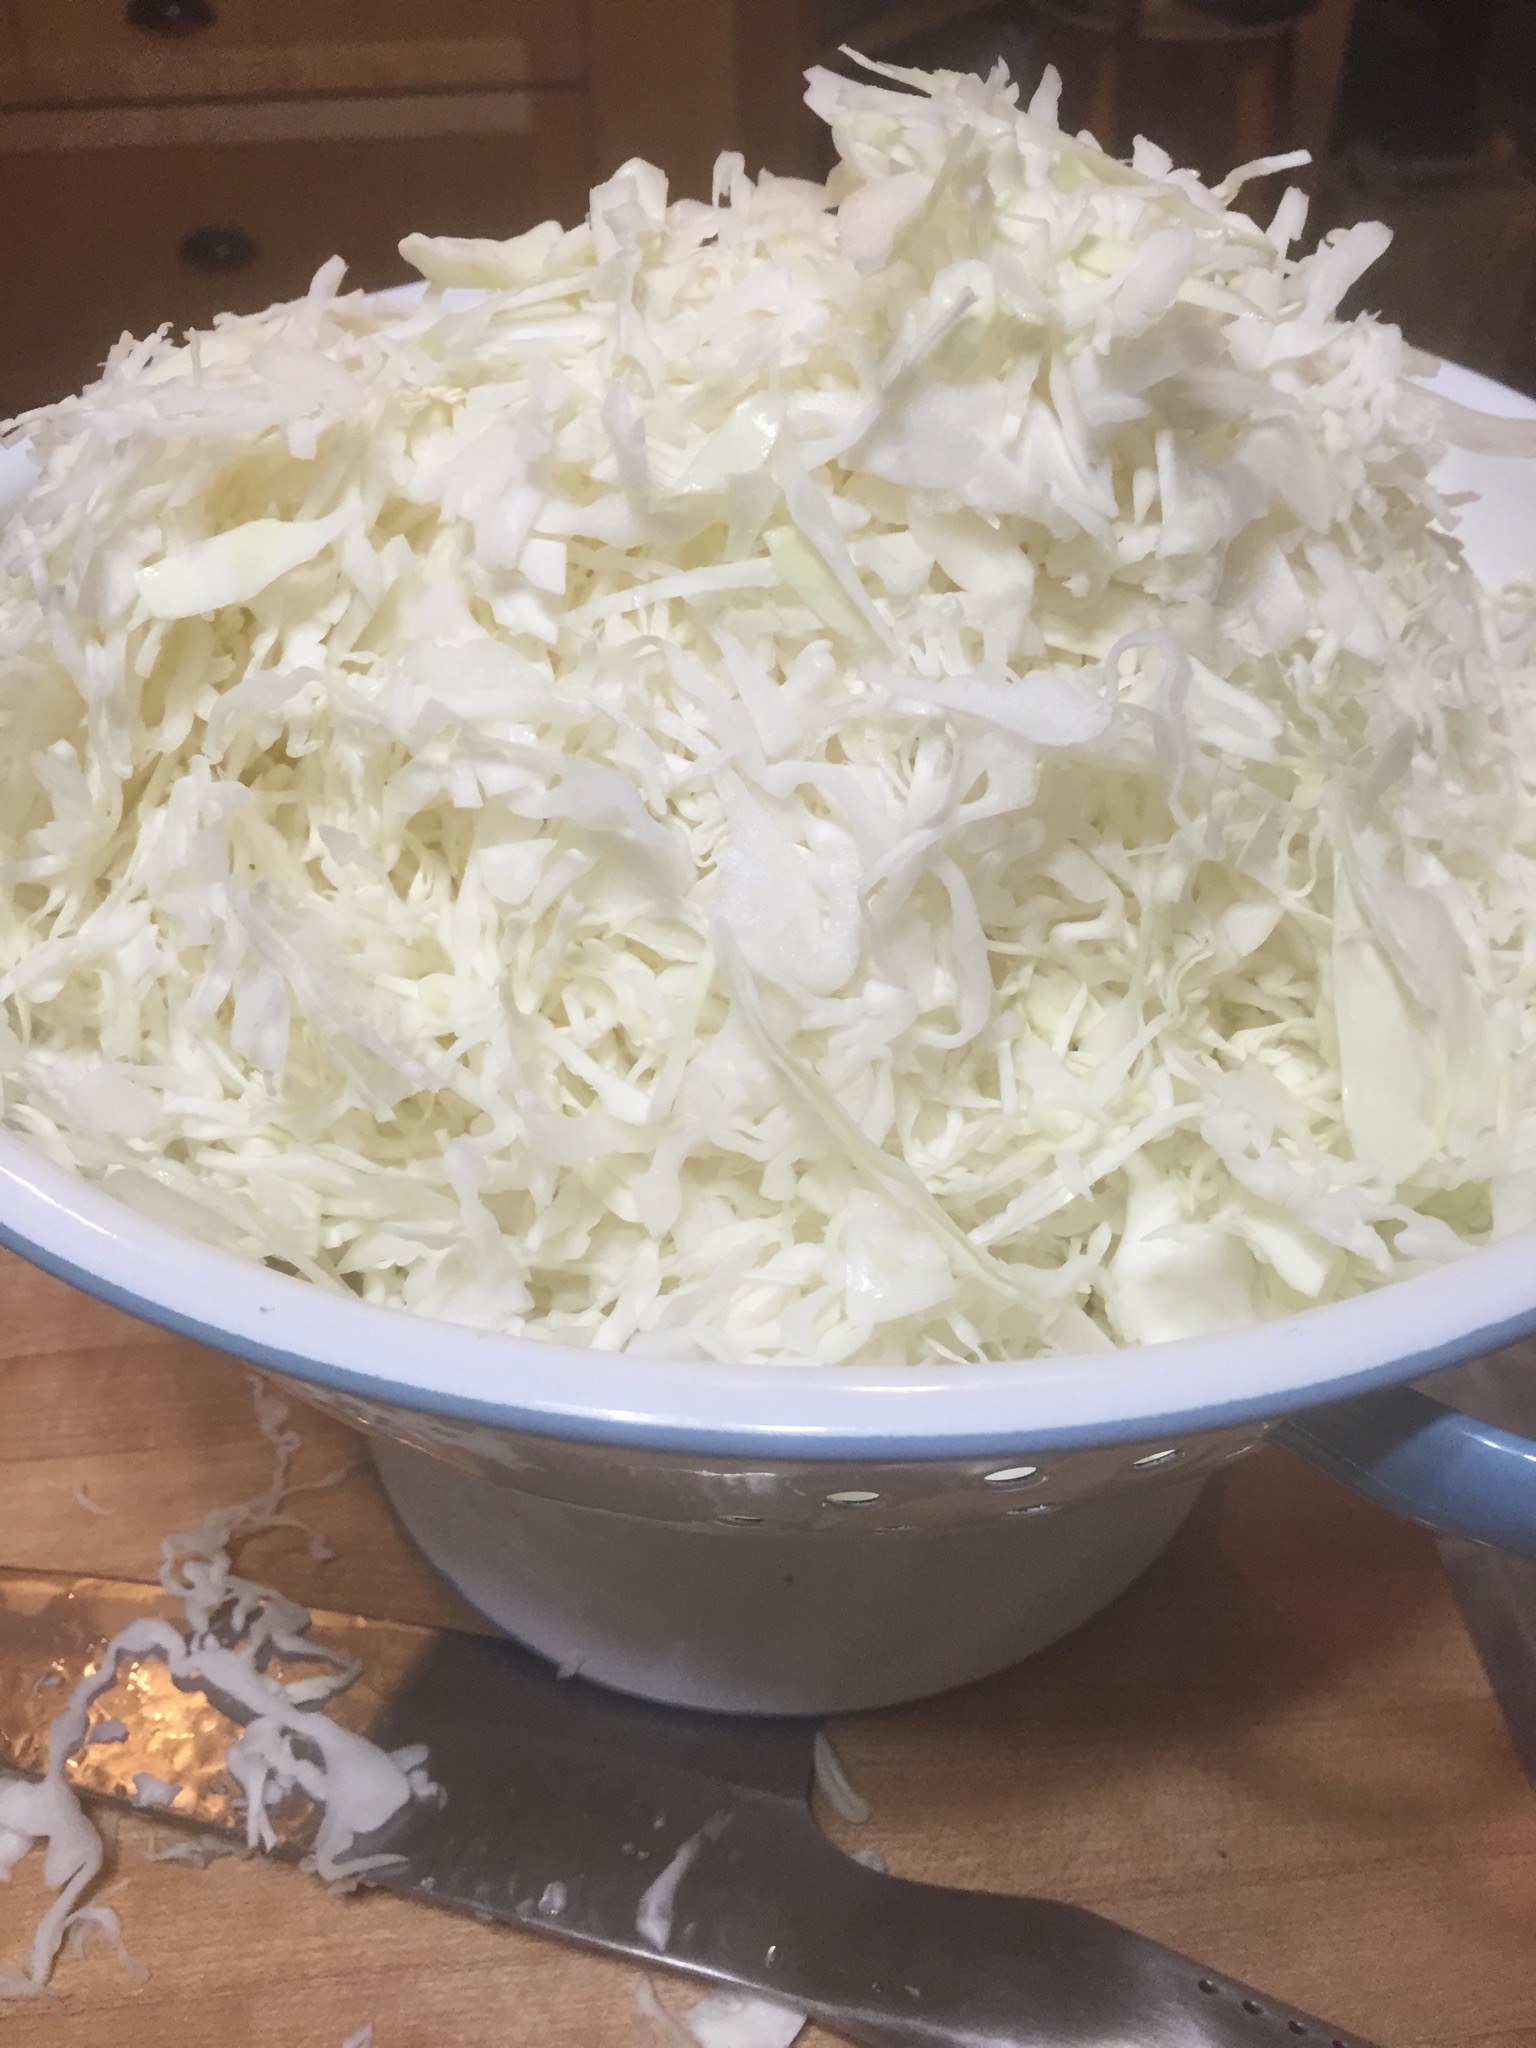
Continue shredding and salting until all of the cabbage is in the pickling container.  Allow for 3-4 inches of headspace in your crock.  Use your hands to press down on the cabbage until the juices flow and start to come to the top.  If the juices don’t cover the cabbage make up a brine using 1 1/2 T of salt to a quart of water.  Bring the salt water mixture to a boil.  Allow it to cool completely before adding it to the cabbage.

Cover the cabbage in the crock with cheesecloth tucking the edges down alongside the cabbage.  Put a plate on top of the cheesecloth and weigh it down to ensure that the cabbage remains immersed in the liquid.  I used an 8 pound medicine ball (an exercise weight) but you can use a brick wrapped in foil or inside a zip lock bag.

img_0123

Now the fun begins.  Cover the crock with a towel,  It’s best kept at 70-75 degrees.  My house is never that warm but i kept it in the kitchen which is usually the warmest place and also most convenient for skimming.  Every day I lifted the towel to see what was happening.  It took several days but bubbles and scum began to form.  Each day after that I removed the weight, skimmed the scum, washed off and returned the weight, recovered the crock and waited for another day.  It took a couple days less than five weeks for the gas bubbles to stop forming.  Interestingly a salty crust formed on the outside of the crock.  It’s apparently very normal so don’t let it worry you.

img_0125

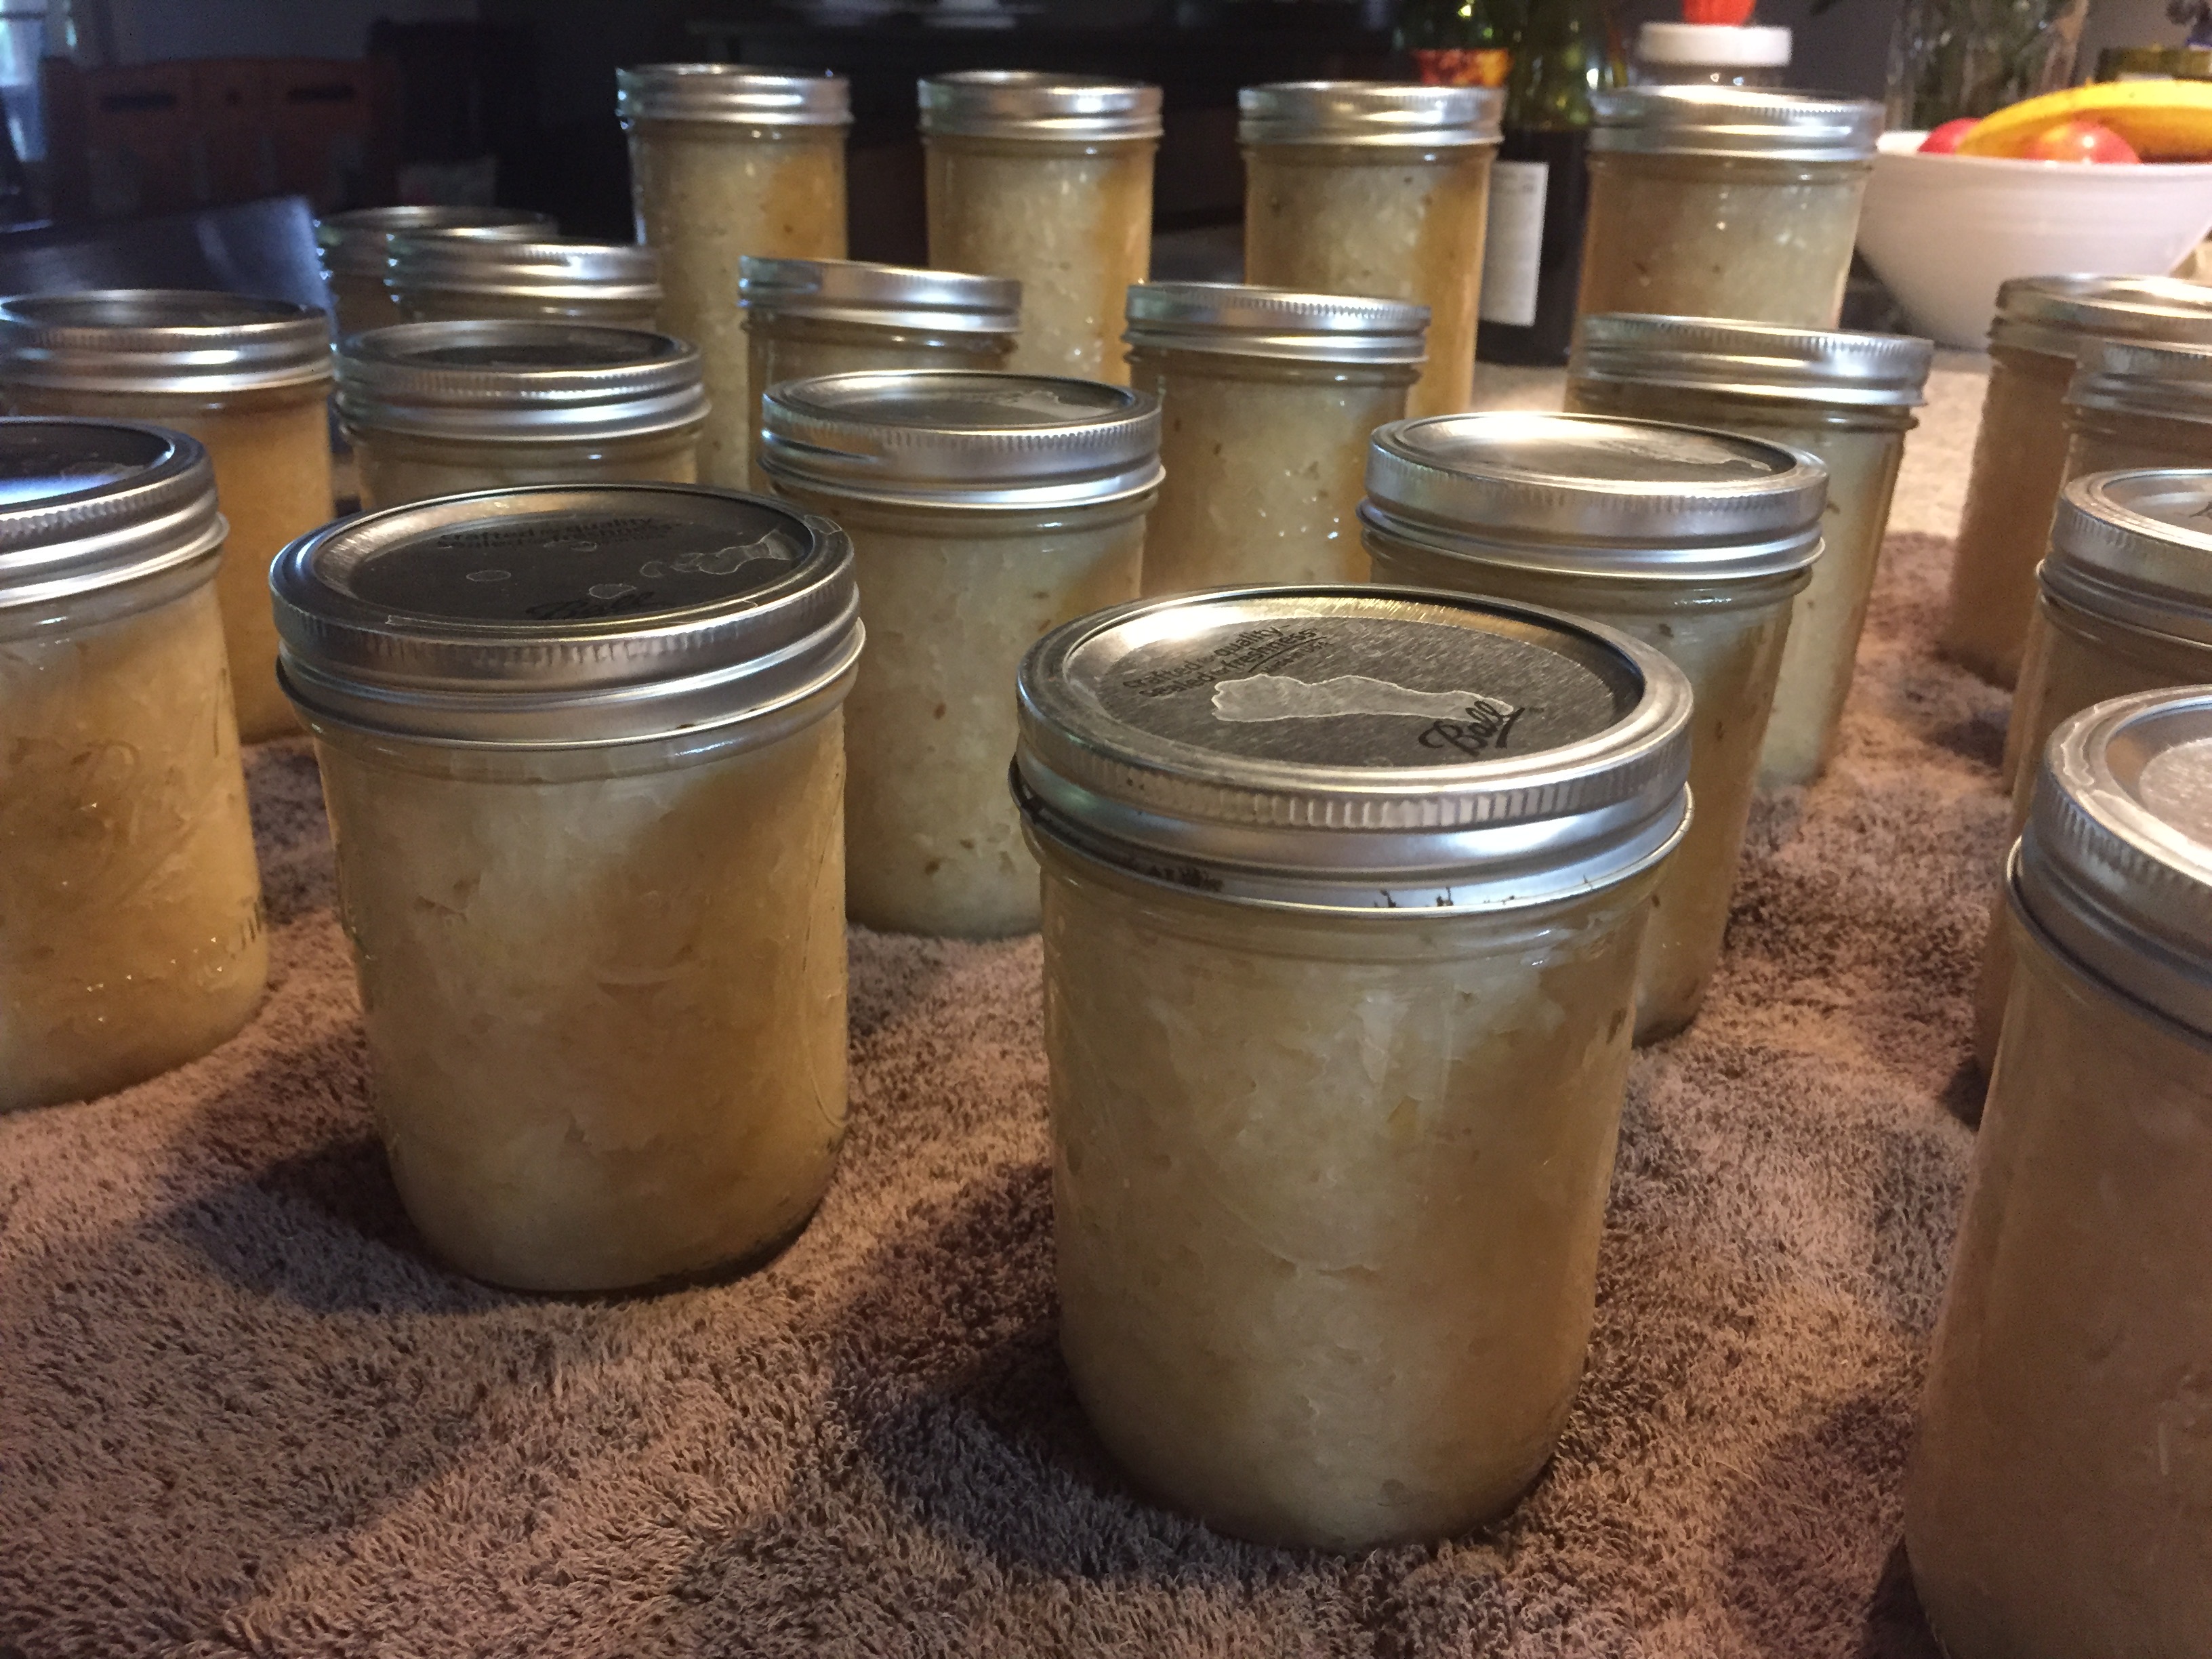
Once the fermentation process is completed remove the sauerkraut to a large stainless steel pot or dutch oven.  Heat the sauerkraut just to a simmer.  Do not boil.  Ladle the sauerkraut into hot jars leaving about 1/2 inch of headspace and process in a water bath of 15 minutes for pints, 20 minutes for quarts.

img_0124

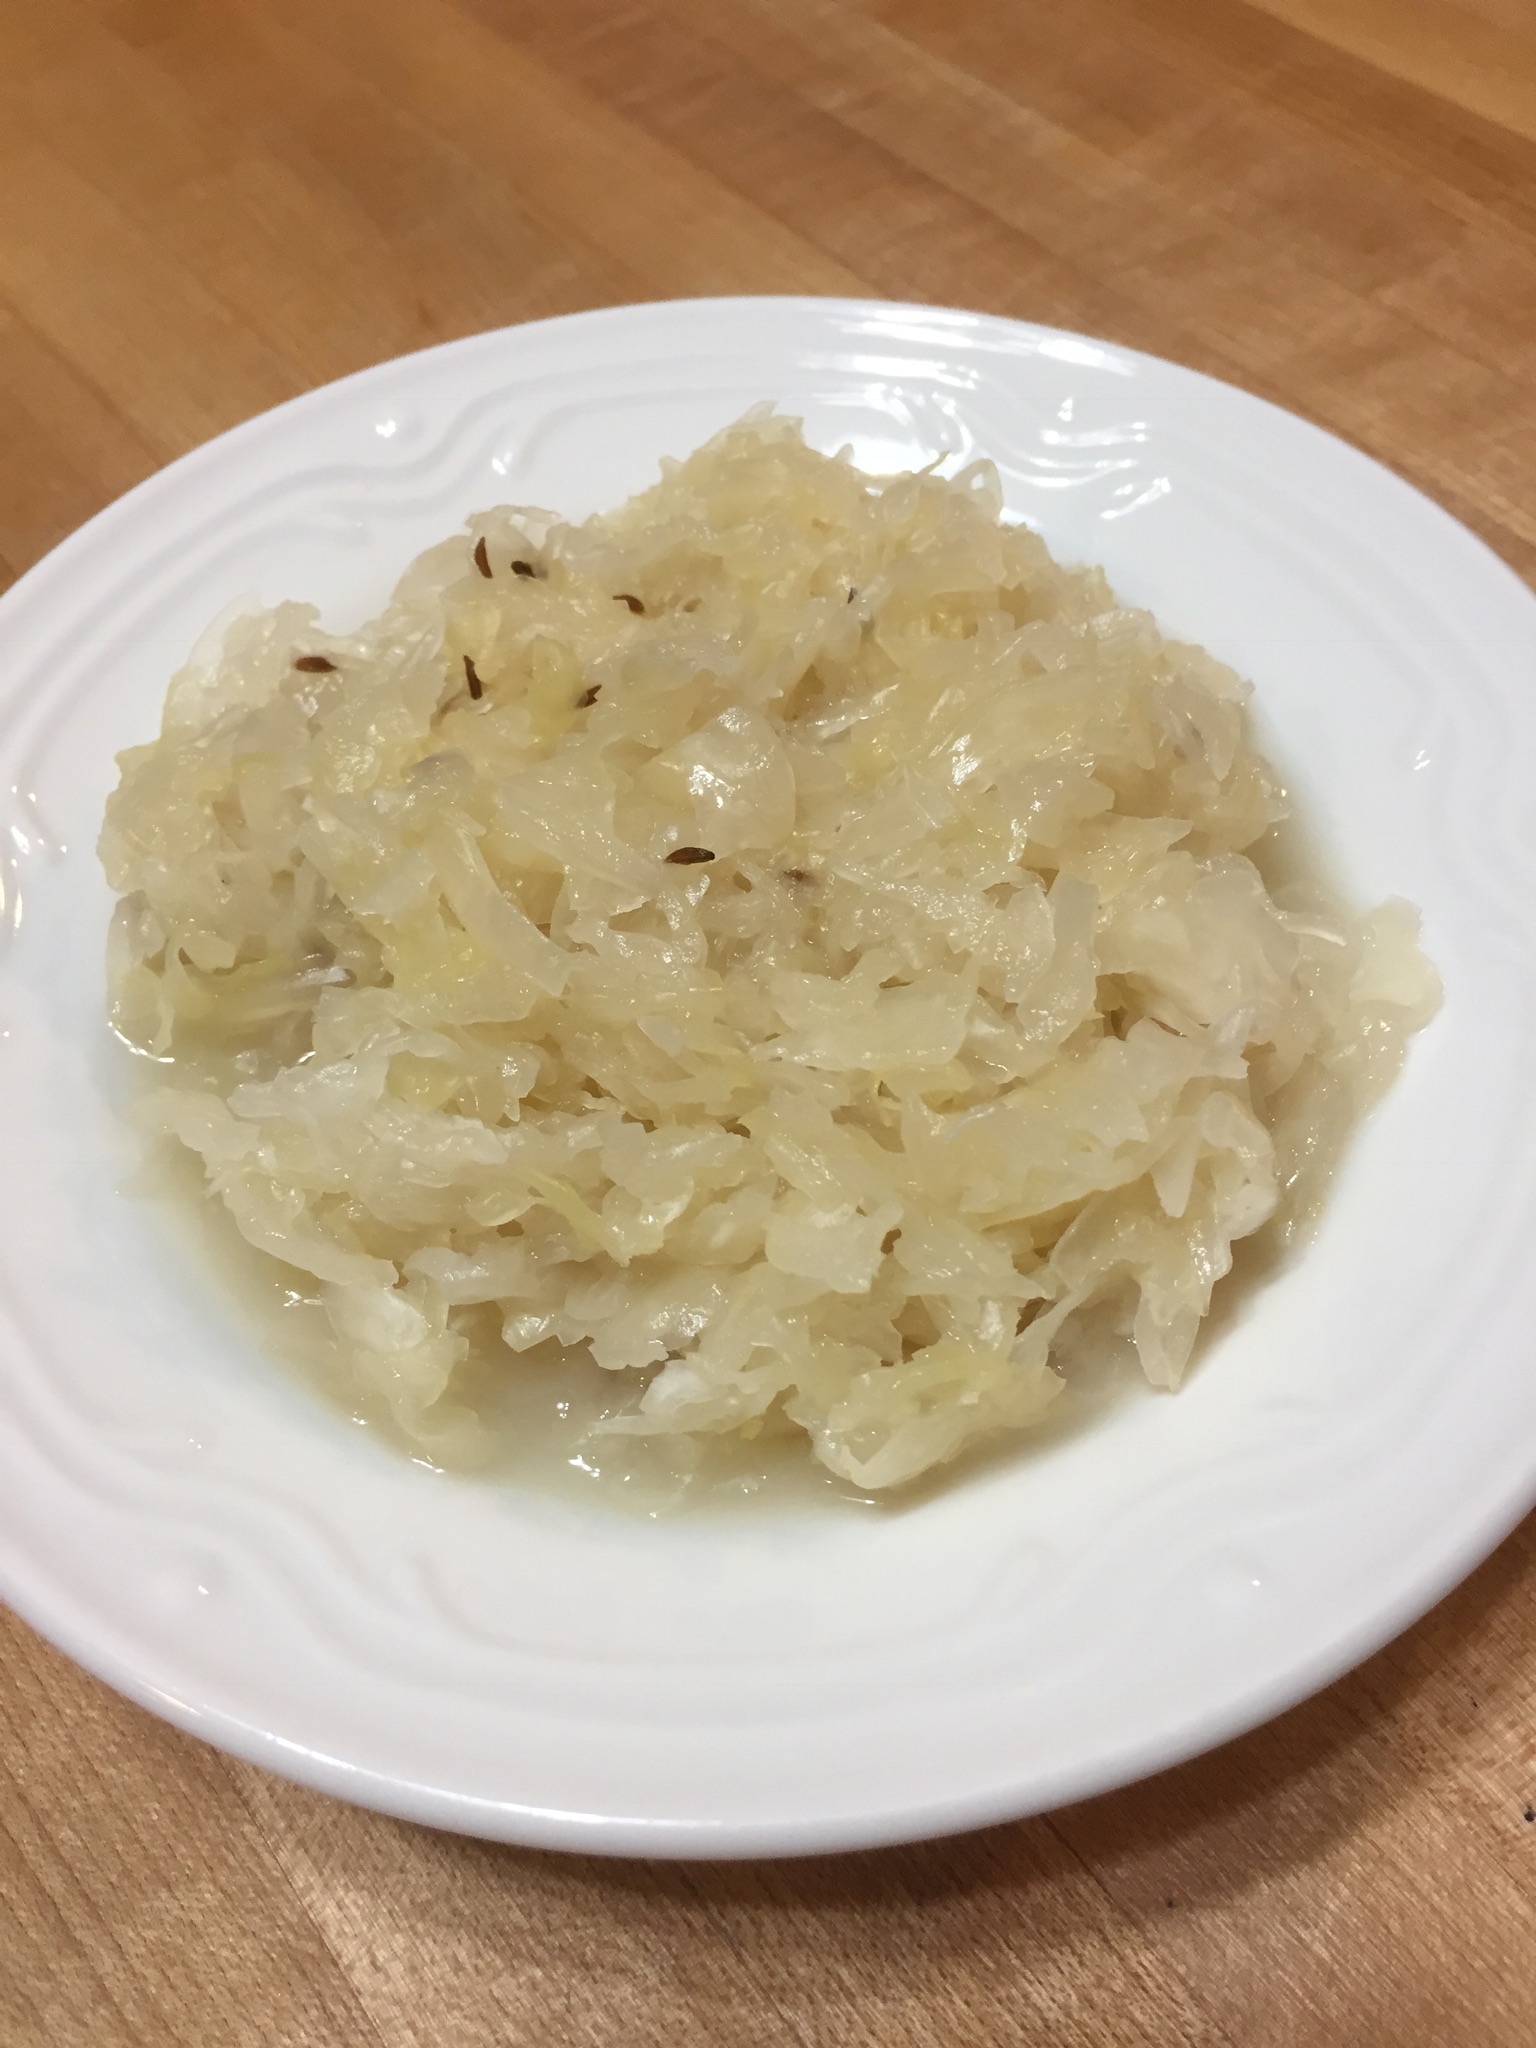
My 5 heads of cabbage made 23 pints of sauerkraut.  I added caraway seeds to one batch.

img_4048

Looking forward to some Reuben  sandwiches, polish sausages or pork chops with homemade sauerkraut this winter.  Or just a dish of kraut to satisfy a salt craving.

img_3871

A friend told me that his grandad used to make sauerkraut and when they were kids they would sneak a sip or two from the kraut crock.  I wouldn’t recommend that.


Zucchini Fritters

img_3789

A fritter is a batter containing meat, fruits or vegetables that has been fried.  So it has to be good, right?  It’s fried!  A friend gave me a recipe for zucchini fritters a few days ago and I decided to give them a try.  When you don’t plan your menu ahead of time you frequently have to improvise ingredients.  And sometimes the improvision is a great success.  That was the case here.  These fritters were an excellent side.  Even someone who doesn’t like vegetables will like these.

Ingredients:

2 medium size zucchini shredded

2 garlic cloves minced

2 shallots minced (about 1/4 cup)

1/4 chopped fresh parsley

zest of one lemon

1/2 cup Parmesan cheese shredded

1/2 cup flour

1 egg whisked

1/4 tsp cayenne pepper

salt and pepper to taste

img_3780

Grate the zucchini and put it in a colander to drain for 10-15 minutes.

img_3781

Dice the scallions, garlic cloves, and parsley.  Zest the lemon.

img_3782

Grate the Parmesan cheese.

img_3783

In a medium bowl combine the zucchini, flour, cayenne and salt and pepper.  Stir to combine.  Stir in the garlic, shallots, parsley and lemon zest.

img_3784 img_3785

Stir in the cheese and the whisked egg.  Season with salt and pepper.

img_3786 img_3787

Heat a tablespoon or so of canola oil on a griddle or fry pan over medium high heat.  Drop heaping tablespoons of the batter onto the hot griddle and cook 3-4 minutes per side until the fritters are golden brown.

img_3790 img_3792

Serve with a dollop of sour cream and some applesauce.  I served them as a side with a pork loin and asparagus.

img_3797

NOTE:  After draining the shredded zucchini you may still need to squeeze out any remaining liquid.  You can do this with your hands or wrap the zucchini in a clean cotton dish towel  and squeeze.

Zucchini is a very mild squash so feel free to experiment with different kinds of herbs like dill or cilantro or basil instead of parsley.


Chocolate and Salted Caramel Pudding Shots

img_3758

A few weeks ago we went to our favorite music festival and I made pudding shots.  I made three different pudding shots – a caramel apple with Apple Pucker and Butter Shots, a coconut cream with Malibu Coconut Rum, and a chocolate and salted caramel with Baileys.  The chocolate was the most popular and I just made another batch for a friend.

Ingredients:

1  4 oz. box instant chocolate pudding

1/4 cup milk

1/4 cup strong coffee

3/4 cup Baileys Irish Cream

1/2 cup caramel topping

8 oz cool whip

salt flakes

img_3759

In a medium size bowl whisk together the pudding, milk, coffee, and Baileys.  Whisk in the caramel topping.

img_3744

Fold in the cool whip.

img_3752

Spoon into little cups with lids, garnish with salt flakes and enjoy.

fullsizerender

Store the pudding shots in the refrigerator.


Smoked Fish Spread

img_0111

For those of you who have visited the Upper Peninsula  of Michigan (the UP) you know that smoked fish is a “thing.”  As soon as you cross the Mackinac Bridge you start to see little shops with signs hocking smoked fish.  Smoked whitefish, Menominee, salmon, and my personal favorite, smoked trout.  You can buy a whole fish or a slab.  It’s great to eat just as is.  Your fingers get a little greasy and they smell a little fishy but we don’t care.    The fish also makes an excellent spread.  Easy to make.  And you won’t smell as fishy!  My Dad used to make us smoked fish from his fresh catches and I will always remember his as being the very best.  My very favorite.  But Dad is nearly 89 and isn’t fishing much anymore.  So when I visit the UP I frequently get fish for our family and for friends from one of the little shops.

Ingredients:

2 cups (approximately) of smoked fish flaked

4 oz cream cheese at room temperature

1/2 cup sour cream

3-4 green onions sliced thin

2 T capers

2 T lime juice

2 tsp smoked paprika

1/2 tsp cayenne pepper (1 tsp if you want more kick)

Cracked pepper

Salt to taste

img_0102

Use a hand mixer and beat the cream cheese and sour cream together until it is smooth.

img_0103

Add the capers, lime juice, black and cayenne pepper, and paprika to the cream cheese, sour cream mixture and stir well to combine.

img_0105

Slice the green onions and flake the fish.

img_0104 img_0106

Add the fish and onion to the creamed mixture and blend well.

img_0107 img_0108

Taste before you salt.  Some smoked fish is saltier than others.

This spread is excellent on crackers or served with raw vegetable like celery and carrots.  Great with bread and butter pickles.  You’ll also love it served on another UP tradition.  Finn Crisp.  Rye bread is the most traditional bread in Finland and in some areas of Finland it is baked only a few times a year, then dried and enjoyed year round.  It is baked with a hole in the center allowing the loaves to be hung on dowels to dry.  I’m sure that Finn Crisp is modeled  after those loaves.

img_0110 img_0112

Enjoy  the smoked fish spread and enjoy the Finn Crisp if you can find it.

NOTE:  You could add some fresh dill to this recipe or substitute some minced dill pickles for the capers.


Pizza Sauce

image

Last year when I was canning tomatoes I decided to make salsa.  As usual, I did more than necessary and have plenty of salsa left for this year.  This season I made some of my tomatoes into pizza sauce.  There is no pizza delivery anywhere remotely close to where we live so when we are craving pizza I need to make it myself.  The sauce is relatively easy to make.  Cooking down the tomatoes is the most time consuming part so you need to be patient or you will end up with watery sauce.  The kitchen smells so good when this sauce is cooking.

Ingredients:

Tomatoes , approximately 4 quarts peeled and diced

2 T olive oil

1 Large Onion diced

6 or more cloves of garlic (I used more)

2 T oregano

2 T basil

2 T celery seed

4 T chopped fresh parsley

2 T salt

2 T granulated sugar

cracked pepper to taste

1/4 tsp citric acid per pint of sauce

imageimageimage

Core, peel and dice the tomatoes.  Bring a large kettle of water to a boil and drop a few tomatoes in for a minute or so until you see the skins start to break.  Remove the tomatoes to an ice water bath and slide the skins off.  Dice and put the tomatoes into a large, non aluminum, kettle.

image image image image

Begin cooking the tomatoes over medium heat.  In the meantime, heat the olive oil in a heavy skillet and add the onion. Cook, stirring frequently, until the onion is tender and translucent but not brown.  Add the onion and garlic to the tomatoes.

image image

Bring the tomatoes to a simmer stirring frequently.  Add the sugar, herbs and spices, and salt and pepper.  Once the tomatoes begin to break down use an immersion blender to get a nice, smooth sauce.  Cook over medium heat, stirring frequently, until the tomatoes have reduced by approximately 50% and you have a nice sauce that clings to the spoon.

image

Ladle the sauce into sterilized jars (I used pints).  Add 1/4 tsp of citric acid just before sealing the jars.  Process the sauce in a hot water bath for 45 minutes.  Once you remove the jars from the water bath allow them to cool completely before storing.

image

That is not ALL pizza sauce…better than half the jars are diced tomatoes.  Now, all you need to do is whip up a crust and get a pizza in the oven.  I made one with the sauce that was left over after filling my jars and some of our favorite toppings.

image image

NOTE. If you don’t have an immersion blender you can use a regular blender or food processor and process in small batches.  Also feel free to add other spices or increase/decrease some of the ones that I used.  If you like your sauce kicked up a little add some red pepper flakes.

I put my garlic cloves in the tomatoes without dicing.  Once the sauce simmered for awhile the immersion blender took care of  them.

Cabbage, Potato and Sausage Bake

image

It’s been a long time since I’ve been on the FinnishDish.  I haven’t stopped cooking or taking pictures of food but apparently I have not been focused on sharing.  I’ve been busy canning…tomatoes, pizza sauce, pickles.  I have a crock full of shredded cabbage waiting to become sauerkraut.  I’ve never attempted that before.  It will take at least another 5 weeks but I will blog that, success or failure.  Everyone tells me homemade sauerkraut is the BEST.  Hope mine lives up to my expectations.  In the process of shredding the cabbage (the thickness of a dime) I had a good amount of odds and ends left so I decided to make the cabbage and sausage bake.  Fall is nearly here and this is perfect one dish, easy comfort food.  One of my Dad’s favorite dishes is boiled dinner and this is kind of a baked boiled dinner.

Ingredients:

1 medium head of cabbage cored and cut into wedges

1 pound of new potatoes

1 large sweet onion sliced

4-5 slices of bacon diced

1 pound sausage links (I used andouille)

1 1/2 cups chicken broth

salt and pepper to taste

image

Preheat your oven to 370.

Cut your cabbage into quarters and core.  Cut quarters in half and put in a large casserole or roasting pan. My cabbage is kind of a mess because it’s odds and ends but it will cook up fine.  Wash the potatoes and add them to the cabbage.

image image

If you’re using larger potatoes cut them into quarters.

Fry the bacon for 6-7 minutes.  You don’t want it to be crispy.  Add the onion and cook until onions are translucent.

image image image

Distribute the bacon and onion mixture, including the drippings, over the cabbage and potatoes.

image

Brown your sausage in the skillet and add to the casserole dish.  Add salt and pepper and pour broth over the meat and vegetables.

image image

Cover tightly with foil and bake for 1 1/2 hours.  Remove casserole from the oven and allow to sit 15 minutes covered.  Serve and enjoy!

image

NOTE:  Recipes frequently call for two or three slices of bacon so when I buy bacon I roll the slices and put them in threes or fours and freeze them in zip lock freezer bags.

Stuffed Pepper Soup

image

Earlier this week I made stuffed peppers and there were a few left over.  While we love leftovers, and truthfully, sometimes leftovers taste even better than they did the first time around, this time I decided to repurpose them.  We have had some pretty chilly May days and soup sounded perfect so I turned the peppers into soup.  Definitely an easy dish.  Earlier this year I posted my recipe for stuffed peppers.  I use ground pork and rice, lots of onion and garlic, and tomatoes.  Any recipe that you use for peppers would work in this soup.

Ingredients:

2-3 leftover stuffed peppers

1 pint of diced tomatoes

2 cups of beef broth (I use Better than Boullion)

2 T olive oil

1 cup rough diced sweet onion

3-4 cloves of garlic minced

basil and oregano

1 T brown sugar

1 pint green beans

image

Heat olive oil in a heavy kettle or Dutch oven and add the diced onion.  Cook for two to three minutes stirring occasionally until the onion are tender but not brown.  Add the garlic and cook for another minute.

image

Rough chop the peppers and add them to the pot.

imageimage

Add the tomatoes, brown sugar and broth.

image image

Stir in the green beans and fresh herbs.

image image

Bring to a gentle boil.  Reduce heat and simmer for 10-15 minutes.  All of the ingredients have already been cooked.  Add salt and pepper to taste.  Ladle into bowls and garnish with a little shredded cheese.  I used Asiago but you can use any of your favorites.  Perfect on a chilly evening with some good, crusty bread.

NOTE:  You can substitute corn, diced zucchini, or frozen peas for the green beans.  If you have more leftover peppers increase the broth and tomato portions.  Enjoy your leftovers!

Creamy Pesto with Asparagus and Chicken

image

I have been on a bit of a blogging hiatus.  Not because I haven’t been cooking.  Probably mostly because I’ve been a bit lazy.  Last weekend we went to an Italian restaurant with a group of people and a friend ordered linguini with a creamy pesto sauce.  She said it was excellent and wanted to know how to make it so I thought I’d do a little experimenting.  I don’t usually like cream sauces but I actually did like this.  I liked it a lot.  I also prefer angel hair over linguini or fettuccini so that’s what I used.

Ingredients:

3/4 cup heavy cream

1/2 cup chicken broth (I used better than bouillon)

2 T butter

1/2 cup pesto

1/4 tsp garlic powder

1/2 cup shredded Parmesan cheese plus more for finishing

1-2 T olive oil

1 chicken breast sliced into medallions

1 bunch of asparagus cut into 1-2 inch pieces

1 can baby artichokes halved

1 heirloom tomato diced

1/2 pound pasta of your choice

image

Heat a large kettle of salted water to boiling and cook pasta according to package instructions.

Heat a tablespoon of olive oil in a heavy skillet.  Cut the chicken breast into medallions, season with salt and pepper and sear on both sides.  Put on a platter and keep warm until serving.

image image

If necessary add a little more olive oil to the skillet and add the asparagus.  Cook over medium high heat just until tender tossing occasionally.  Add the artichokes to the skillet and keep warm.

image image

In a medium size, heavy sauce pan heat the cream and chicken broth to a simmer.  Add butter and stir until melted.  Stir in the pesto and garlic powder.  Add the shredded Parmesan and stir until melted.

image image

Put the cooked pasta in a large skillet over low heat.  Reserve some of the pasta water.  Add the asparagus and artichoke hearts to the pasta.

image image

Add the chicken and the sauce and toss to coat.  If necessary add some of the pasta water.

image image

Add the tomatoes just before serving.

image

Serve in pasta bowls and garnish with some additional shredded cheese and cracked pepper.  This dish was very yummy and for sure I will make it again.  I think that the addition of the pesto and the chicken broth made this dish a little less rich than typical cream sauces although heavy cream and butter play a major role here.

You can add your favorite vegetables in place of the asparagus and artichoke hearts or in addition to them.  You could also substitute shrimp or bay scallops for the chicken or make the dish meatless.  I used prepared pesto but obviously you could make your own and that would make the dish even better!

Mangia!Mangia!

Tomato Bisque

image

This is a rich, tomatoey soup that is a big hit with almost everyone I’ve served it to.  We all grew up eating Campbell’s tomato soup.  When I was a kid, long long ago, on Saturday nights we often had tomato soup with popcorn in it.  It’s actually a very good combo.  I saw a recipe a while back for tomato popcorn soup in an issue of  Food Network magazine.  Of course they used popcorn with truffle oil and grated truffle percorino cheese but even so,  they must have channeled my mother.  I think our family had this because it was a very inexpensive dinner that went a long way.  Truffle oil and truffle percorino would have defeated the purpose.  Plus the little general store in my hometown carried neither.  This soup recipe also uses a little Campbell’s but it’s the add-ins that make it so amazing.  The recipe originated from a bar-restaurant in Jackson Michigan.  I’ve modified it a bit by adding red or orange bell pepper, fresh garlic, and fresh basil.  I also use my home canned stewed tomatoes but good store bought stewed tomatoes work great.

Ingredients:

4 T butter

1 large sweet onion diced

1 red or orange bell pepper diced

4-5 garlic cloves sliced

3 pints stewed tomatoes

1 large family size can Campbell’s tomato soup

8 oz cream cheese

1 T dried basil

3 cups half-n-half

salt and pepper to taste

fresh basil and  Asiago cheese for garnish

image

Melt the butter in a Dutch oven or heavy kettle over medium high heat and add the onions and peppers.  Cook until they are tender, stirring occasionally, for about 5 minutes.  Add the garlic and cook an additional minute or two until the garlic is fragrant.

image

Reduce the heat.  Stir in the tomatoes and tomato soup.  Cube the cream cheese and add that to the tomatoes.

image image

Cook over low heat until heated through.  Stir in the dried basil and salt and pepper to taste.  Use an immersion blender and purée the soup.  If you don’t have an immersion blender you can add the soup, in batches, to your food processor or blender.  Stir in the half-n-half.  Continue to cook over low heat until the soup comes to a simmer.  Serve it up garnished with fresh chiffonaded basil, shredded cheese and croutons.  I used Asiago cheese and croutons made from swirl rye.  Enjoy!

image

NOTE:  You can add some diced oven dried tomatoes, diced green onion, or another favorite cheese like sharp cheddar or smoked Gouda.  This soup can also double as an awesome sauce for vegetable crepes or pasta dishes.  This soup  freezes beautifully.


Irish Soda Bread

image

One of my daughter’s friends recently asked me for a recipe for Soda Bread and it reminded me that it I been a long time since I’d made it myself.  It’s a very simple, rustic bread.  No yeast.  No proofing.  No rising.  Very little kneading.  Easy to pull together.  I think I got this recipe years ago from a newspaper article on traditional St. Patrick’s day dishes and I tweeked it a bit.   I love adding citrus zest, preferably orange but even grapefruit zest brightens it up.  It tastes best warm from the oven but then most breads do.

Ingredients:

4 cups AP flour

4 T granulated sugar

1 tsp baking soda

1 T baking powder

1 tsp salt

1/2 cup cold butter cubed

1 1/4 cups buttermilk

1 egg

1 tsp citrus zest (I used orange)

image

Preheat the oven to 375.  Whisk together dry ingredients.  Cube the butter.  In an electric mixer with a paddle attachment add the butter to the dry ingredients and mix on low speed until the butter is mixed in.

image image

Whisk together the buttermilk, egg, and zest.  With the mixer running on low add the buttermilk egg mixture and beat until incorporated.  The dough will be moist and a little sticky.  Remove the dough to a lightly floured surface and knead a few times sprinkling with a little additional flour if necessary.  Shape into a round loaf and place on a baking sheet lined with parchment.

image image

Mix together:

1/4 cup melted butter

1/4 cup buttermilk

Generously brush the loaf with the butter-buttermilk mixture.  I also brush the mixture on a couple additional times during the baking process.  Bake for 45-55 minutes or until toothpick inserted in the center comes out clean.

image image

Cool on a wire rack.  Slice and enjoy!  Great with a little drizzle of honey or homemade preserves.