Baguette

image


Today was a perfect bread baking day. We had the first snow flurries of the season. And it isn’t even November. As soon as the bread came out of the oven we had to slice into it, smear on a little butter and munch away. I got the heel of the bread, my favorite. Known in Finnish as the “kantapää.”  My grandfather had to have bread with every meal and in between meals. I remember my grandparents slathering very generous amounts of butter on their bread and then sprinkling it with salt. That was probably in the days before salted butter but even so. Must be where I acquired my love of salt. The baguette is French, not the bread of my childhood, but very simple and very good. There are only four ingredients.   The most time consuming thing is letting the dough rise multiple times. Here we go.

2 1/2 tsp dry yeast

1 2/3 cups water (Divided)

3 1/2 cups  unbleached all purpose flour

1 1/2 tsp salt

image

image

Sprinkle yeast into 1 1/4 cups lukewarm water. Let it sit for about 5 minutes and stir to dissolve. Whisk together the flour and salt in a larger bowl. Make a well in the center and pour in the dissolved yeast.  Use a wooden spoon and draw enough flour into the yeast/water to form a paste. Cover the bowl with a towel and let it froth for 20 minutes.

image

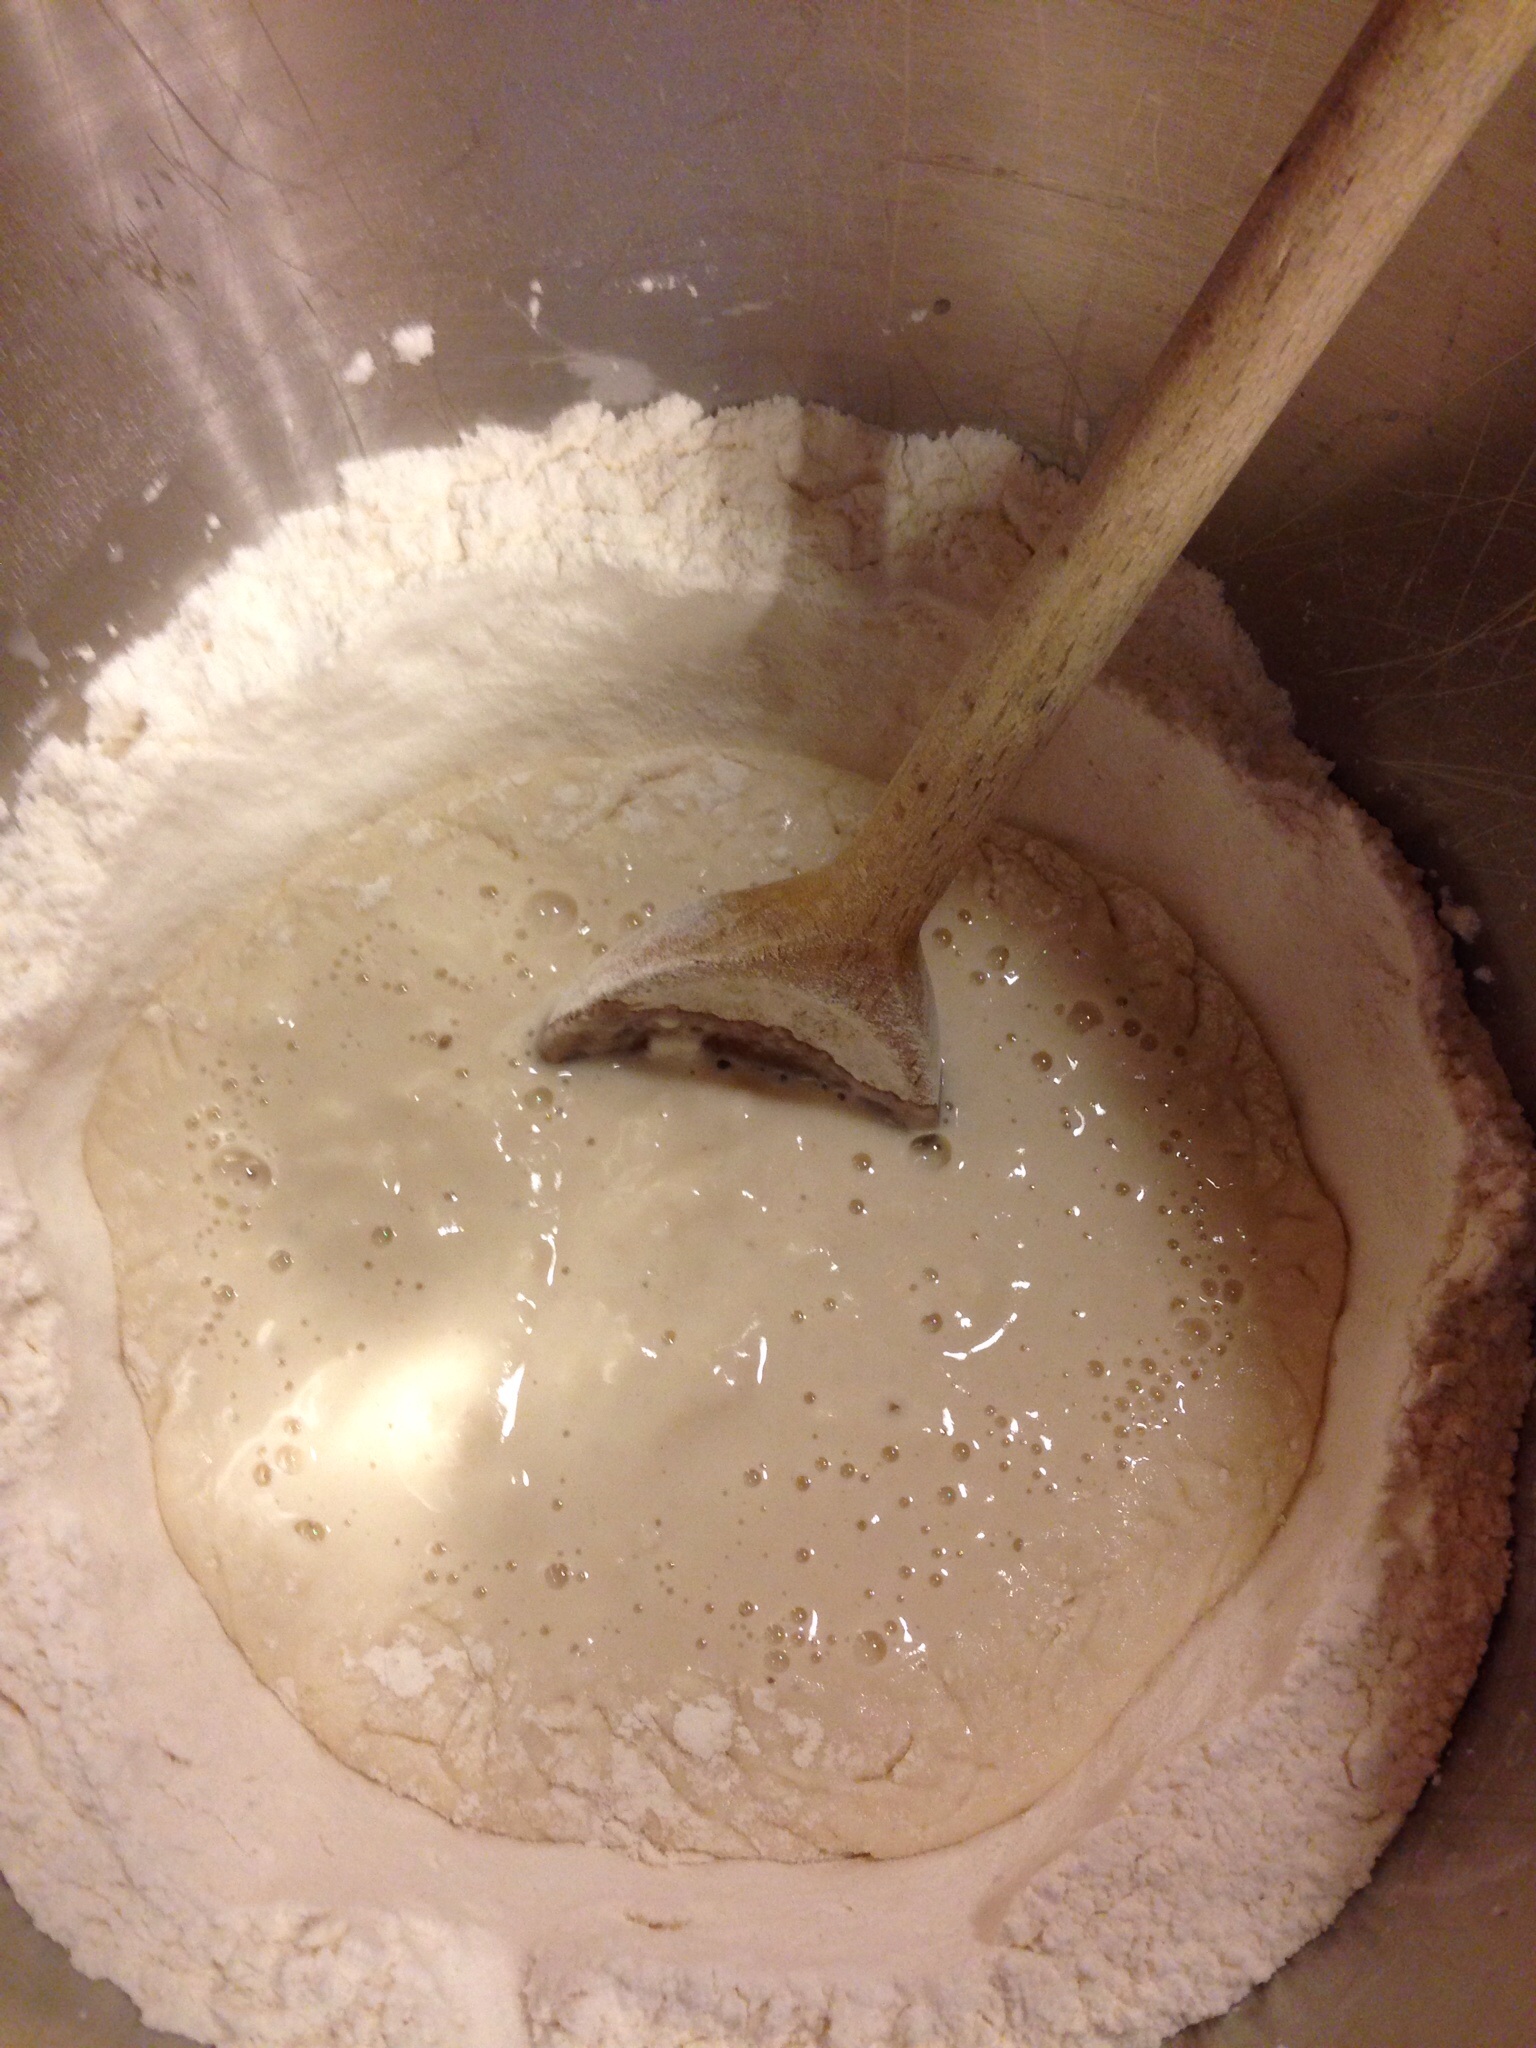
I have favorite cotton “bread” towels that I always use.

image

After the twenty minutes have passed mix in the remaining flour with a wooden spoon and add the remaining water, one tablespoon at a time, just until you have a nice soft, sticky dough. Turn out onto a lightly floured surface and knead for about 10 minutes until smooth and elastic. Try to avoid adding extra flour as you knead.

image

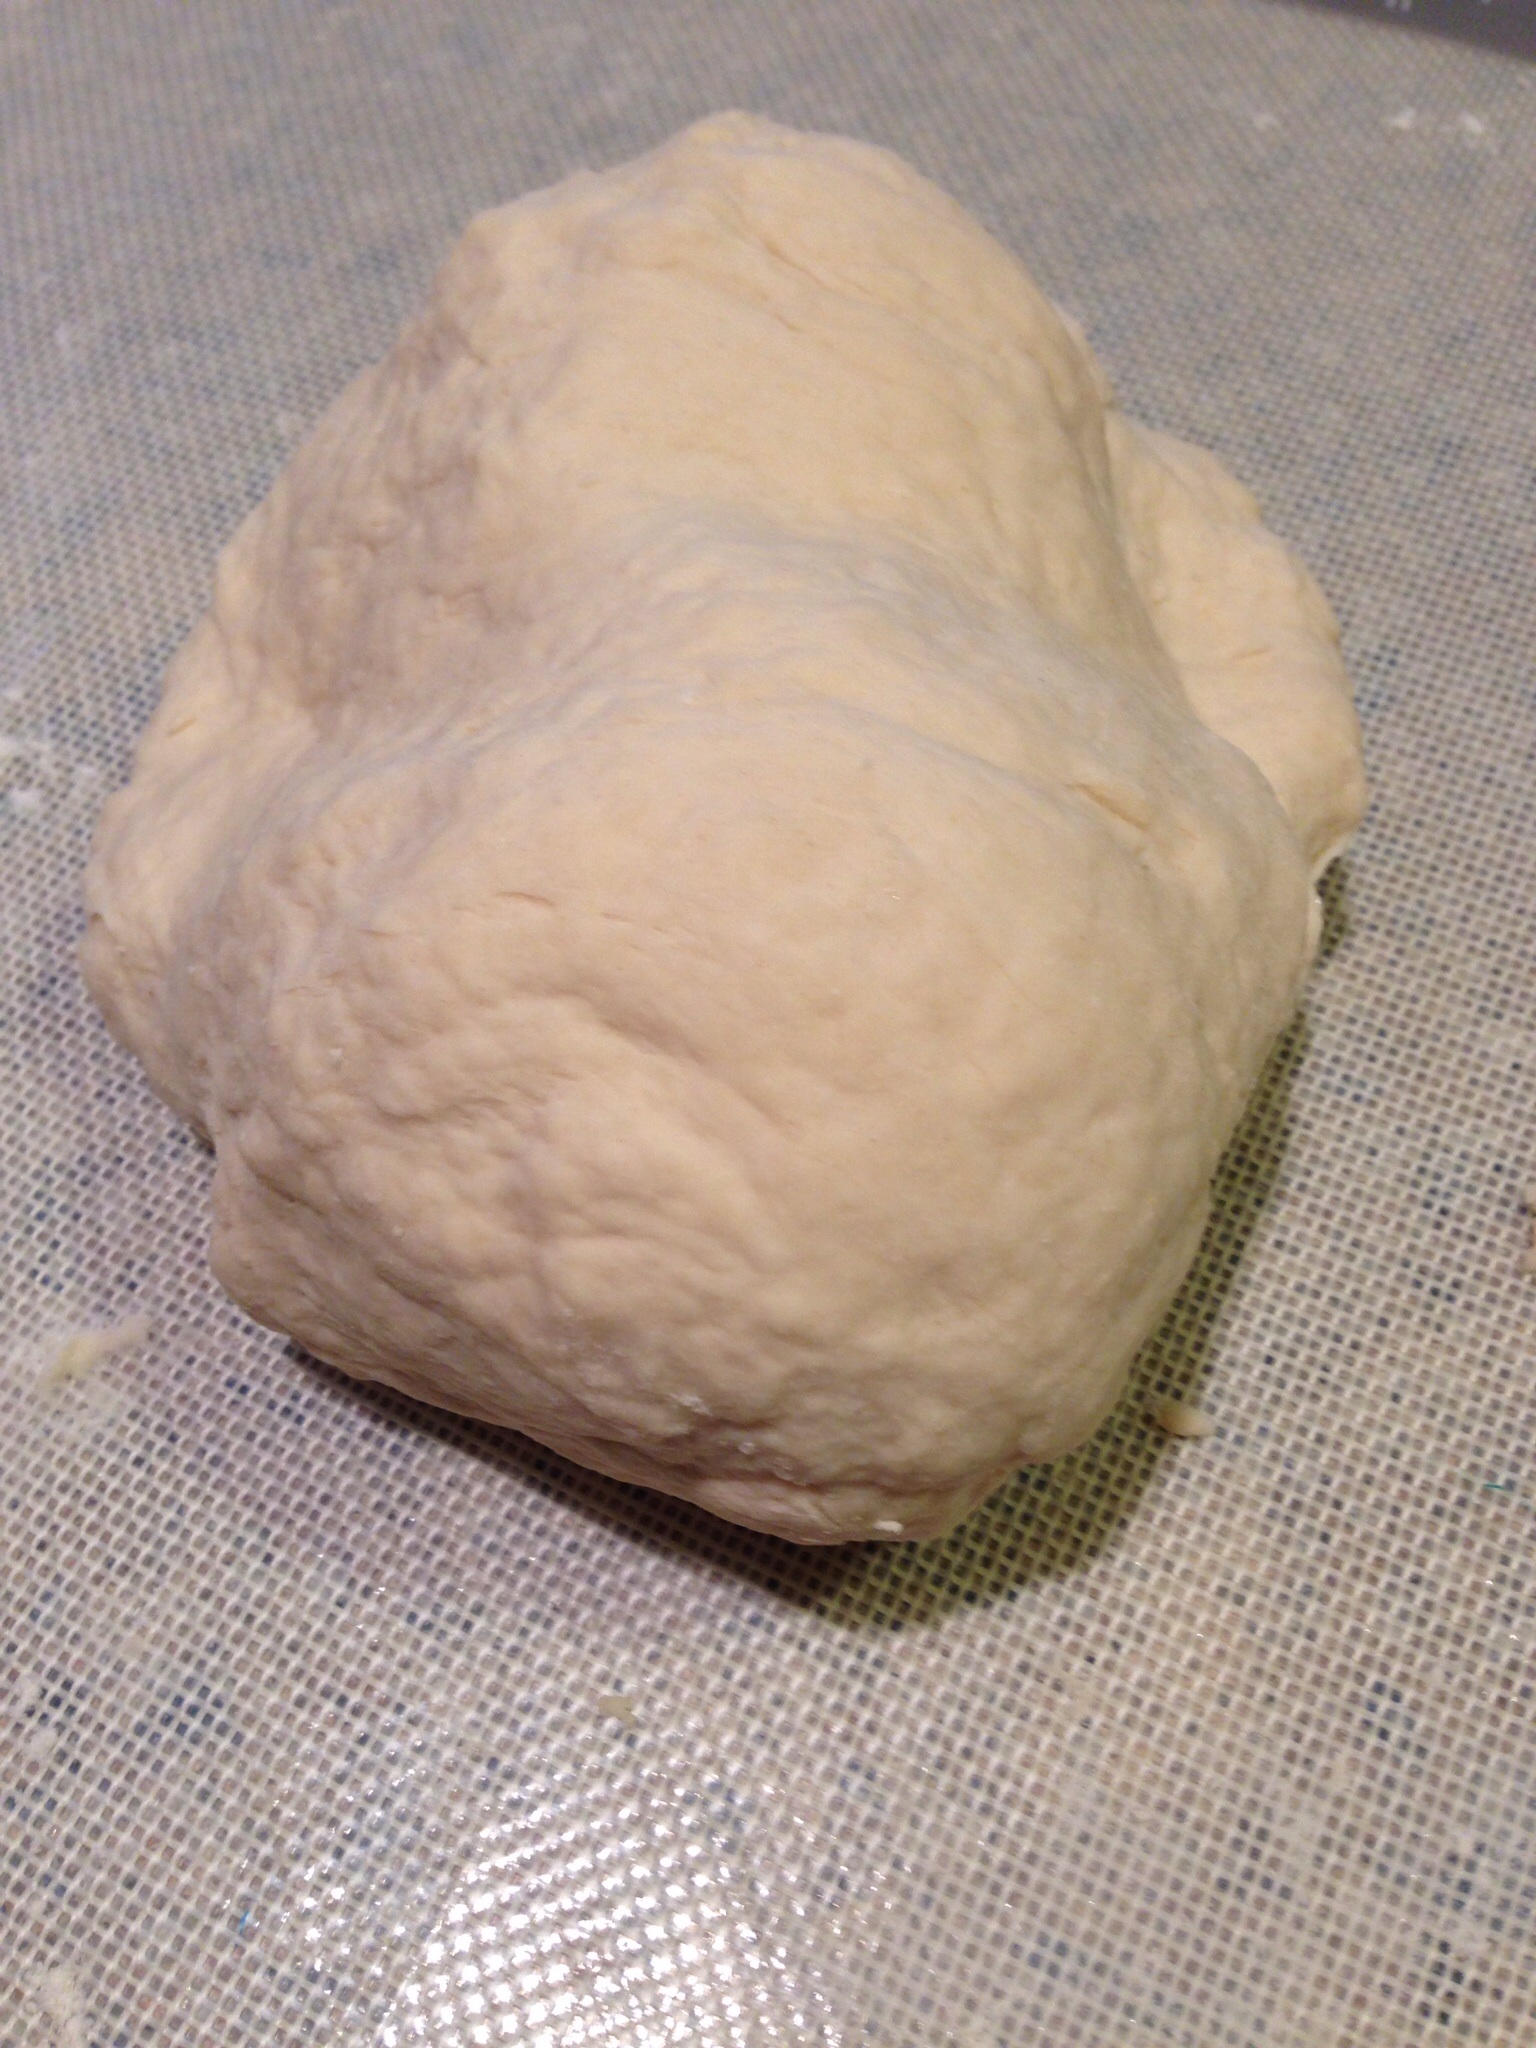
Put your nicely kneaded ball of dough in a lightly greased bowl, cover it with your bread towel and let it rise in a warm place free of drafts for about 1 1/2 hours.

image

Punch down, re-cover and let rise 45 more minutes.

image

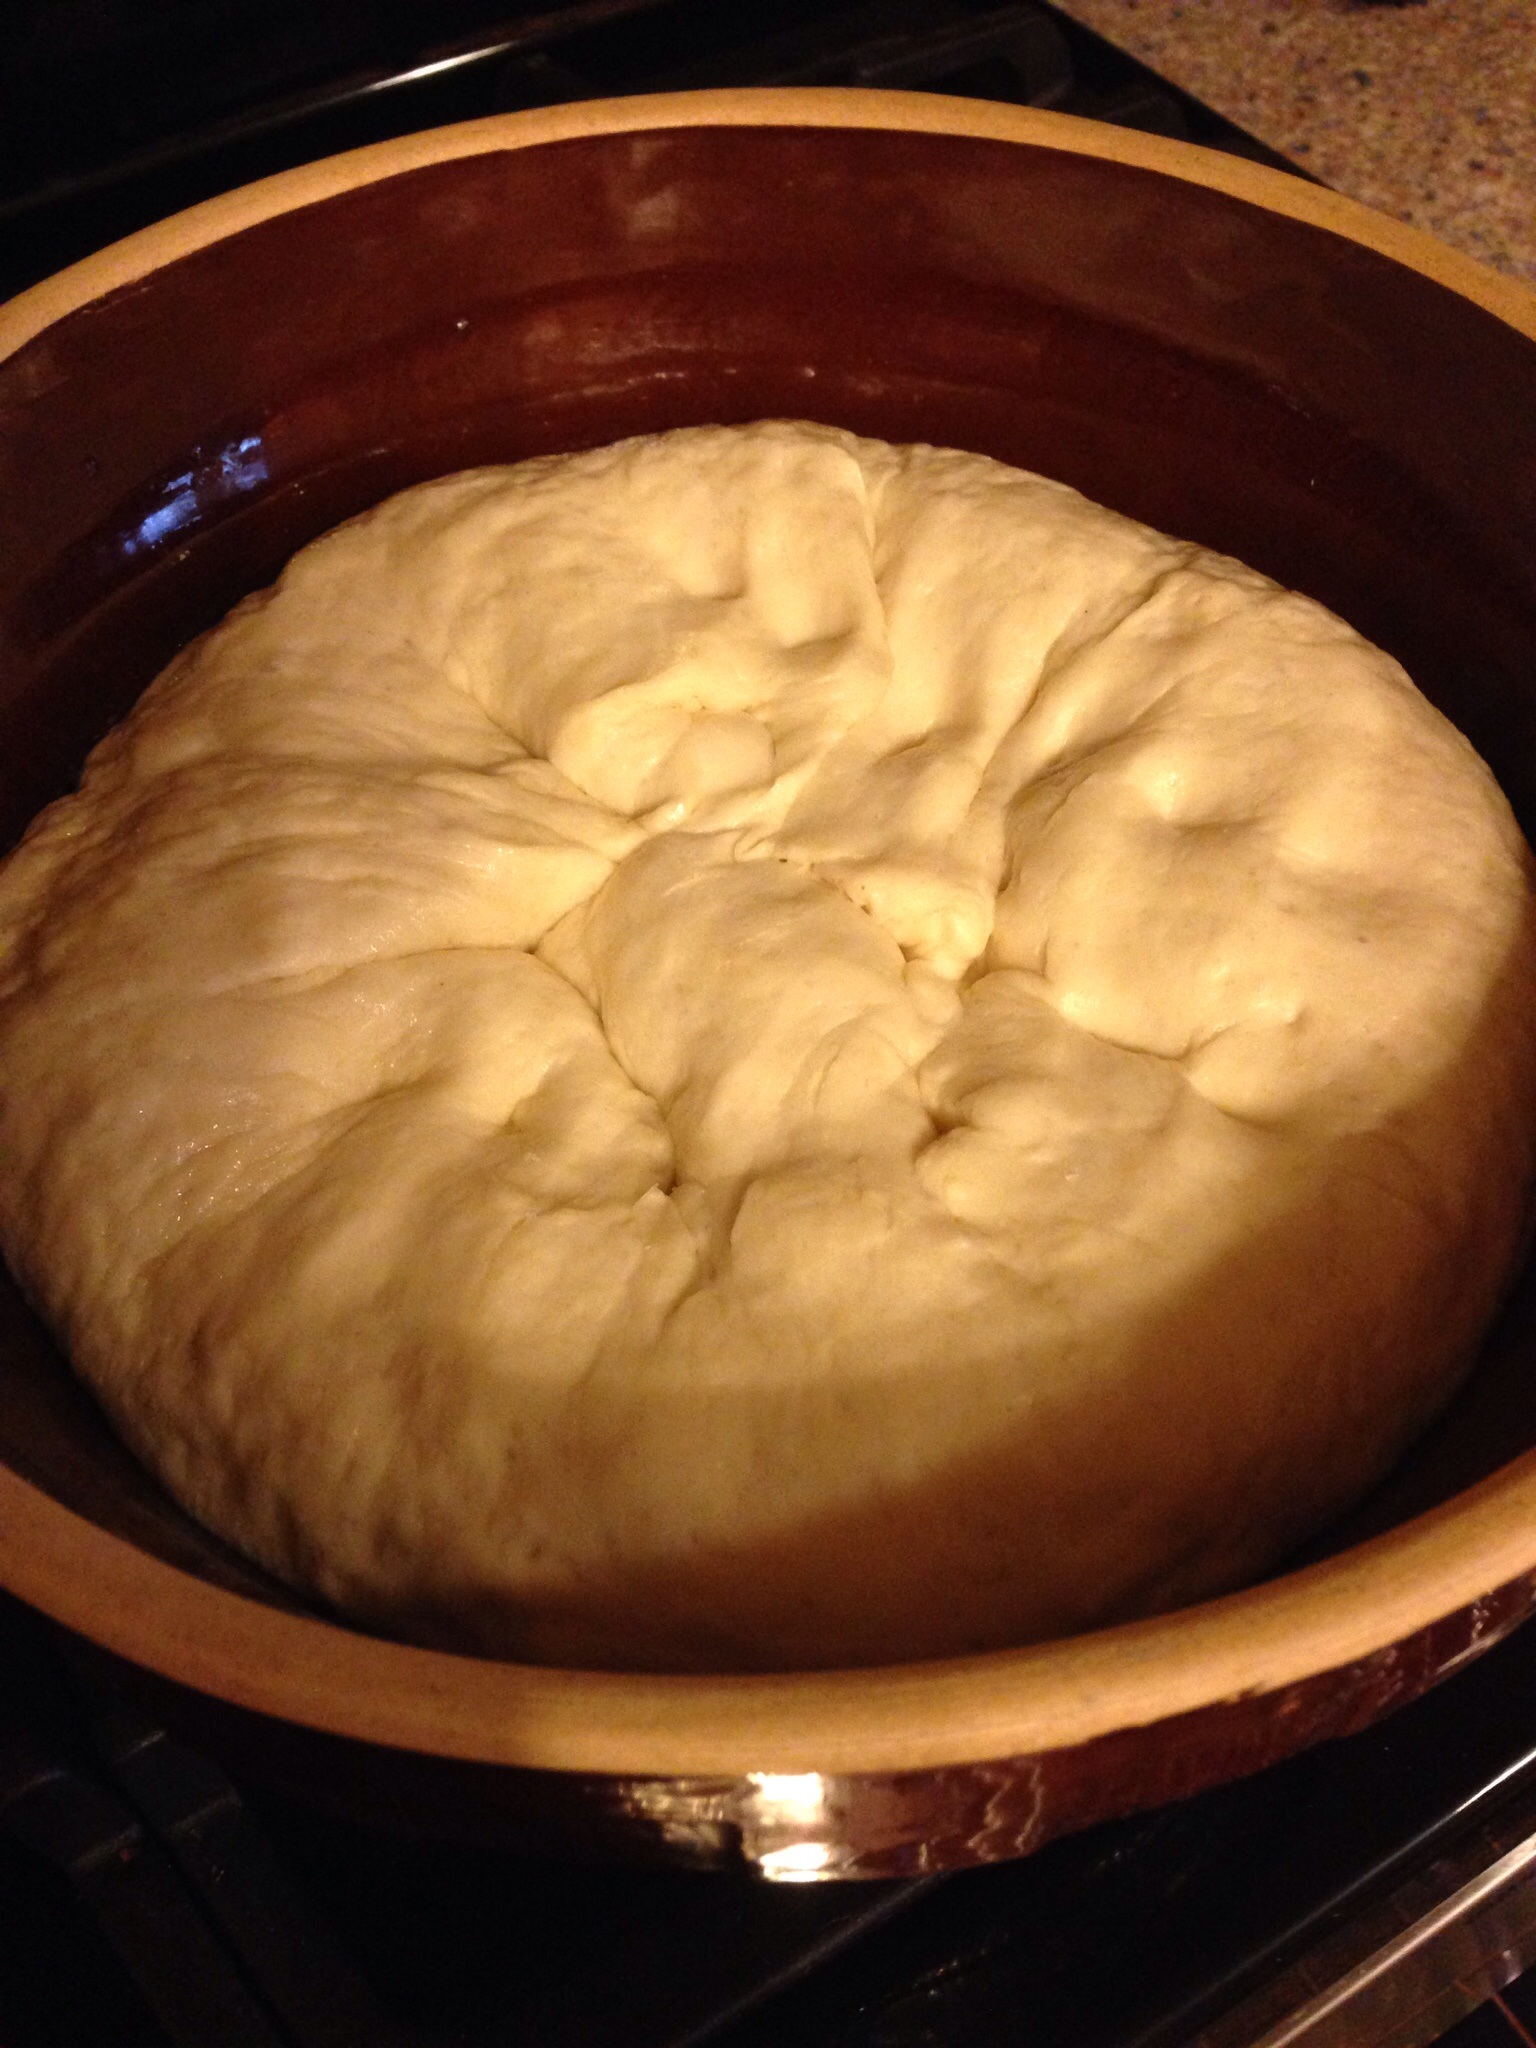
Punch down, re-cover and let it rise about 45 more minutes until double in size. That’ll be the third rising.

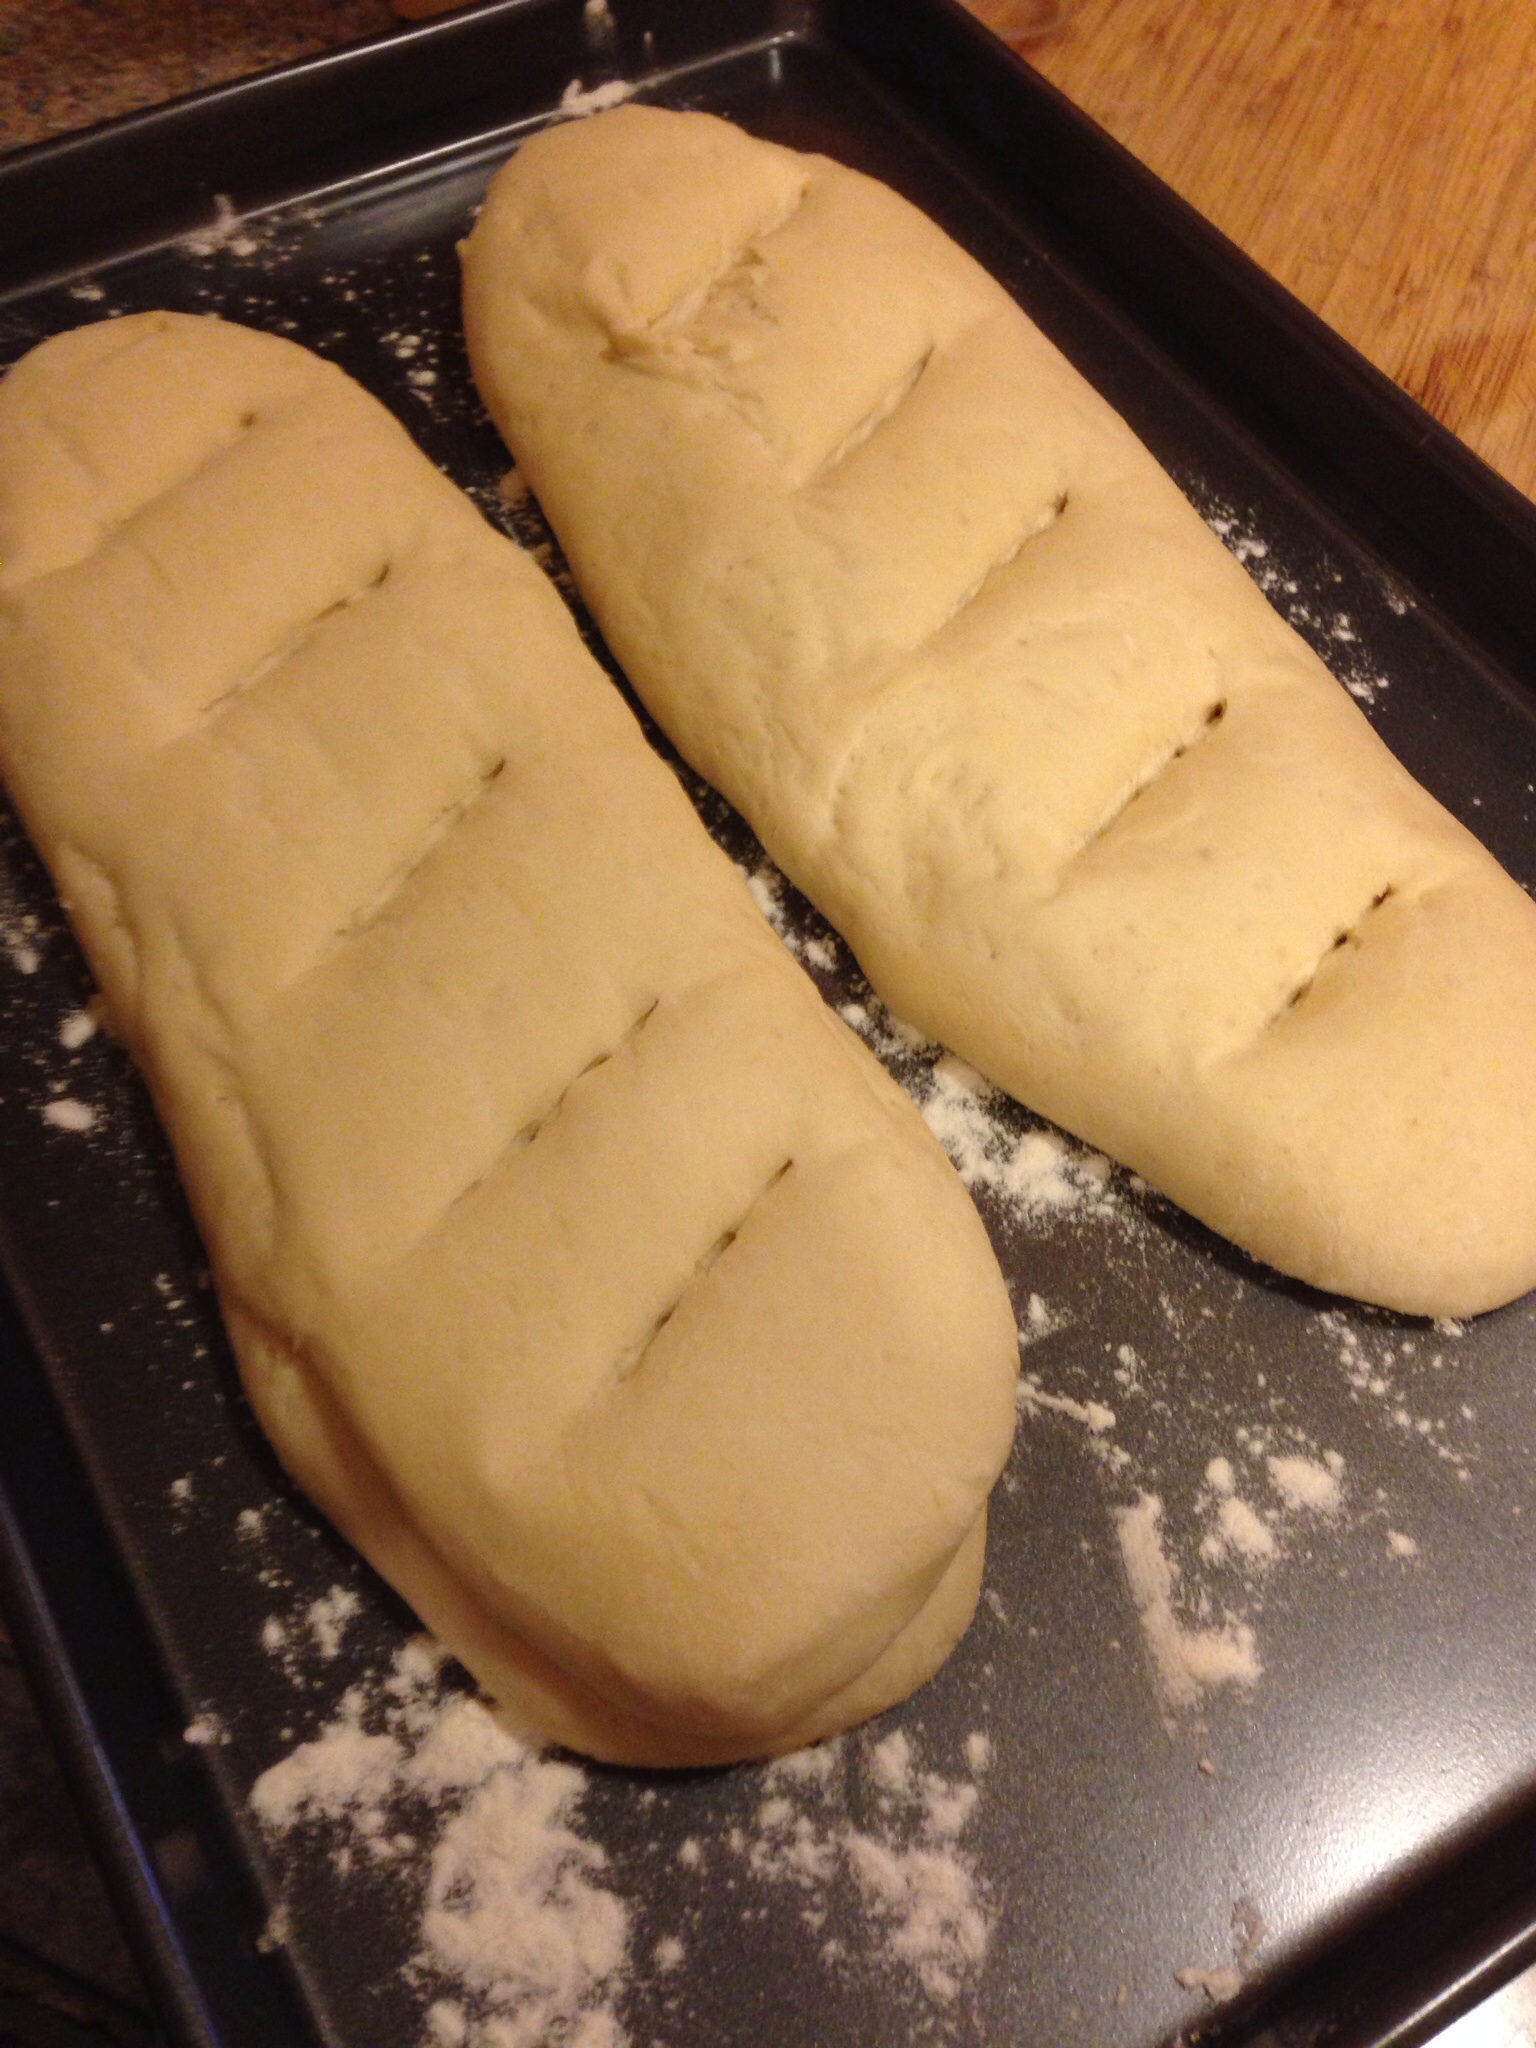
Divide the dough into two equal pieces and shape. Each should be about 12 inches long. Place them on a lightly floured baking sheet, re-cover and let them rise until doubled in size, about 50 minutes.  Preheat oven to 475.

image

Cut several diagonal slashes in each loaf.

image

Bake in preheated oven for 20-25 minutes until golden and hollow sounding when tapped. Cool on a wire rack.

image

Slice and enjoy.

image

You can have your bread and eat it too.

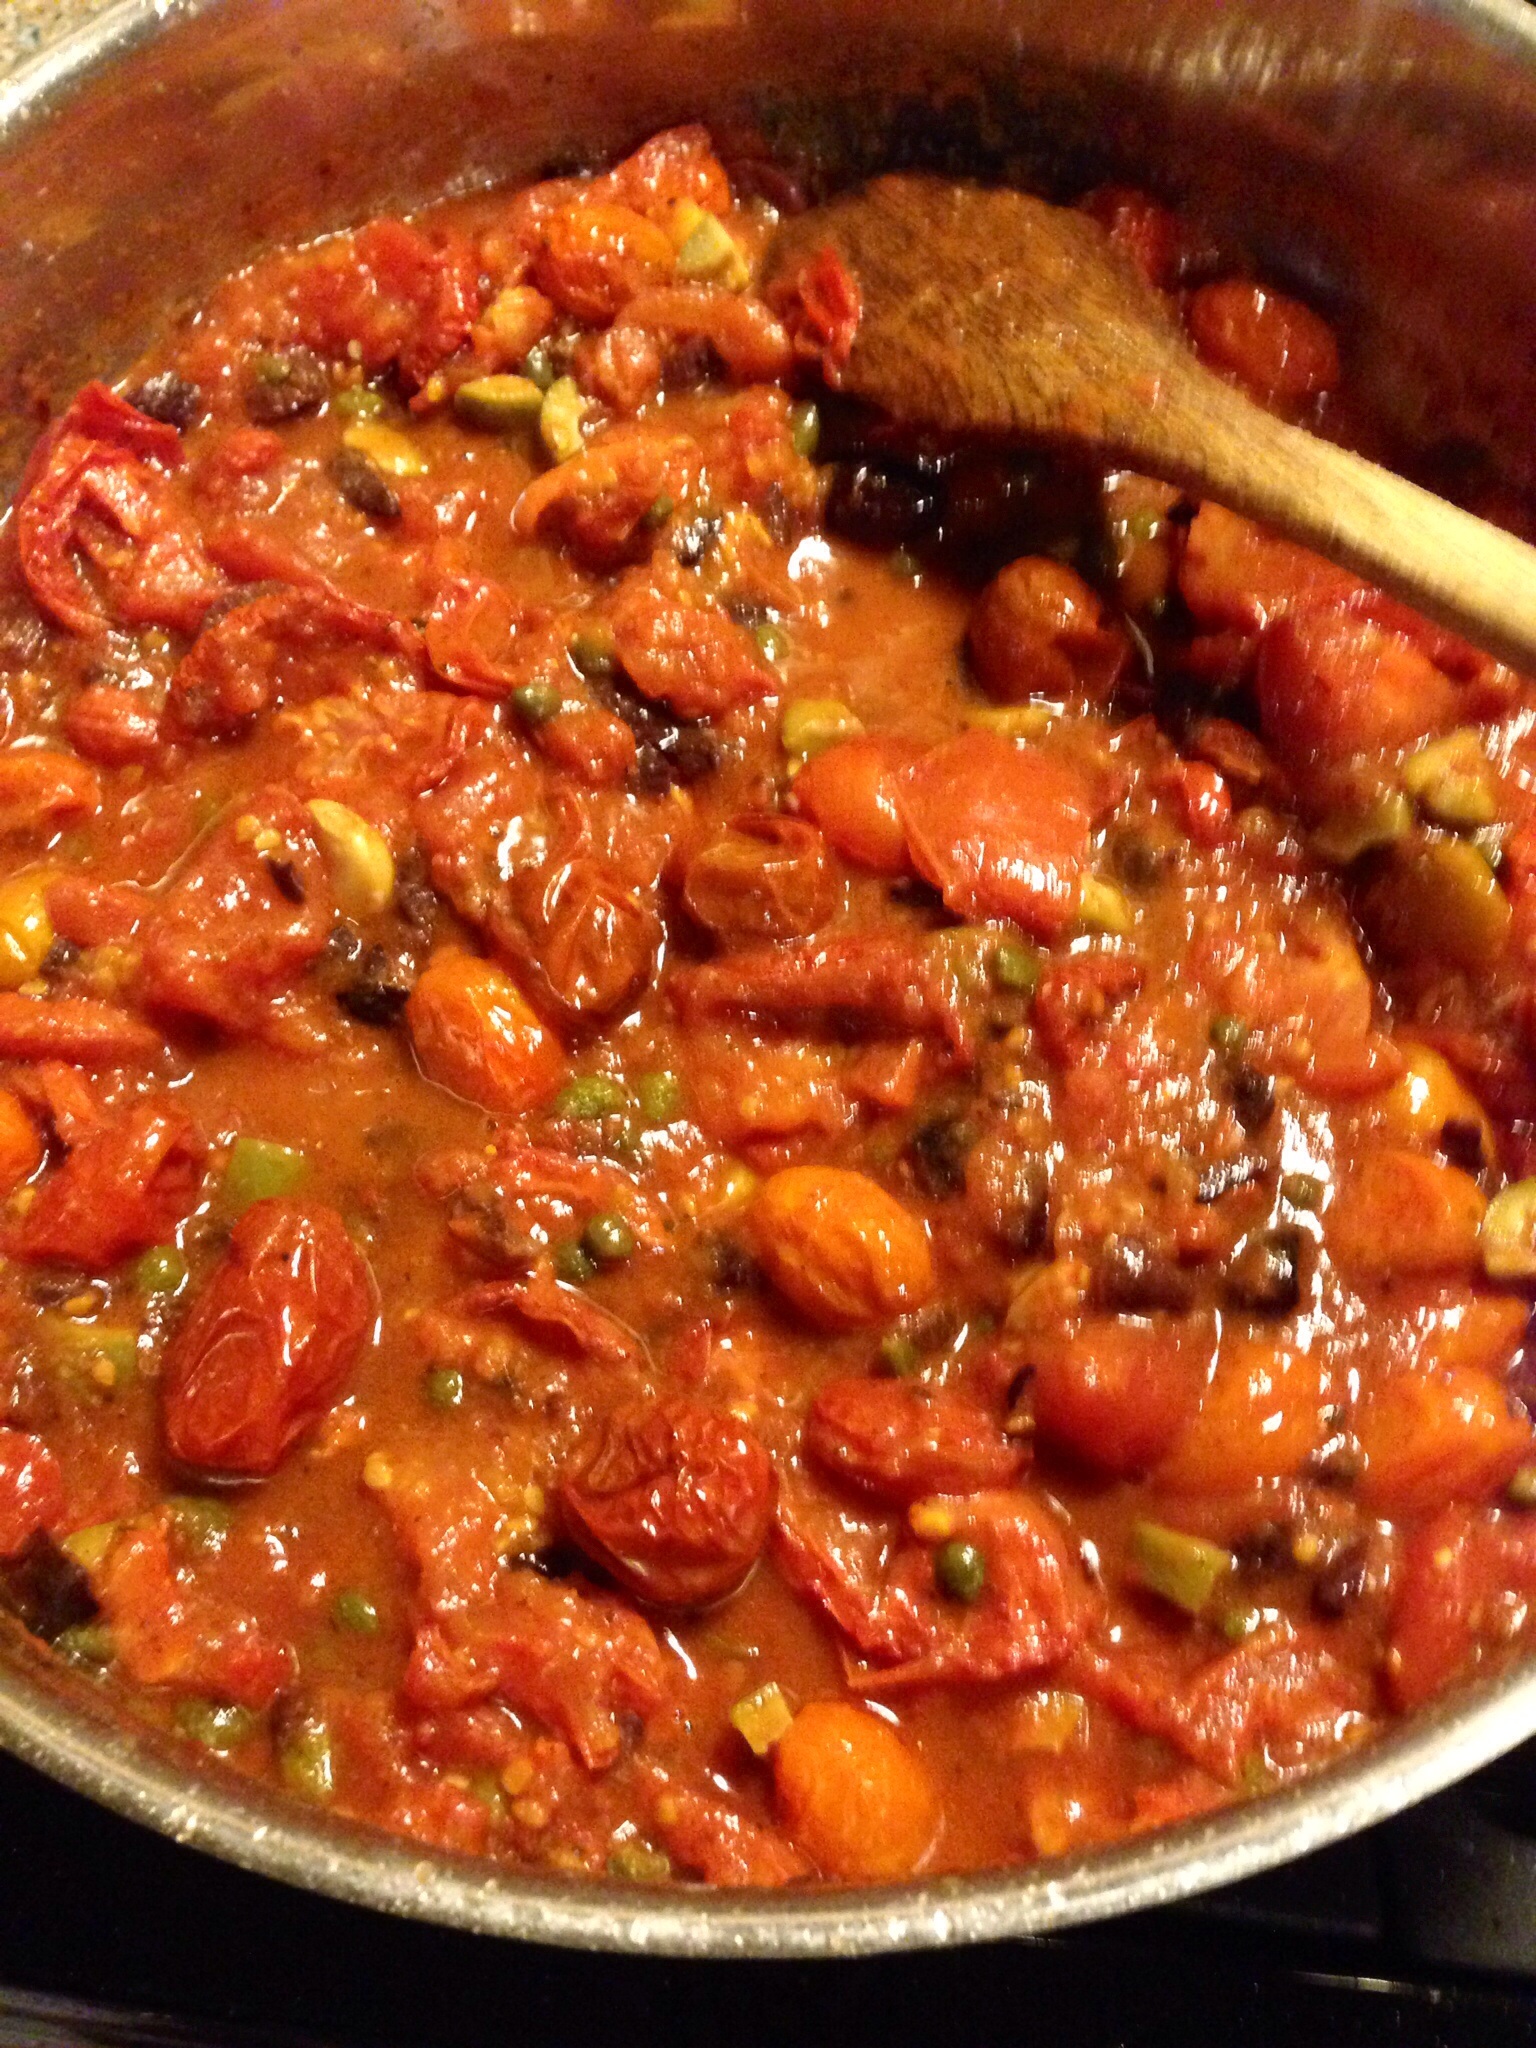
A few posts back I roasted tomatoes and used them to make pasta sauce. Those same tomatoes with a little olive oil would be delicious on this bread. Or just dip a slice into some olive oil seasoned with fresh ground pepper and a little grated Parmesan.  That will be especially good if you’re lucky enough to get the “kantapää.”

Potato and Corn Chowder with Ham

image


Soups are a favorite of mine to make and to eat especially as the weather starts getting cold.   I had ham left over from last night and not a lot of time so this was a perfect soup to make. One of my favorite soups since childhood contained many of the same ingredients as my potato chowder but instead of ham it had fish. We called it “kala mojakka” (Finnish for fish soup).  Sometimes the only parts of the fish the soup contained were the heads but they gave the best flavor to the broth. This from the days when nothing edible went to waste. To me, any soup was “mojakka”. My grandmother made it best.

Potato and Corn Chowder with Ham. It’s what was for dinner tonight.

2 stalks of celery

2 leeks (white and pale green portion only)

1/2 sweet red or orange bell pepper

1/2 large sweet onion

3-4 cloves of garlic

4 T butter

2 T flour

1/2 tsp cayenne pepper

1/2 tsp dried thyme

salt and pepper to taste

1 1/2 cups diced potatoes (redskins or Yukon)

1 1/2 cups fresh or frozen corn

4 cups chicken broth

1 cup diced ham

1 cup half and half

image

Rough chop onion, celery, pepper and leeks.

image

Dice the potatoes and rinse well.  (I prefer not to peel the potatoes.)

image

In a Dutch oven or heavy kettle melt the butter and sauté the vegetables (onions, celery, pepper and leeks) over medium heat until they are tender, 5 minutes or so.

image

Thin slice the garlic and add to the sautéing  vegetables.

image

After adding the garlic sauté another minute.  Add in the flour and stir until incorporated with the vegetables.  Stir in the broth, the diced potatoes, the cayenne pepper and thyme. Bring to a boil, reduce heat and simmer about 10 minutes or until potatoes are tender.

image

Add corn, diced ham and salt and pepper to taste. Stir in one cup of half and half.

Continue to simmer until thoroughly heated.

image

Ladle into bowls. Garnish with a little shredded sharp cheddar cheese and some fresh parsley.

image


image

Enjoy!  I told you it was easy and not very time consuming at all. Once again this is a recipe that can be modified based on personal preference or just based on what you have on hand. The soup is excellent with no meat or you can substitute sausage. Cook the sausage ahead of time and put on paper towel to “degrease.”  Add the sausage near the end of the recipe in place of the ham.

I like to serve this soup with homemade croutons but I had no bread. Crackers had to do tonight. I have two bowls of leftover soup. It’s what will be for lunch tomorrow. Maybe tomorrow I can make some good bread to go with it. Maybe.


Scalloped Potatoes with Cheese

image


Scalloped potatoes are one of my favorite comfort foods. They are one of my dad’s favorites too but he likes his “cheeseless,” probably because that’s the way my mother made them. If I made a ham a day or two earlier I would have cubed the ham and mixed it in with the potatoes but I’m cooking both the ham and the scalloped potatoes today. So they are served side by side.  Scalloped potatoes and ham. It’s what’s for dinner tonight.

There are dozens and dozens of different ways to prepare scalloped potatoes. I’ve made them several different ways myself. But I like them with a lot of onions and a little cheese. Not so much cheese you’d mistake them for au gratin potatoes but just enough cheese to make them a little richer and creamier. You can make any modifications based on your personal tastes.

When I was in high school I took Home Economics. I took Home Economics because I was a girl. It was the class where I learned to outline textbooks. I believe outlining to be a skill with no real life purpose that I’m aware of. However, all of us learned to make a white sauce. Now that is a skill with a real life purpose. It’s enabled me to make great Mac and cheese, pasta sauces, gravies, and, of course, scalloped potatoes. Mrs. Little, my Home Ec teacher, would be proud of me for remembering the white sauce.

Scalloped Potatoes with Cheese

2 pounds small potatoes

1 large sweet onion sliced thin

9 T butter divided

6 T flour

4 cups milk

1 cup grated cheese (I used 1/2 cup smoked Gouda, 1/2 cup gruyere)

1 tsp dry mustard

5-6 fresh sage leaves (optional)

1 tsp fresh thyme leaves (optional)

salt and pepper to taste

1 cup fresh bread crumbs

image


Preheat your oven to 400.

Scrub your potatoes and slice them thin. I use a mandolin so the potato slices are uniform thickness. I also prefer not to peel them. Rinse the potatoes thoroughly after slicing and drain well.

image


Thin slice the onion. For some reason I have trouble slicing onions on a mandolin so I just use a sharp knife.

image


Melt 6 T of the butter in a heavy deep skillet. Whisk in the flour and a couple of the sage leaves that have been thin sliced. Whisk for a minute or two.

image


Slowly add the 4 cups of milk continuing to whisk. Whisk in the ground mustard and continue to whisk until the sauce begins to thicken.

image


Use 1 T of the butter and grease a large casserole dish. Layer half the potatoes first, half the onions, sprinkle one half cup of the cheeses and half the sauce. Repeat.

image

Melt the last 2 T of butter in a skillet. Pulse your fresh bread crumbs with a few fresh sage leaves and fresh thyme. Toast on top of the stove tossing until lightly toasted. Sprinkle on top of the potatoes.

image

Cover with foil and bake for 30 minutes. Uncover and bake for an additional 30 minutes or until potatoes are fork tender and the top is golden brown.

image


Allow the potatoes to sit for about 5 minutes are taking them from the oven.  I served mine with sliced ham, steamed broccoli and some spiced apple slices.

image


Use whatever cheeses are your favorites. If you prefer, omit the sage and thyme. Perhaps try some basil and/or parsley. Or go herb-less.  Enjoy. It’s not fancy but you will find it comforting food.


Angel Hair Pasta with Oven Roasted Tomatoes

image


This weekend we had very special friends visit from out of town. Pasta dishes are always favorites with them so I decided to make pasta two ways. Two ways that were both new recipe interpretations for me which is only a safe thing to do if your guests love you unconditionally. One pasta was a red dish, the other was white. One was meatless, the other had sausage. Both of them turned out very well. I’m going to share the meatless red here. Angel hair pasta with oven roasted tomatoes…it’s what was for dinner and again for lunch the next day.


This recipe is only something you’ll want to try if you will be home all afternoon and if you love the smell of roasting garlic and tomato. Everyone who walked in that afternoon commented on the strong aroma of garlic.  You could roast the tomatoes without the garlic but the flavor would not be the same.  The first part of this dish is the time consuming part…not a lot of work, just time.

Get ready to roast your tomatoes. Preheat the oven to 350 with the racks in the top third of the oven. I combined different kinds of tomatoes…Romas, beefsteak, and small heirloom tomatoes.

imageimage

Slice the romas and the beefsteaks. Leave the cherry/grape tomatoes whole. Put the tomatoes in a large bowl, add 1/2 cup of olive oil and toss the tomatoes to coat. Spread them out in a single layer on jelly roll pans. Peel and smash a dozen or so cloves of garlic and distribute between the two pans of tomatoes. Lightly salt. Turn the oven down to 225 and put the tomatoes in. Roast them for six hours switching the position of the pans after three hours.

image


I told you this process was not at all difficult. It won’t take long and the garlic aromas will begin to permeate the kitchen. These tomatoes are so yummy. You won’t ever want to buy sundried, jarred tomatoes again. Throw the garlic away. It will be tough. The flavors have married the tomatoes and olive oil.

image


Now for the pasta sauce.

3 cups of oven roasted tomatoes (rough chop slices)

2-3 cloves of garlic thin sliced

5-6 anchovy filets

2 T olive oil

1 tsp crushed red pepper

2 T tomato paste

1 pint jar diced tomatoes

20 or so kalamata olives coarsely chopped

10 or so large green olives coarsely chopped

3 T capers

fresh grated asiago cheese

image


Bring salted water to a boil in a large pot and cook pasta according to package instructions.

Heat olive oil in a heavy skillet. Briefly sauté the garlic slices. Add the anchovy filets and sauté until they melt into the oil. Add the pepper flakes and tomato paste. Add the chopped tomatoes, the olives and capers, and the oven roasted tomatoes. Simmer until thoroughly heated.

image


Combine the sauce and pasta and toss. Add a half cup or so of the pasta water if necessary. Top with fresh grated asiago cheese. Serve with a tossed salad and some crusty bread.

If you have more than three cups of oven roasted tomatoes there are any number of uses for them in addition to just eating them straight up. They would be great in an omelet, on a sandwich, in a salad. I used the tomatoes I had left tonight when I roasted a pork loin with Brussels sprouts and baby Yukon gold potatoes. I added them to the vegetables when the cook time was almost up.

Oxtail Soup

image

It’s soup weather!  Soup is one of the ultimate comfort foods. It’s what you’re supposed to eat when you’re not feeling well. It makes your house smell good. It’s something you can add the leftovers from your refrigerator to. Soup recipes are fun to modify to suit your personal tastes. Add this vegetable. Don’t add this one. I had some nice looking oxtails from my favorite organic farm and decided they were the perfect beginning for a pot of soup. It’s what was for dinner last night. And it’s probably what’s for dinner tomorrow night.

Oxtails – about 2 pounds

1/4 cup olive oil

1 cup flour

salt and pepper

2 T tomato paste

1 large onion rough diced

2 stalks celery rough diced

5-6 garlic cloves

1 quart diced tomatoes

4 cups beef or mushroom broth

2 bay leaves

1 tsp thyme

2 carrots thin sliced

1 cup diced potatoes

1 medium rutabaga peeled and diced

1 cup fresh green beans cut in 1 inch pieces

imageimage

Heat olive oil in a heavy kettle. Add flour and salt and pepper and oxtails to a zip lock bag and shake to coat. Brown meat on all sides, remove and set aside.

image

Add onion, garlic, and celery to the kettle and cook for 3-5 minutes over medium heat.  Stir in tomato paste.

image

Add tomatoes, broth, bay leaves, thyme and fresh ground pepper and salt. Return the oxtails to the pan. Simmer for 3-3 1/2 hours. Remove oxtails and add carrots, potatoes, rutabaga, and beans. Additional celery and onion if you’d like.

image

Remove the meat from the bones and add that back into the soup. Oxtails are not very meaty but they provide a great flavor to the soup. Simmer for approximately 1 hour until the vegetables are tender. Season with salt and pepper to taste.

image

Serve up with some crusty bread and you have a perfect hearty dinner. I didn’t have any good bread so I made baking powder biscuits but crusty bread or rolls would have been better.

You can add other root vegetables to this soup like turnips or parsnips. If you add fresh or frozen peas add them toward the end of the cooking process.

TIP:  So many recipes call for 1 or  2 tablespoons of tomato paste. I open cans of tomato paste, put them in the freezer for about an hour, open the other end and push the tomato paste out. I slice the paste and put each section into a zip lock snack bag. I always have tomato paste handy.

Crockpot Candy

image


I very often see recipes that people copy and post to their Facebook page with a comment like “looks great” or “I want to make this.”  Because people have seldom actually tried the recipes I’m always a little skeptical thinking something might have gotten lost in translation. Over the years I’ve actually known people who give you a recipe and intentionally leave out an ingredient. When you try to replicate a dish you loved that someone else made, the missing ingredient assures that it will never turn out as good as theirs.

The Crockpot Candy was one of the rare, untested by anyone I know, Facebook post I decided to try. I don’t eat chocolate but I make a lot of chocolate candy and desserts because chocolate is one of my husband’s favorite things. The recipe is definitely simple and the first time I made it it was a huge hit.   This is my second batch and I decided to make this batch in mini-cupcake papers rather than putting spoonfuls on wax paper. The recipe made about 50 candies.

Get your crockpot out and in about 3 hours you’ll have some beautiful and delicious chocolate treats.

1 16-oz can of lightly salted peanuts

1 16-oz can of lightly salted mixed nuts

1 12-oz bag of dark chocolate chips

1 12-oz bag of milk chocolate chips

2 11-oz bags of butterscotch chips

2 12-oz bags of white chocolate wafers

image


Layer the ingredients in your crockpot in the order listed above.

image image


imageimage


Cover your crockpot, turn it on low and set a timer for 2 hours. After 2 hours stir all the ingredients well, put the cover back on and set your timer for another 30 minutes.

image image


Turn off the crockpot. Using two spoons fill mini-cupcake papers or put chocolate on wax paper and allow the chocolate to harden. If you put a tray at a time in your freezer for 5 minutes or so it makes the candy set up faster and it’s easier to handle.

image


Amazingly easy.

I always use good chocolate in my recipes. In this case all of the chocolate is Ghiradelli. If you prefer you can substitute peanut butter chips for the butterscotch chips. The original recipe I saw used peanut butter chips but my husband doesn’t like peanut butter mixed with his chocolate so I improvised.  I also added some coconut to half of the chocolates this time around. I stirred in about a cup of coconut to the already melted/stirred chocolate.  You could also add raisins or dried cherries to the melted chocolate.

I have not tried halving this recipe. Chocolate can be temperamental when melting so I’m not sure how well it would work.

Find yourself some pretty little boxes, fill them with the chocolates and these would make much appreciated gifts for the holidays, for hostess gifts, or as a thank you.

image

P B & J Cake

image


I made this dessert once before and it is actually the recipe that, a couple years ago, prompted me to start cutting out and organizing recipes I thought looked good from magazines.  I wanted to make this cake a second time and COULD NOT remember what issue of what magazine I’d seen it in. Turns out it was the June 2010 issue of Cuisine at Home. That recipe is now neatly clipped and filed in the dessert section of a spiral notebook and is marked with 4 stars. It looks enough like a PB&J sandwich to fool some people.  And it’s what was for dessert tonight.

Cake

3 cups all purpose flour

1 tsp baking powder

1/2 tsp baking soda

1/2 tsp salt

1 1/4 cups whole milk

2 tsp vanilla extract

1 1/2 cups creamy peanut butter

1 stick butter at room temperature

2 cups granulated sugar

1 cup packed brown sugar

6 eggs at room temperature

image


Preheat your oven to 350. Generously grease the bottom of 2 loaf pans.

Whisk together flour, baking powder and soda, and salt and set aside. Combine milk and vanilla and set aside. Cream peanut butter, butter, and white and brown sugar in a stand mixer with paddle attachment on medium high speed for 5 minutes until well combined. Add eggs to the creamed mixture one at a time beating well after each addition.

imageimage


Alternately add flour and milk to creamed mixture beating after each addition just until mixed, scraping the sides of the bowl when necessary.

Divide batter evenly between prepared pans. Bake 50 minutes. If cakes are browning too much on the sides after 50 minutes loosely tent with foil and bake 10-15 minutes more until toothpick inserted in the center comes out clean.

Let cakes rest in pans on a wire rack for about 20 minutes then turn them out to cool completely.

Peanut Butter Icing

3/4 cup peanut butter

1 stick butter at room temperature

3 cups powdered sugar sifted

1/4 cup milk

2 tsp vanilla extract

image


Beat peanut butter and butter at medium speed until light and fluffy, about 5 minutes. Add powdered sugar, milk and vanilla and beat just until smooth and creamy. image


Assemble your sandwiches. Slice the cake loaf.

image

Spread a slice with a generous amount of peanut butter icing and jam of your choosing (I used my homemade strawberry jam). Put a second slice of cake on top, just like making a PB&J sandwich, and enjoy!  Great with a glass of milk or a cup of coffee.

imageimage


After the first time I made this cake my daughter bought me a cake pan shaped like a slice of bread. Today I baked one loaf pan of batter and the slice of bread shaped pan with the other half of the batter. I assembled the slice of bread cake by trimming off the top to level the cake and slicing it in half and spreading the icing and jam in the center. I’ll have to share that with friends…it’s a lot of cake!  (The jam on this cake is a tart cherry).

image


imageimage


image


Chili Rellenos with Roasted Pepper and Tomato Sauce

image


On one of our first visits to Santa Fe New Mexico we had Chili Rellenos at a place on the square called the LaFonda. It became an immediate favorite dish at a favorite destination in a favorite town. It’s a dish with many interpretations, not all of them to my liking. I came across a recipe that I tweaked a bit and though it’s something I rarely make it’s something we really enjoy!  The preparation is a bit tedious but the end result is worth it. The first thing I do is make the sauce.

Roasted Pepper and Tomato Sauce

2 T olive oil

3 red, yellow or orange sweet peppers roasted and diced

1 large sweet yellow onion diced

3-4 cloves of garlic roasted

1 pint jar (or 14.5 oz can fire roasted) tomatoes

1/4 cup diced cilantro

1 T honey

salt and pepper to taste

imageimage

Preheat oven to 400. Halve the sweet peppers and remove the seeds and stem. Rub with a little olive oil and, along with the garlic, roast on a foil covered sheet pan for 20-30 minutes until peppers are blistered. Remove from oven and put peppers and garlic in a bowl and cover with Saran Wrap.  Wait until the peppers are completely cool and peel and rough dice peppers and squeeze roasted garlic from their skins. Meanwhile heat 2 T of olive oil in a heavy skillet. Rough dice onions and add onions, peppers, and garlic to hot oil and simmer 10-15 minutes until tender. Add tomatoes and cook until thickened and reduced. Put tomato mixture in the food processor along with the cilantro. Pulse a few times. Stir in the honey and add salt and pepper to taste. Set aside and hold at room temperature to serve with the chilies.

Rellenos

5-6 pablano peppers

2 1/2 cups chickpeas

2 1/2 cups shredded Monterey Jack cheese

1 1/2 cups goat cheese

1/4-1/2 cup cilantro

1 bottle of beer

1/2 c flour

3 eggs

1 cup corn meal

peanut oil for deep frying

imageimage

Roast the whole peppers in a 400 degree oven until skins are blistered, 20-30 minutes. Remove from oven, put in a bowl and cover with Saran Wrap. Set aside until completely cooled. Put chick peas, shredded Monterey Jack, goat cheese, and cilantro in a food processor and pulse until well blended. Remove cheese mixture and shape to resemble the pablano peppers.

imageimage

Leaving the stems intact remove skins from the pablano peppers, slit on one side and remove seeds and membranes. Place peppers on paper towel to drain. Place cheese mixture inside of the peeled and cleaned pepper and, using your hands, shape to seal around the filling.

image

Heat oil in a heavy kettle or Dutch oven to 400. Use a thermometer to monitor the temperature. With a whisk lightly beat the 3 eggs in a medium size bowl. Whisk in the  beer.  Put the corn meal in a shallow bowl or on a plate and do the same with the flour. Once the oil is at the appropriate temperature dip the stuffed pepper into the flour, then into the beer/egg mixture and then the cornmeal. Deep fry until golden on both sides. Remove with a slotted spoon to a paper towel lined plate. Serve with the roasted pepper and tomato sauce and guacamole if you choose.

Chili Rellenos with homemade refried beans. It’s what was for dinner tonight.

image

TIP:  I always shred my cheese versus purchasing it pre-shredded. It is more economical and there are no additives. And I think the cheese has much better flavor.


Cranberry Sauce – Three ways

image


Cranberry sauce and poultry dishes just seem to go together. The sauce with whole berries is my favorite although I remember holidays when I was a child and my mother would get out the jellied cranberry sauce. She’d open both ends of the can and push the can shaped concoction onto a special dish and she would slice it.  I think we liked it. We ate it. And I know a lot of other people who still favor the wiggly, sliceable stuff. Cranberries are not available year round where I live so this year I decided to can sauce to use year round. I also froze several bags for recipes like cranberry muffins or sweet potato crisp. I did cranberry sauce three different ways; plain cranberry sauce, spiced cranberry sauce with orange rind and cinnamon and cloves, and cranberry apple relish.

Simple Cranberry Relish

4 cups water

4 cups sugar

10 cups cranberries

imageimage

Put your cranberries in a colander and wash them. Pick out the stems and any bad berries. In a large, heavy kettle combine sugar and water and bring to a boil. Turn heat down to medium and simmer for 5 minutes. Add cranberries and cook over medium heat for approximately 15 minutes without stirring until skins burst. Using a jar funnel ladle the sauce into sterilized pint jars, make sure the lips of the jars are wiped clean and put the two piece vacuum caps on your jars. Process in a water bath for 15 minutes making sure there are a couple inches of water over the jars. Put the jars on a heavy towel to cool.  Pretty basic.

Apple Cranberry Relish

6 tart apples peeled, cored and diced

10 cups cranberries

3 1/2 cups sugar

1 1/2 cups water

1 1/2 cups golden raisins

1 1/2 cups brown sugar

3/4 cup cider vinegar

1 T cinnamon

1 tsp salt

1/2 tsp allspice

1/2 tsp cloves

imageimage

In a large heavy kettle bring the sugar and water to a boil. Reduce heat and simmer for 3-4 minutes. Stir in remaining ingredients and bring to a boil.

image

Reduce heat and simmer uncovered for 20-25 minutes. Using a jar funnel ladle into pint jars leaving a 1/2 inch of head space. Make sure jar lips are wiped clean, fasten two piece vacuum lids and process in a water bath for 15 minutes. Put the jars on a heavy towel to cool.

Spiced Cranberry Sauce

4 cups sugar

3 cups water

1 cup fresh squeezed orange juice

rind of one orange

2-3 whole cinnamon sticks

1 T whole cloves

10 cups cranberries

imageimage

Combine sugar and water in a large heavy kettle and bring to a boil.  Reduce heat and simmer 5 minutes. Meanwhile remove orange peel with a sharp knife leaving as much of the white part on the orange. Cut the rind into very thin strips.  Juice the oranges. If necessary add bottled orange to make one cup. Put the cloves in a mesh bag for easy removal. Add juice, rind, cinnamon sticks, cloves and berries to simmering sugar water. Bring to a boil. Reduce heat and simmer for 15 minutes until berries burst.

imageimage


Follow the steps outlined above to bottle the sauce. Process for 15 minutes in a water bath and cool jars on a heavy towel.

I think I will have to make chicken one night soon so I can enjoy a jar of cranberry sauce.  Any one of these would be a good addition to a carton of yogurt or over a dish of vanilla ice cream.  Or add a few tablespoons of sauce to a turkey or chicken sandwich.

image

Tuna Steaks with Caper-Olive Sauce

image


I’ve always loved fish. I grew up eating awesome fresh water fish that my dad would catch; brook trout, coho salmon, rainbow trout, perch, bluegills, even smelt. I never had ahi tuna until I was an adult and it’s become one of my absolute favorites. Where I live it’s rare that I can find ahi tuna in any kind of grocery or specialty market so I’m always thrilled when I do find it. I was able to purchase some tuna recently and found a recipe that I had clipped from a magazine and it’s what was for dinner.

2 5-6 oz tuna steaks

olive oil and salt and pepper

Lightly rub the tuna steaks with olive oil and season with salt and pepper.

image

For the sauce

1/2 cup olive oil

1/4 cup capers

1/4 cup pitted and sliced kalamata olives

2 T minced shallots

2 T minced fresh parsley

2 T fresh lemon juice

image

Mince the shallots and parsley. Slice the kalamata olives. And juice the lemon.

image

Heat the olive oil in a heavy skillet. Once the oil begins to shimmer add the capers, olives and shallots. Simmer 3-4 minutes over medium/low heat. Remove from the heat. Just before serving stir in the lemon juice and parsley.

image

Heat a heavy skillet (I used a cast iron pan) over medium high heat. Sear the tuna steaks 3 minutes per side. Remove the steaks to dinner plates and spoon the  caper-olive sauce over the tuna. Serve with a wedge of lemon.  Hopefully you will remember to put the lemon wedges on the plates…I noticed mine when we had finished eating.

I served the tuna with oven roasted cauliflower with a cheddar/fontina cheese sauce.

image

This was a great dinner!  I will definitely make this sauce again and think it would taste great on a salmon steak or mahi mahi.

TIP:  Be careful not to overcook your tuna. It should be seared for a few minutes on either side and should be rare or medium rare in the center. If you overcook it you should just buy a can of tuna for a lot less money because that’s what it will taste like.