Liver-Palooza

Liver-Palooza…..not for the faint of heart or lily-livered.

The urban dictionary defines palooza as “an all out crazy party.”  One of the tweets referred to palooza as “a big Norwegian festival.”  Not sure either of those are entirely appropriate but this week was a Liver-Palooza for me after a long liver hiatus. I do have a lifetime of liver memories. When I was a child one of my mother’s requirements was that we cleaned our plates. That was not a bad thing if you liked what was on your plate. But that wasn’t always the case. Like when she decided to serve liver and onions for supper. My dad will not eat liver and I know for a fact my mother never required him to clean his plate on liver nights. I remember her putting strawberry jam on our liver to help it go down. I’m probably correct in assuming that I am the only remaining person in my family that actually voluntarily eats liver.

Anyone who was on Weight Watchers in the early 70s like I was will remember Jean Nidetch decided that, to lose weight successfully and to get the body’s requirement of vitamins and iron, one meal a week had to include a serving of liver the size of a deck of cards. By then I was able to eat it without the strawberry jam.

My husband frequently tells people about one of our first dinner dates in Chicago when he took me to the Italian Village, a favorite place of his, and I order liver and onions.  As I recall, the Italian Village did a great job on the liver!

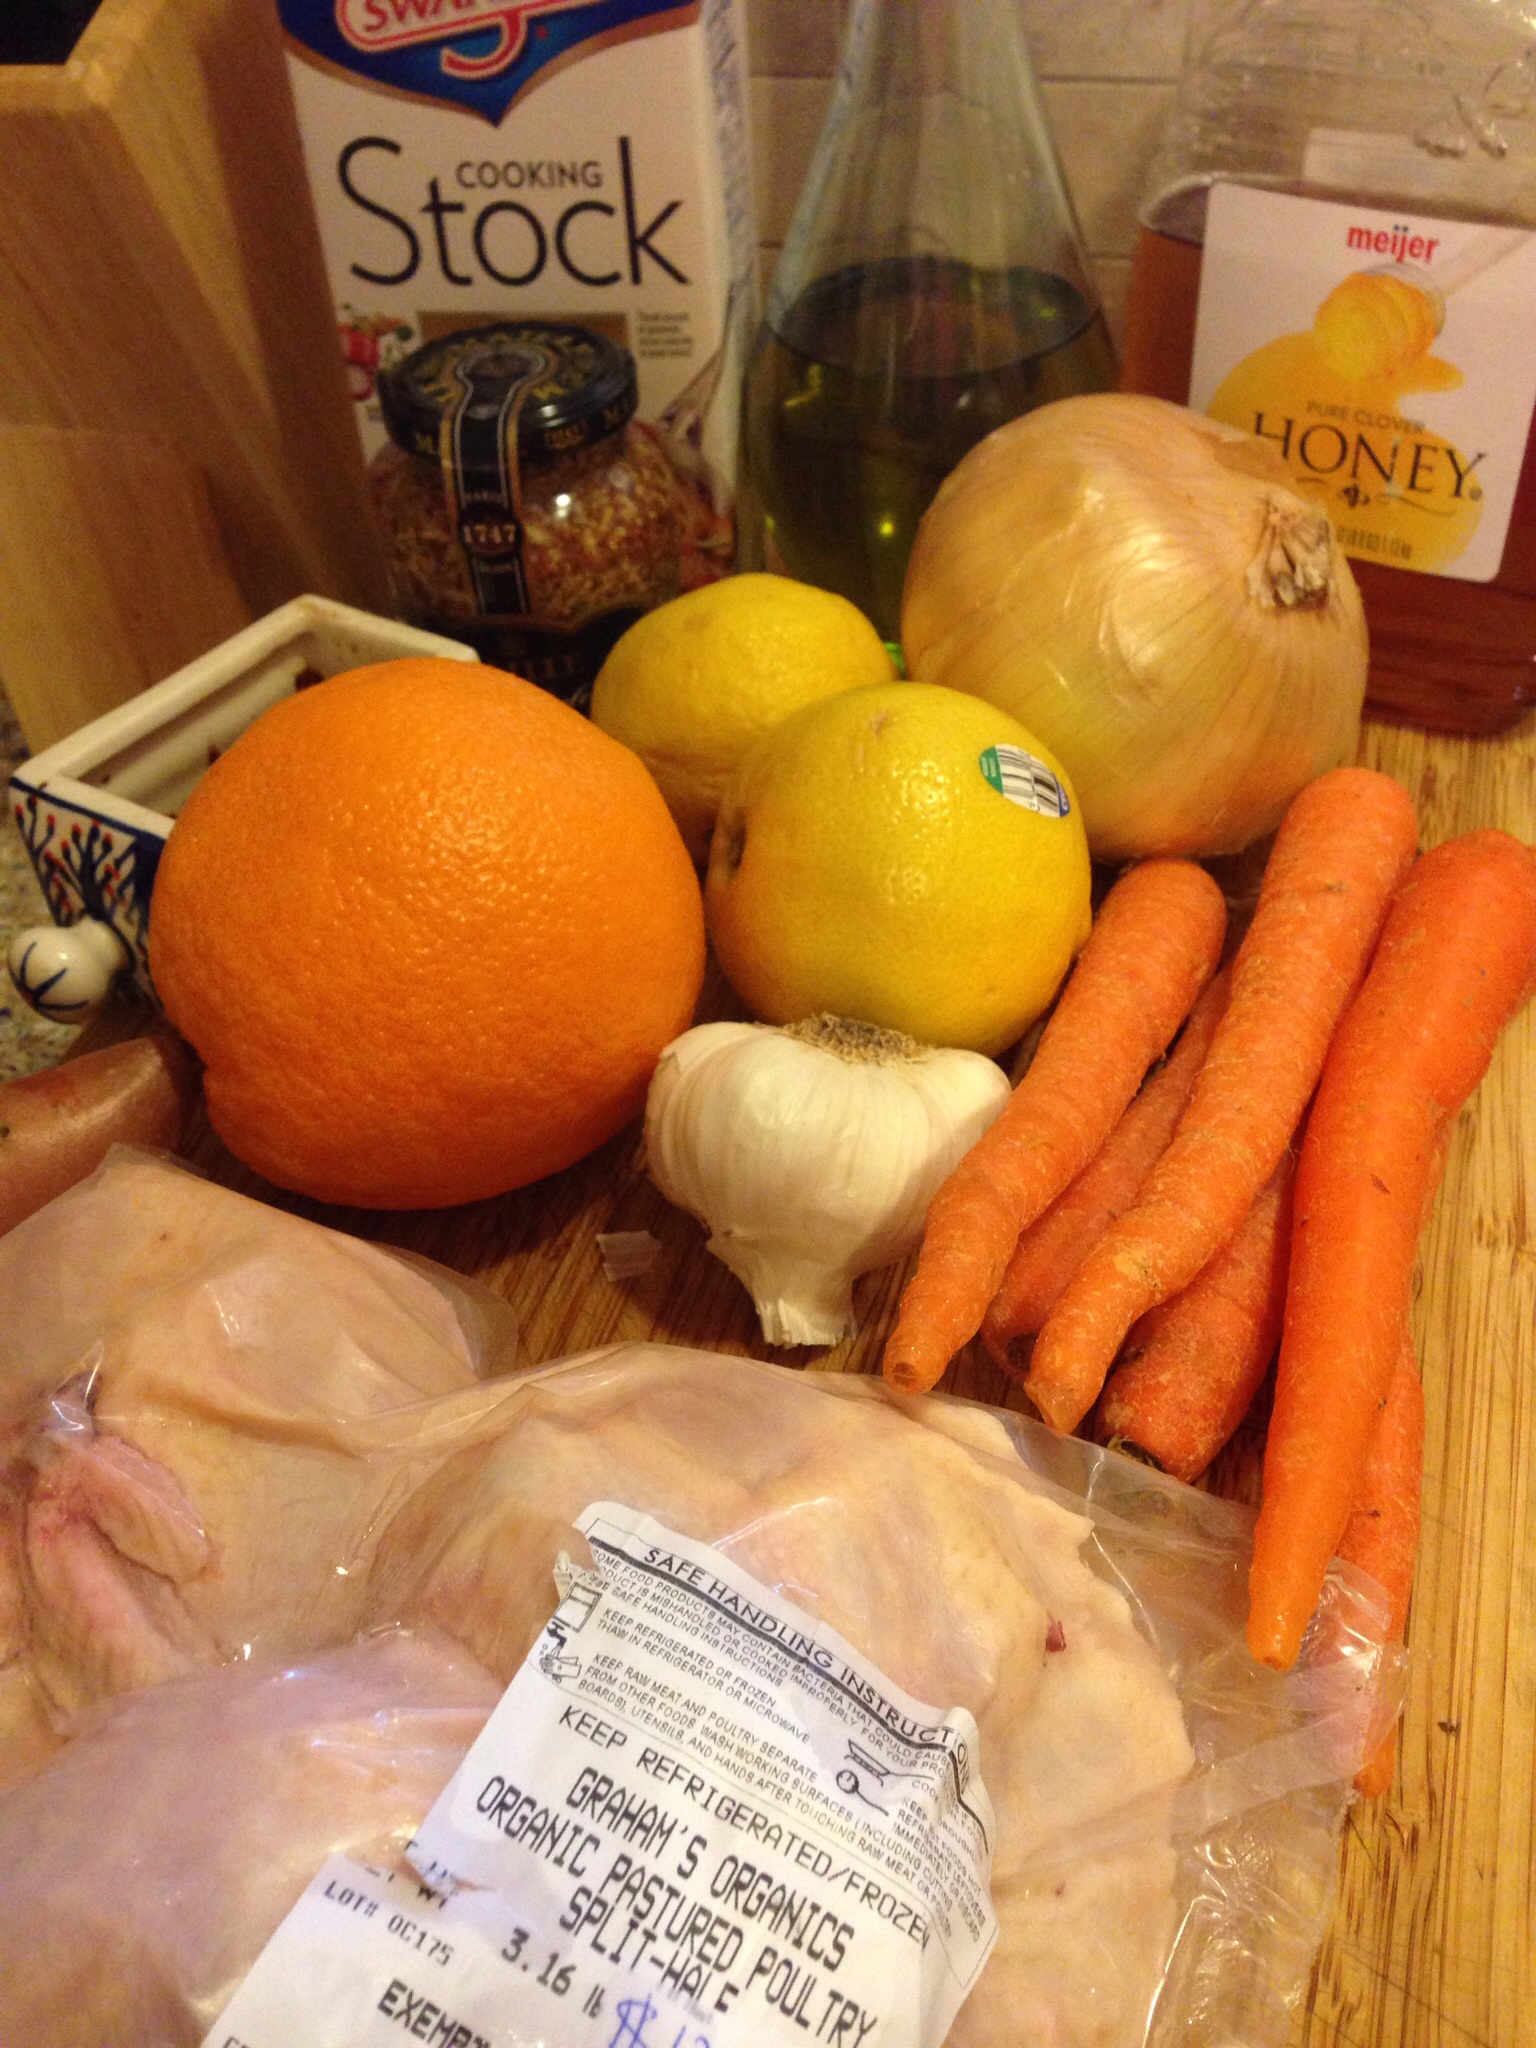
This most recent liver palooza came about as a thank you to a good friend for a huge favor he did for me. I typically don’t cook liver because it is one of the very few foods my husband won’t eat. Liver and Lima beans. (I don’t cook Lima beans either.) I invited our friends to dinner Saturday night and cooked liver and onions and bacon for him and for me and I made some pretty awesome chef salads for his wife and my husband. The liver tasted great. The trick is to not cook it for so long that it looks and cuts like a piece of shoe leather. It should be a little pink in the center and tender. I soak it in milk for about a hour, dry it off, dredge it in seasoned flour and fry it in my cast iron pan in some of the bacon drippings.

image

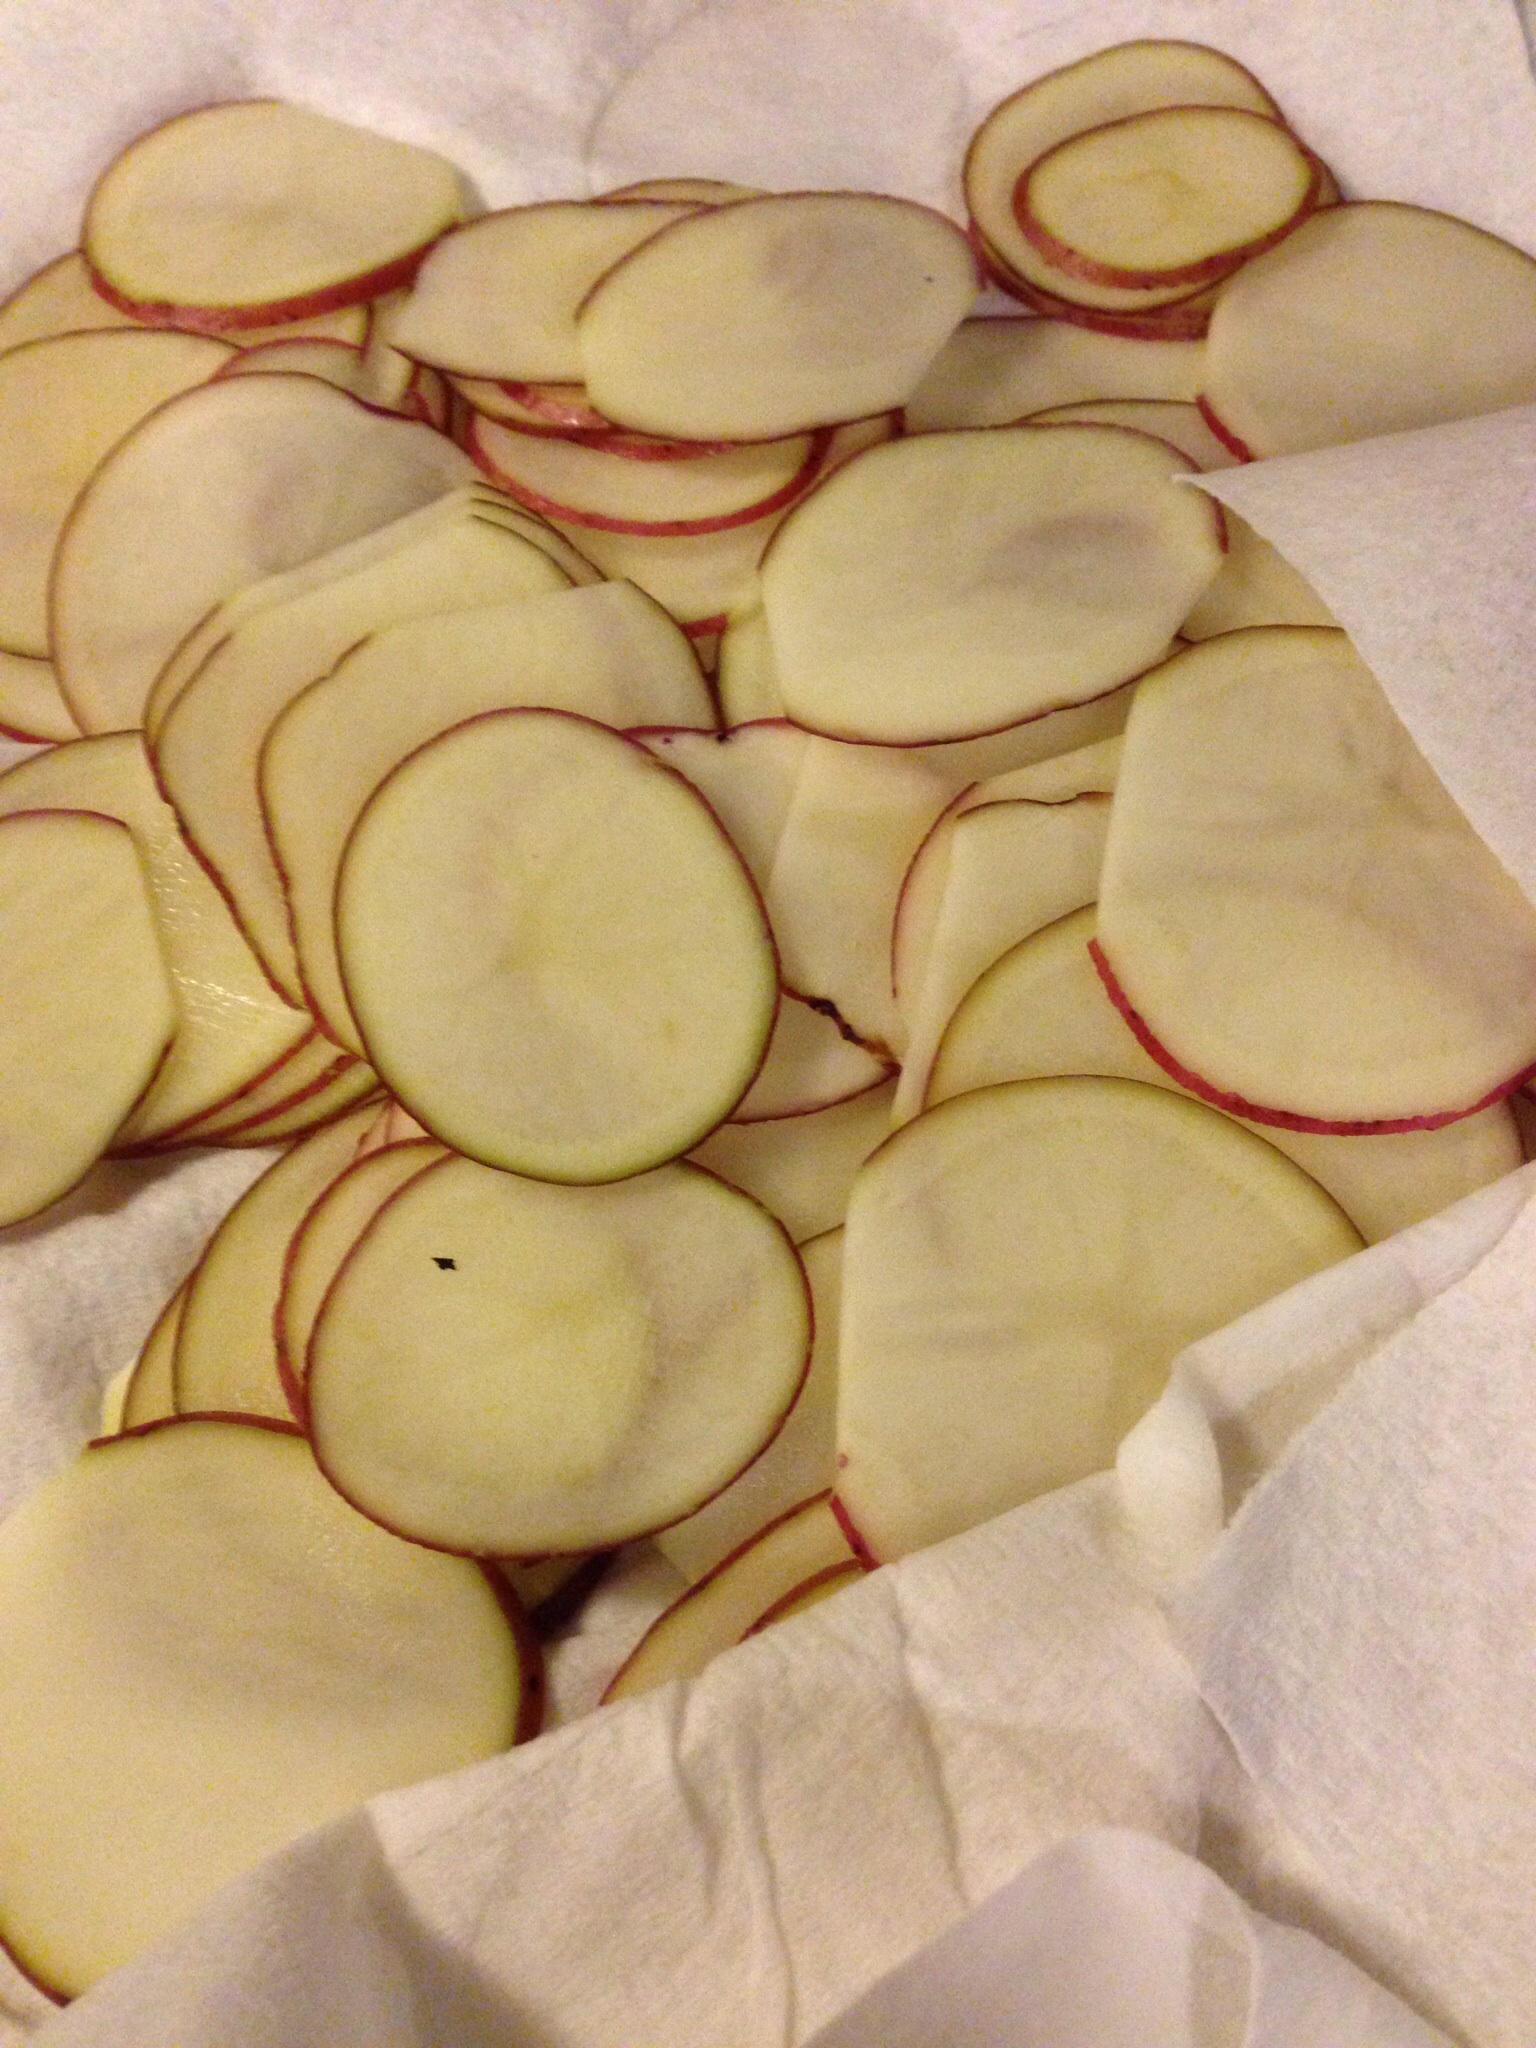
Lots of onion and good quality liver.

Tuesdays are grocery shopping days and we stopped at a little Amish market for organic milk. My friend and I both spied Koegel’s Braunschweiger in the cooler and we both purchased a piece. It’s been a couple decades I think since I had Braunschweiger. Which brings me to today’s lunch.

image

Braunschweiger is a German word that, in America, refers to liver wurst. I started to read how liver wurst is made and then I stopped. You might not want to read about it either.

Today for lunch I made myself a sandwich.

image

Sour dough bread, Hellmans mayo, red onion, tomato, lettuce, and, of course, my liver wurst. Some assembly required.

image image

I ate my sandwich along with a nice hot cup of coffee on the back porch. A solo picnic. In honor of Jean Nidetch I substituted lettuce for the top of my sandwich.

After this week I will probably have another long liver hiatus. Except perhaps for the occasional crackers and pate.

Blueberry Buttermilk Pound Cake

image

It has been a couple weeks since my last post. We’ve been doing some traveling and most recently I spent a week in Chicago with my daughter. A perfectly wonderful celebration of Mother’s Day and my birthday. As they age a lot of people stop celebrating birthdays or lie a little about their age. My theory is, the older we get the longer we should celebrate. This year the two middle weeks of May are my birthday and next year it may be the entire month!  Birthday lunches and dinners with family and friends, toasts, presents, cards, FB greetings…embrace your age, embrace the attention, wear a tiara, eat cake. If no one bakes you a cake, bake your own. That’s what I did!  While I was in Chicago my daughter and I made this cake. A new experiment. And a successful one. I decided to replicate this delicious cake for my birthday.

Ingredients:

1 cup butter at room temperature

2 cups sugar

4 eggs

3 cups flour

1/2 tsp baking soda

1/4 tsp salt

1 cup buttermilk

1 tsp vanilla extract

1 tsp almond extract

2 cups blueberries

image

Preheat your oven to 325 and grease a bundt pan.

In a mixing bowl cream the butter until light and fluffy.

image

Gradually add the sugar and beat until well blended. Add the eggs, beating after each addition.

image

Whisk together the flour, baking soda and salt. Add to the creamed mixture alternating with the buttermilk. Begin and end with the dry ingredients.

image

Stir in the extracts. Stir in the blueberries.

image

Spoon the batter into the prepared pan and bake for 1 hour. Allow the cake to cool for 10-15 minutes, invert the pan and plate the cake.

Now sometimes the things I bake are works of art and sometimes they’re not. Today this cake was not a work of art!!

image

This is the cake I baked last week with my daughter.

image

This was the birthday cake I baked myself. Oh my. I really should be embarrassed to post this picture. I’ve had problems with things sticking in this pan before but this was ridiculous. We are eating the cake and it tastes SO much better than it looks. But the pan is in the trash!  I need to buy myself a new bundt pan. Maybe a birthday gift to myself.

This cake is great with a scoop of vanilla or butter pecan ice cream or a generous dollop of whipped cream. Happy birthday to me!


Shepherd’s Pie

image

Shepherd’s Pie is a dish that works well with countless variations. I, in fact, just sent a recipe for a Pizza Shepherd’s Pie to my brother who is a pizza aficionado.

I’m leaving to spend a week with our daughter soon and I’ve been making dishes that result in leftovers so my husband will have good eats while I’m away. Last night it was Mac and Cheese. Tonight Shepherd’s Pie.

Ingredients for base:

1 lb ground beef

1 medium onion rough chopped

4-5 cloves of garlic

1 T beef Better than Bouillon

2 T flour

1 pint stewed tomatoes

2 cups vegetables (I used corn and asparagus)

1/4 cup fresh parsley chopped

1 tsp dried thyme

salt and pepper to taste

image

Ingredients for Potato topping:

2 lbs of potatoes peeled and cut up

5-6 carriers peeled and cut up

3-4 cloves of garlic

cream or half-n-half

3 T butter

1 cup shredded cheddar cheese

salt and pepper to taste

image

Peel the potatoes and carrots, rinse well, add the whole garlic cloves and cook until the potatoes and carrots are tender. While the potatoes cook begin preparing the base.

image

In a heavy Dutch oven cook the ground beef until it’s no longer pink.

image image

Remove the cooked beef to a bowl and leave approximately 2 T of the drippings in the Dutch oven. (My meat was very lean and I had to add a little olive oil to the pan.)  Add the onions and garlic to the drippings and cook over medium heat until the onions are tender.

image image

Stir the flour into the onion garlic mix and cook for a couple minutes stirring constantly. Stir in the tomatoes, thyme, and the Better than Bouillon. Cook over medium heat stirring occasionally until mixture begins to thicken.

image

Stir in the ground beef and the chopped parsley.  Add salt and pepper to taste. Thoroughly combine and pour into a casserole dish.  Preheat oven to 400.

image

Distribute the vegetables over the meat.

image

Once the potatoes and carrots are tender drain the water and whip or mash adding butter, cream and cheese.  Add salt and pepper to taste. I usually mash the potatoes, always mash them for my daughter who likes a lump here or there, but for this casserole I like to whip them.

image

Evenly distribute the potato mixture over the casserole.

image

Bake for 20 minutes or until the meat mixture starts to bubble around the edges. Scoop onto your plate and enjoy. Serve with a salad and some good crusty bread.  We both had second helpings and there is still plenty left for two good meals while I’m away.

NOTE:  Lamb or a combo beef/pork mix would be good substitutes for the beef.  Fresh mushrooms are a good add to the onion/garlic mixture. Peas, green beans, spinach are some of the vegetables that can be substituted for the corn and asparagus. A little horseradish or another type of cheese change up the potato icing.   Anyway you mix it up, it’s an easy, hearty meal.  A little bit classy, a little bit trashy.

Mediterranean Orzo Salad

image

Some of my favorite recipes are from my Knit Wit girl friends. We have the most incredible pot lucks!  All of us love to cook and bake and feed people. This recipe showed up at one of our feasts and I make it often.  It’s a great side dish but last night it was my entree with a piece of crusty bread I made a couple nights ago.

Ingredients:

1 cup uncooked orzo (prepared per package instructions)

2 cups baby spinach chopped

5 oz jar sun dried tomatoes in oil

3 T red onion chopped

1/2 cup sliced kalamata olives

6 oz jar marinated artichoke hearts undrained

14 oz can small artichoke hearts chopped

3 oz feta cheese

image

NOTE:  I used sweet white onion because I didn’t have red. And I was out of feta cheese…which is really a good addition.   But the salad still tasted really good even without the cheese. 😊

Bring two cups of salted water to a boil, add the orzo and cook for about 5 minutes.  Drain and set aside.

image

Rough chop both artichokes and put them in a salad bowl.  Set the marinade aside.

image image

Rough chop the tomatoes (reserve the oil) and dice the onion.

image image

Add the tomatoes, onion, and sliced olives to the salad bowl.

image

Add the orzo to the salad bowl. I like to do it when the orzo is still warm. I think the orzo observes the flavors of the marinade and oil better.

image

Rough chop the spinach and add it to the salad bowl.

image

Toss the salad along with the marinade from the jar of artichokes and some of the oil from the sun dried tomatoes. Add 3 oz of cubed feta cheese (remember, I was out of feta) and salt and pepper to taste. I prefer this salad at room temperature but it’s also good chilled. Either way, I’m sure you will enjoy it.

This salad is great served with lamb chops, fish or even a good burger. This afternoon we had left over salad with tuna melts.

Citrus Chicken with Vegetables

image

This recipe is an amalgam of different recipes that I, at one time or another, tore out of magazines and filed away. I get several food magazines and I used to see recipes that I thought looked especially good so I saved the entire magazine. When I decided I wanted to try that special dessert or salad or soup that I’d seen I could never remember which issue or even which magazine I’d seen it in. So, instead of saving all the magazines I get, I now try to tear out the recipes I want to try and file them in spiral binders by category. If I try them and they are fails I throw the recipe out. Keepers stay in the binder with a 😊 on them. It’s my attempt to utilize my somewhat rusty organizational skills. Occasionally I sit down with one of the spiral binders and look for a recipe that strikes my fancy and that I have all the ingredients for. The latter is what sometimes inspires me to combine recipes or just ad lib on a concept. This chicken dish is one of those amalgams.

Ingredients:

Whole chicken cut into pieces (or whatever parts you prefer)

3 T olive oil

1/4 cup chicken broth

4 T fresh squeezed orange juice

4 T fresh squeezed lemon juice + 1 lemon cut into thin wedges

4 T whole grain mustard

4 T honey

1 tsp red pepper flakes

5-6 cloves of garlic chopped

1 large onion sliced

2-3 sweet potatoes peeled and cubed

4-5 carrots peeled and cut into chunks

Salt and pepper to taste

image

Cut the whole lemon in half, then in quarters, and finally cut each quarter into 4 wedges. Put the lemon wedges in a cup or so of boiling water and simmer for about 5 minutes. Drain and set aside.

image image

Preheat the oven to 425. In a large roasting pan or jelly roll pan lined with tin foil spread out the potatoes, carrots, and onion.

image

Generously salt and pepper the chicken and scatter the chicken pieces, skin side up, in with the vegetables.

image

In a medium sauce pan combine the citrus juices, olive oil, mustard, honey, broth, red pepper flakes and garlic.

image image

image image

Whisk all of the ingredients together and bring to a simmer. Pour the sauce evenly over the chicken and vegetables and add in the lemon wedges.

image

Bake uncovered. Take care not to overcook and dry out the chicken. Use a meat thermometer and remove the chicken pieces once they reach 155-160 degrees. Keep them warm on a platter covered with foil. Return the vegetables to the oven until they are tender. Once the vegetables are done spoon the vegetables and sauce over the chicken pieces and serve.

image

I have a thing about cranberry sauce with chicken dishes; see my cranberry sauce on the plate at 3:00. I also had some leftover Amish egg noodles and served the chicken, vegetables and sauce over the noodles. You can change up the vegetables in this dish based on personal preference or whatever you have on hand… Cauliflower, Brussels sprouts, sweet peppers, green beans, turnips or parsnips. Any of those would be good. Your kitchen will smell wonderful while this is cooking!

Homemade Potato Chips with Chilpotle Lime Dip

image

Homemade chips anyone?  Remember when we all owned a “Fry Baby” or “Fry Daddy” and apparently fried lots of things??  Those must-have appliances came with a plastic lid so you could just store and reuse the oil. I rarely deep fry anymore but a couple weeks ago I made chili Rellenos which are deep fried in a pretty fair amount of oil. So as not to be wasteful, once the oil had completely cooled I strained it using a fine mesh colander lined with a coffee filter. After doing that the oil can be stored in the refrigerator and used one or two more times…unless you’ve fried fish in it and then no, do not reuse. I decided to make fish and chips for dinner.  My excuse for a dinner of all fried things was not wanting to waste that oil.  I know that will make perfect sense to anyone reading this.  Back in the Fry Daddy days I guess we didn’t need an excuse.

To prepare the potatoes for chip making wash them and, using a mandolin on a fine setting, slice away. I used redskin potatoes and I do not peel them. Rinse the potatoes well after slicing and dry them as thoroughly as possible with paper towel or clean cotton dish towels.

image

Heat your oil in a heavy Dutch oven until it reaches 375-380 degrees. Carefully begin dropping the potatoes in the hot oil and let them fry until they are lightly browned. Don’t crowd the potatoes in the pan.

image

You may have to turn them once. When they are done to your liking remove the chips from the hot oil using a skimmer and put them on a pizza pan or jelly roll pan lined with paper towel. Salt them immediately with coarse salt and put them in a warm oven.

image

Begin your next batch until you’ve made the desired amount of chips. I think putting the chips in a warm oven after frying also helps to crisp them up and any excess oil dissipates or is absorbed by the paper towel.

Dip Ingredients:

1 cup sour cream

1/2 cup mayonnaise

3 T chilpotle peppers in adobo (chopped well)

juice and zest of one lime

image

Thoroughly combine all ingredients.

image

Keep refrigerated until you’re ready to serve.

NOTE:  If you have any chips left store them in a zip lock bag and, before serving the left overs, warm them up a bit in the oven.   The dip is also excellent on fish tacos and would add a little zip to a vegetable tray.  You can also make really yummy chips with sweet potatoes.

Snickerdoodles

image


This is more of a tribute post than a recipe post. A very dear family friend passed away a couple weeks ago and I inherited a few boxes full of knitting and quilting and sewing patterns. In her files I found clippings from 1961 and 1962 when she wrote a column in a local newspaper entitled “A Pinch of This…A Pinch of That…”  She had a “blog” before there were blogs.

image

She was a beautiful lady who graduated from Michigan State University with a degree in Home Economics. She was a great cook and baker, an incredibly talented seamstress (she made my wedding dress), a fantastic hand quilter, and a whiz with knitting needles and a crochet hook. Right up to the time she passed away she was knitting hats for newborns that she donated through her church.  She was a patient teacher who passed on her skills to her sons and grandchildren. And a few to me. When I took up knitting a few years ago I would call her for long distance assistance and whenever I visited she wanted to see my latest projects.

In her “A Pinch of This…A Pinch of That” column she gave advice and helpful hints and, you guessed it, the recipe for Snicker doodles.   I am a real sappy sentimentalist so when I found this particular column I had to make the cookies.

Ingredients:

1 cup shortening (I used butter flavor Crisco)

1 1/2 cups granulated sugar + 1/4 cup for rolling

2 eggs

2 1/2 cups flour

1 1/2 tsp baking soda

1/2 tsp salt

2 tsp cinnamon

image

Beat the shortening, eggs and sugar together thoroughly.

image

Stir in the flour, baking soda and salt. Chill the dough and roll into balls about the size of a walnut. While the dough is chilling whisk together the sugar and cinnamon in a small bowl.

image

Roll the dough balls in the cinnamon sugar and place about 2 inches apart on an ungreased baking sheet.

image

Bake at 400 for 8 to 10 minutes or until lightly browned and still soft.

imageimage

Cool on a wire rack. Enjoy.

In her column my friend talks about making these for Halloween. She says, “I just finished a batch of cookies and put them in the freezer in anticipation of many little trick or treaters. It’s fun to see the smiling faces as you hand each small fry his surprise. This is a good time to remember too much candy for growing youngsters is not a good idea. Vary your gifts, fruit such as apples or oranges along with a homemade cookie. A plain napkin with the goodies in the center and the corners brought together and tied with string, is much easier to handle.”  Those were the days. When kids got excited about a homemade cookie and a piece of fruit and parents would actually let their kids eat the homemade cookie and piece of fruit.

I was so happy to find these clippings. I’ll share more of the helpful hints in the future. Rest in Peace Peggy Johnson. I believe that having her in my life made me a better person.  She will live on always in my heart and mind and with every snicker doodle I make.

💕

Strawberry Lime Sorbet

image

Spring seems like it’s never going to get here and I thought a nice fruity sorbet would make a refreshing dessert and would taste like Spring. I happen to have an ice cream maker that I haven’t used in awhile so I dusted that off and put the bowl in the freezer. I decided to combine strawberries and lime to get a little sweet tart thing going on.

Ingredients:

2 1-lb boxes of strawberries washed and hulled

2 T fresh squeezed lime juice

zest of one lime (about a tsp)

1/2 cup water

1/4 to 1/2 cup of sugar (depending on how sweet the fruit is and, of course, personal taste)

1 tsp vanilla extract

image

Put the washed and hulled berries in your food processor and purée until smooth.

image

Pour the purée into a large measuring cup or bowl and set aside while you prepare the syrup.

image

Taste your purée for sweetness and then determine how much sugar to add. I used a generous 1/4 cup. Measure your sugar, zest, lime juice and water into a small saucepan.

image

Cook over medium heat stirring constantly just until sugar is dissolved.

image

After taking it off the heat stir in the vanilla. Allow the syrup to cool a little. Once it’s cooled stir the syrup into the purée. You should have between 3 and 4 cups total once the syrup and purée are combined. Refrigerate 4-5 hours or overnight. Now dust off your Ice cream maker.

image

Once it’s assembled (I had to get the manual out) turn it on and pour in the purée.

image

After about 30 minutes I had a perfect sorbet. Scoop out and garnish with a little slice of lime or a piece of fresh mint. And enjoy the taste of Spring!

image image

Now that I’ve dusted off the ice cream maker and located the manual I think I’ll be experimenting with more fruit sorbets. They are a lot lower in calories than ice cream or even frozen yogurt.

NOTE:  Put your sorbet into a container with a good sealing lid and store it in the freezer. Before serving leave it out for a couple minutes for easier scooping. Also, I had a particularly juicy lime so I saved the rest of the juice in a labeled zip lock snack bag and put it in my freezer.

image


Chocolate Filled Coconut Nests with Cadbury Eggs

image

In Easters past my daughter and I, and sometimes her friends, would color lots of eggs and then decoupage pictures we cut out of magazines, add glitter and hot glue gems on them. Sometimes they were hard boiled (or accidentally soft boiled).  One year I bought brown eggs by mistake. But our favorite was making a hole in each end of the egg and blowing the whites and yolks out. I poked the holes, my daughter had to do the egg blowing. I wasn’t so good at that!   I have a bowl full of those blown eggs saved. I’m kind of a sappy sentimentalist.

image image

This is a project I would have enjoyed doing with my daughter. Plus Cadbury milk chocolate eggs are her all time favorite Easter candy. The nests were easy.

Ingredients:

14 ounce bag of good coconut

4 egg whites

1/2 tsp salt

food coloring (pick your favorite color)

1 cup Ghirardelli chocolate chips

1 pkg chocolate eggs

image

Preheat the oven to 300.

Separate the yolks from the whites and, using a whisk, stir the whites and the salt together. Add a small amount of food coloring and blend into the egg whites. I used the Wilton paste and a little bit goes a long way. Just stir. Don’t whip.

image image

Stir in the coconut until well blended. Spray miniature muffin tins with cooking spray and put a couple tablespoons of the coconut mixture into each muffin cup. Gently press the mixture into the bottom and up the sides of each cup leaving a nice indentation in the center.

image

Bake for approximately 25 minutes or until coconut begins to brown a little. Remove from the oven and cool in the tins for about 10 minutes on wire racks.

image

Using a metal icing knife remove the nests from the pans to finish cooling on the wire rack.

image

Melt the chocolate chips in a microwave safe dish stirring every 20 seconds or so just until melted.

image

Put about 1 tsp of chocolate in each nest followed by a couple Cadbury eggs. The chocolate will help to secure the eggs in the nests.

image

Share these little nests full of goodness with friends and family. They would make a nice addition to Easter baskets or your Easter dinner table. Wrap them in a little Saran Wrap and tie them with pastel ribbon.

image

NOTE:  I used my egg yolks to make some vanilla pudding. We will have that for dessert tonight with some fresh berries. You might also want to use a little butter cream icing in the center of each nest and use jelly beans instead of chocolate eggs.

Happy Easter.

Chili Rellenos with Tomato-Pepper Sauce and Refried Beans

image

One of our favorite vacation destinations is Santa Fe New Mexico. We love all of the arts, the people, the beautiful scenery and the food. Chili Rellenos are one of our favorites. We first had really good rellenos at the La Fonda, a hotel restaurant on the square in Santa Fe, and we loved them. I have tried a few different ingredient combinations and this one has become my make at home favorite. I’d rather go to Santa Fe and order them but mine are the next best thing. It’s a fairly time consuming process so I don’t make them very often.

The first thing I made today were the refried beans.

Ingredients:

1 48-oz jar pre-cooked Randall’s pinto beans

1 large onion, rough chopped

2 T bacon fat or crisco shortening

1/2 cup chicken or vegetable broth

1 jalapeño seeded and in a small dice

1/4 cup fresh cilantro leaves chopped

image

Heat the grease or shortening in a large heavy skillet and add the onion.

image

Cook the onions over low heat, stirring occasionally, until the onions are caramelized. About 20 minutes. Be careful not to burn them. You want them to be golden and sweet.

image

Drain and rinse the beans. Add the beans and broth to the caramelized onions and cook about 10 minutes over low heat.

image

My bean smashing implement of choice is an old fashioned potato masher. Smash the beans and onions together. Add a little extra broth if the beans seem too dry. Dice the jalapeño and chop the cilantro.

image

Stir the pepper and cilantro into the beans. Add salt and pepper to taste. Transfer the beans to an oven safe dish and cover with Saran Wrap until you’re ready to heat them in the oven.

image

I sprinkle a little cheese on top of the beans before pitting them in the oven. (Queso fresco, queso Oaxaca, goat cheese or Monterey Jack.). When you’re ready heat in the oven at 350 for about 20 minutes until the cheese is melted and the beans are heated through.  If you want the beans to be vegetarian use crisco and vegetable broth.

Next I roast my peppers and prepare the Tomato-Pepper Sauce.

I line a large baking sheet with foil, preheat my oven to 425, spread the peppers out and roast them until they have a nice char on each side.

image

Turn the peppers at least once. It takes about 30 minutes total. Once the peppers are done put them in a covered bowl to steam and cool before peeling.

Sauce Ingredients:

2 or 3 large red or yellow bell peppers roasted or a jar of roasted peppers

1 large onion rough chopped

5-6 cloves of garlic rough chopped

2 T canola or olive oil

1 pint tomatoes in their juices

1/4 cup cilantro

2 T honey

salt and pepper to taste

image

Heat the oil in a large heavy skillet over medium heat. Sauté the onions, roasted and diced peppers, and garlic together. Cook until tender, 15 minutes or so.

image

image

Stir in the tomatoes and cook until thickened and reduced by half.

image

Once the sauce is thickened and reduced transfer it to your food processor. Add the cilantro and honey and pulse until smooth.

image

Pour the sauce into a serving bowl and add salt and pepper to taste. Set aside until you’re ready to serve the Rellenos. The sauce is served at room temperature.

image

Last, but not least, we prepare the peppers and the filling.

Poblano Peppers and Filling Ingredients:

4 poblano peppers roasted and peeled

3/4 to 1 cup goat cheese

1 1/4 cup Monterey Jack cheese shredded

1 can chickpeas (garbanzo beans) drained and rinsed

1/4 cup cilantro leaves

image

Peel the roasted peppers and, using a sharp knife make a slit the length of the pepper and remove the seeds and membranes. Lay the peppers on paper towel until you’re ready to stuff them. Put the chickpeas, cheeses, and cilantro in the food processor and pulse until well blended.

image

Divide the filling into 4 equal parts and shape into ovals.

image

Put one of the ovals into each of the poblano peppers and, using your hands, gently close the pepper around the filling.

image

Heat peanut oil in a deep fryer or a heavy Dutch oven to 385 degrees.

Coating Ingredients:

2 large eggs whisked

1 cup beer

flour

cornmeal

image

Whisk the egg and beer together. Roll the pepper in flour, dip it into the egg mixture, and roll in the cornmeal.

image image

image

Gently lower a couple peppers into the hot oil.

image

Fry until the peppers are golden brown turning once while they are frying. Remove peppers to paper towel to drain. Fry the remaining two peppers.

image

Serve hot with the refried beans and a generous serving of the tomato-pepper sauce.

image

Mexican rice and chips and guacamole are both excellent sides with this dish. Garnish with lime wedges if you’d like. Excellent with a nice cold beer or a tequila drink. You might feel transported to Santa Fe.