Braised Country Style Pork Ribs

image

This is a Dutch oven dinner.  I have several Dutch ovens in varying sizes and shapes and I love cooking in them.  The cast iron provides perfect even heat, they go from stove top to oven to table, and clean up is pretty easy.  Very often, when we think ribs, we think barbecue.  I do love country style ribs barbecued but this is a good change of pace.  A very homey, cold weather, comfort meal like your mother or grandmother would have put on the table.  And it makes the kitchen smell wonderful when it’s cooking.  One of my Dad’s favorite meals is a boiled dinner and this dish has a lot of the same components.

Ingredients:

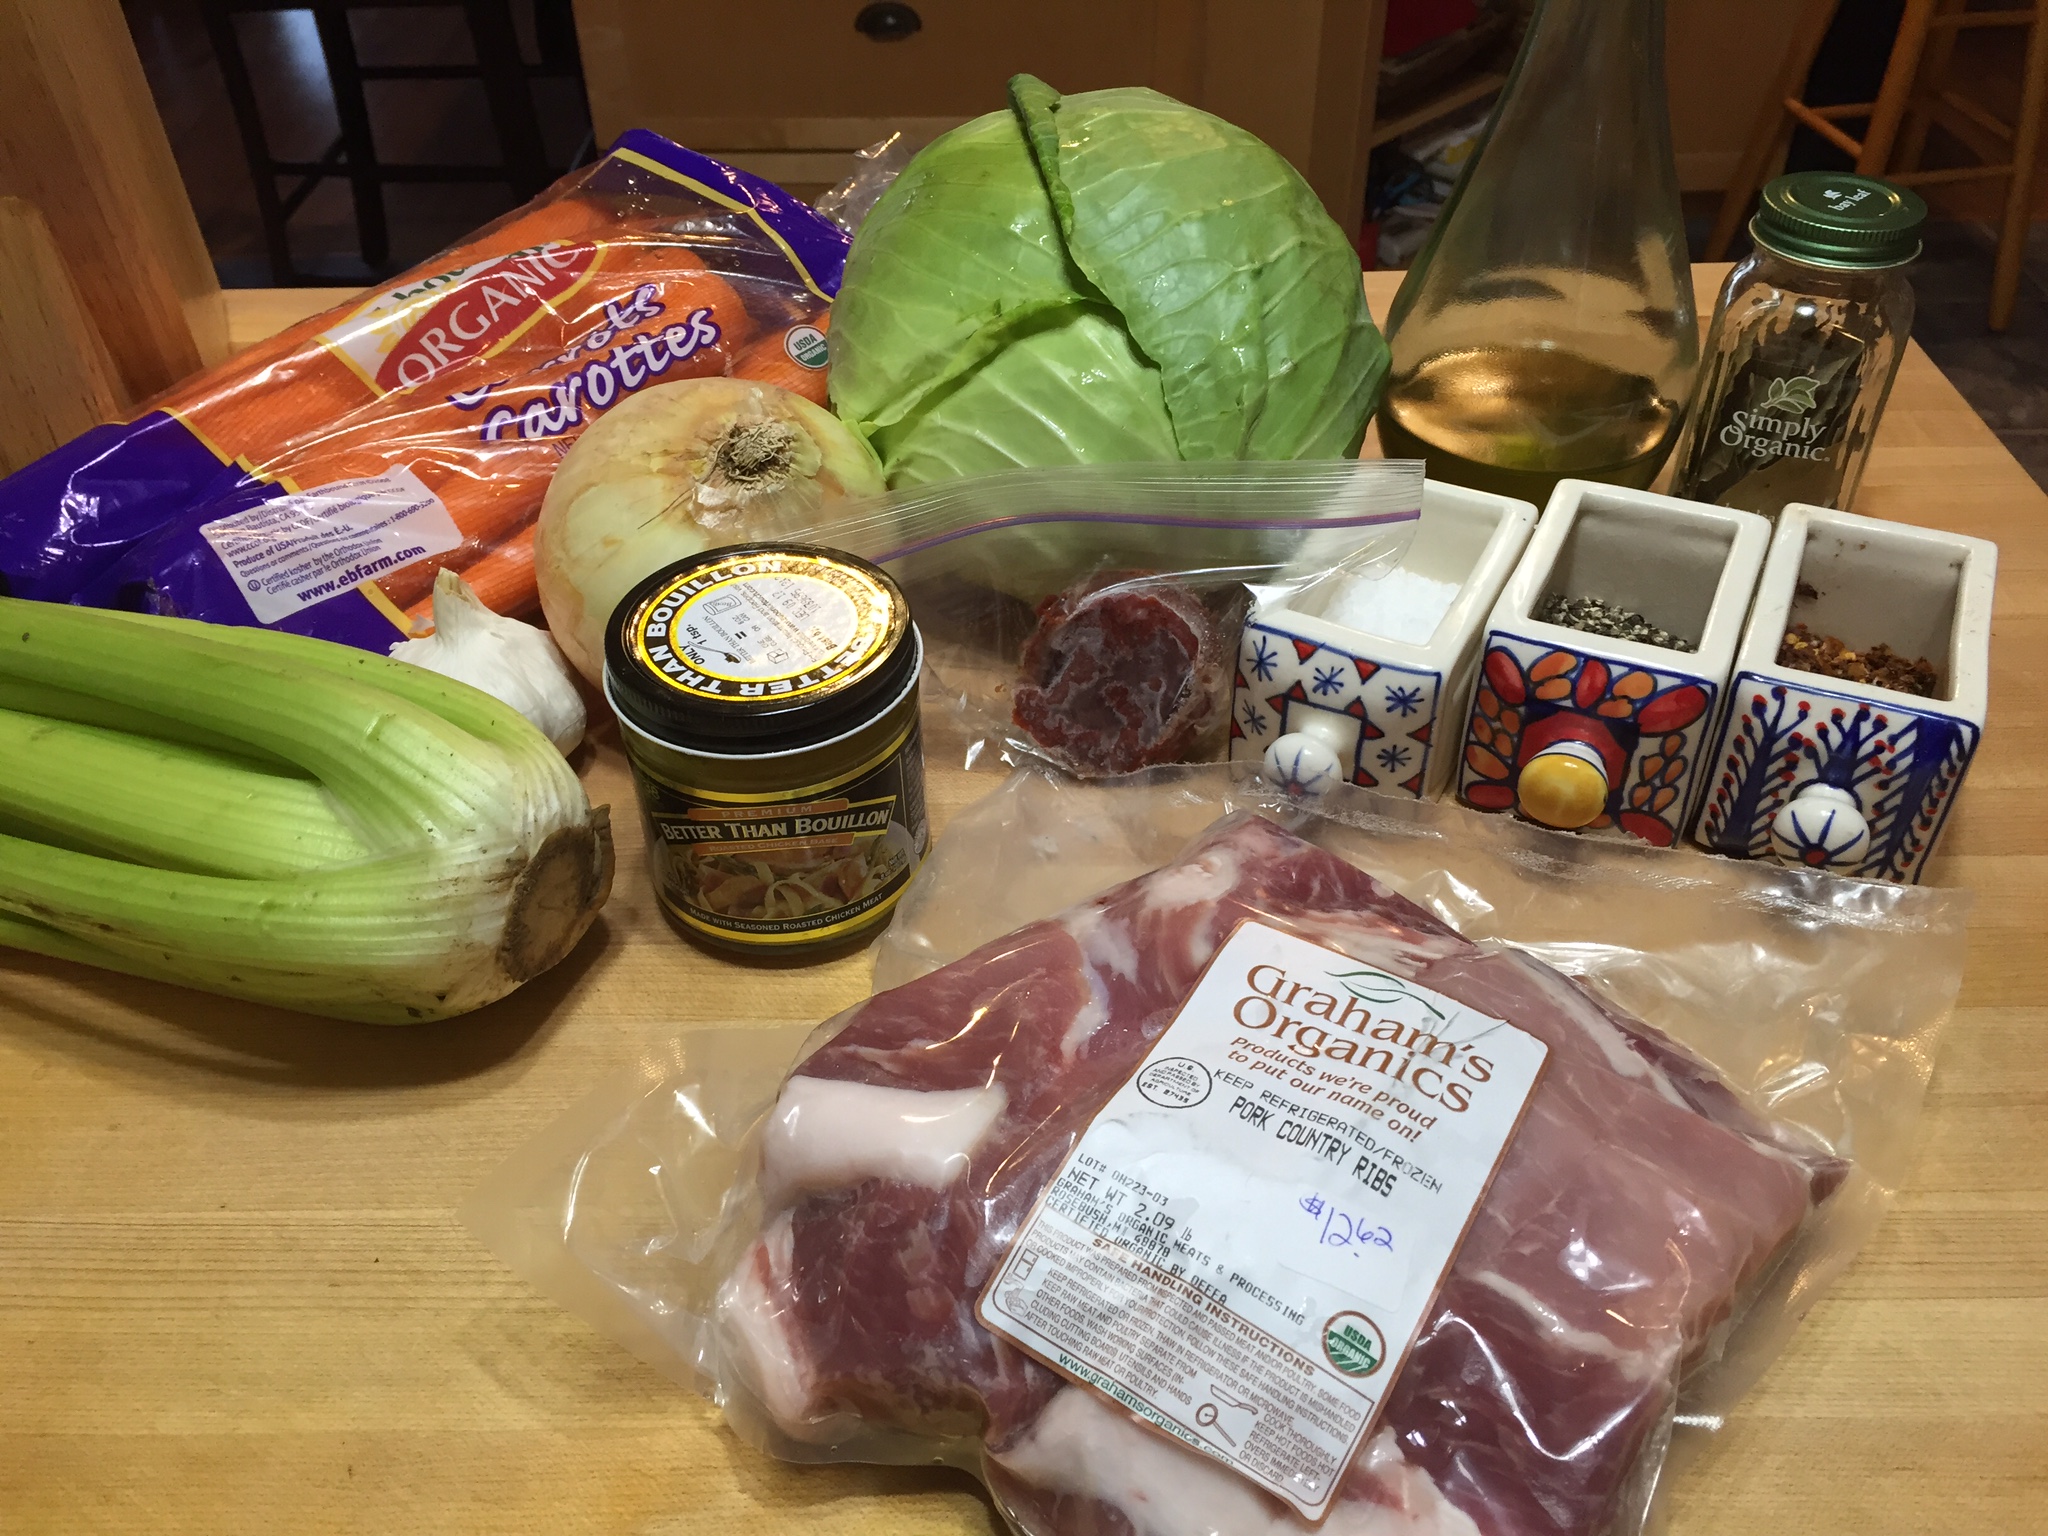
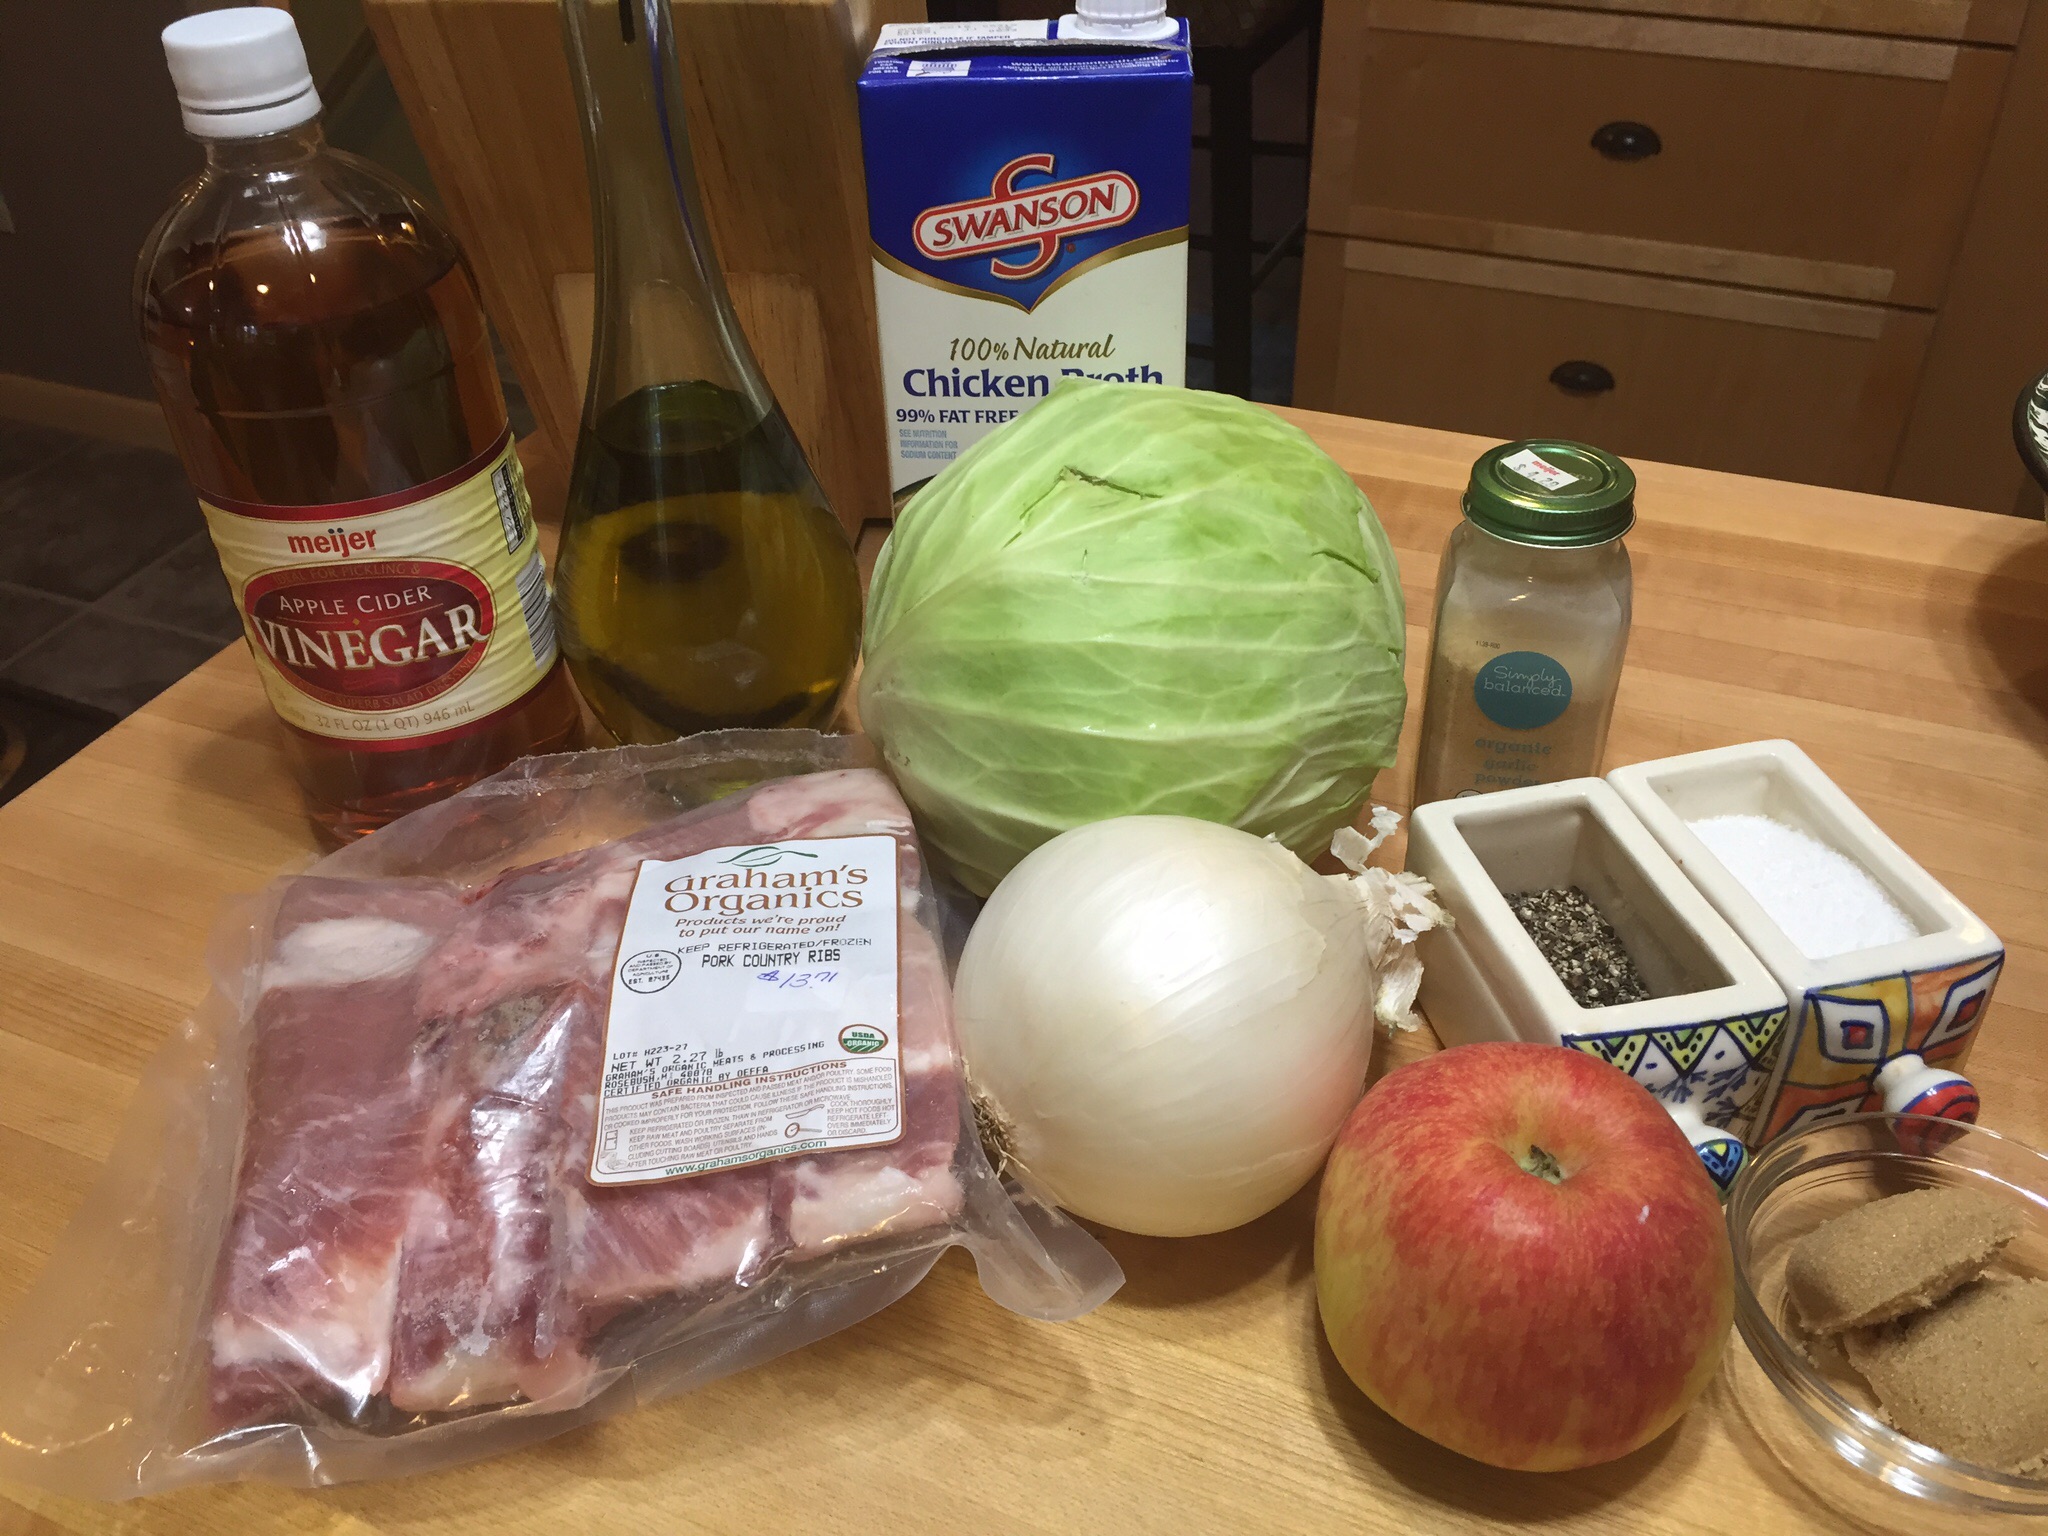
2# of country style ribs

2 T canola oil

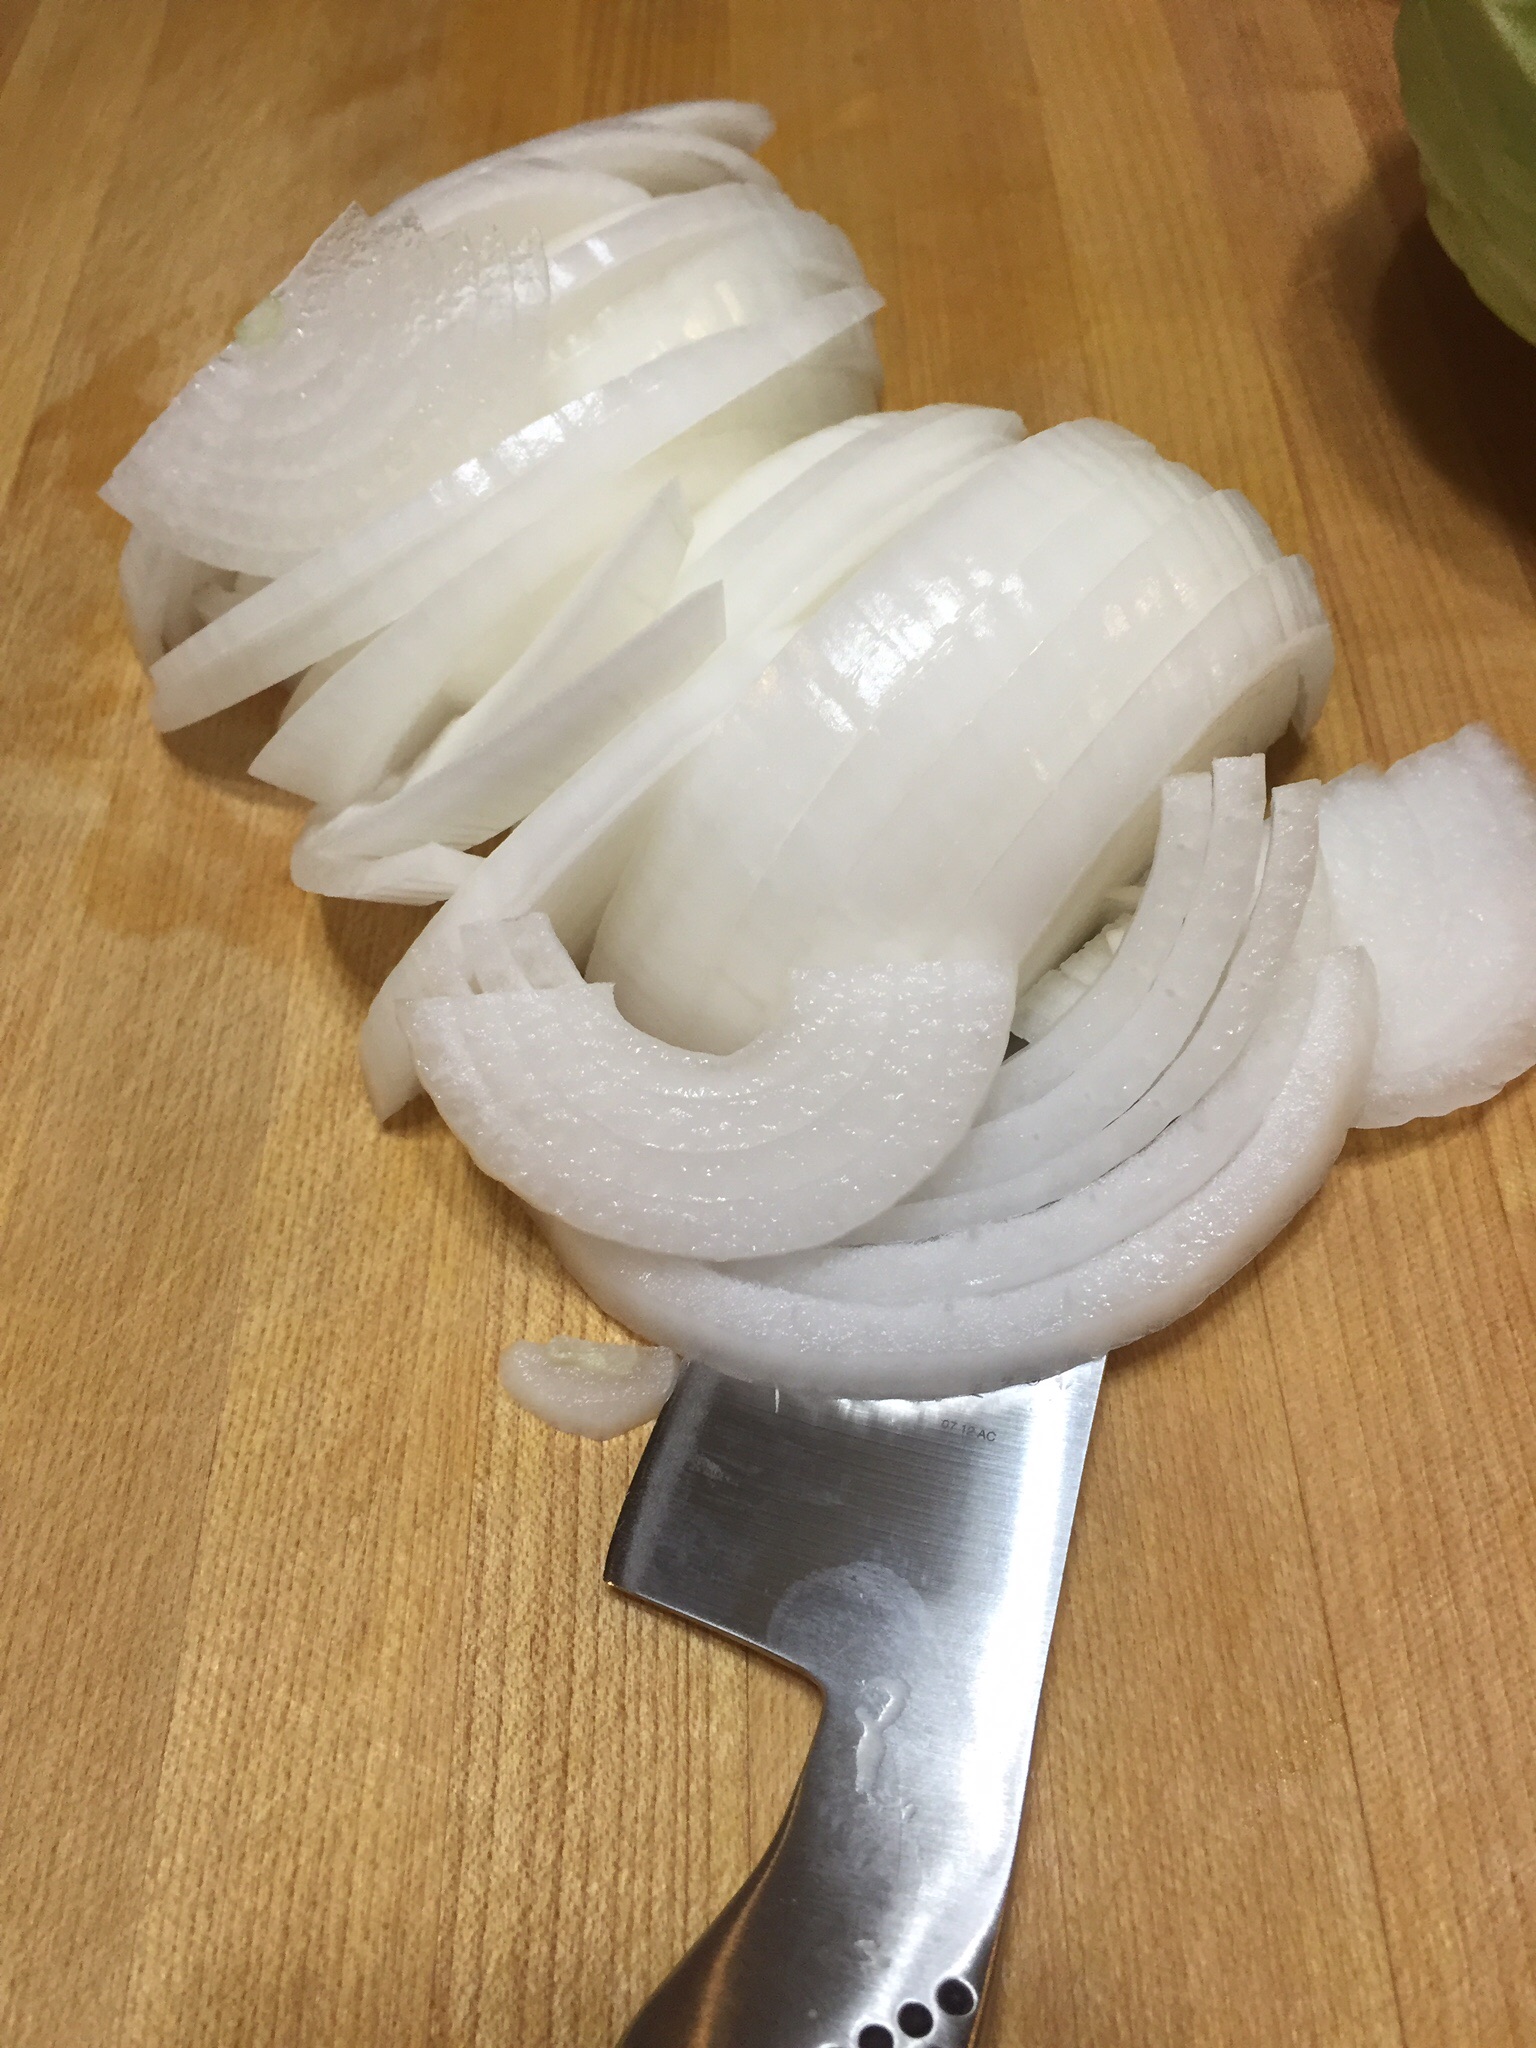
1 onion rough chopped

2 carrots sliced

2 stalks of celery rough chopped

1/2 head of green cabbage rough chopped

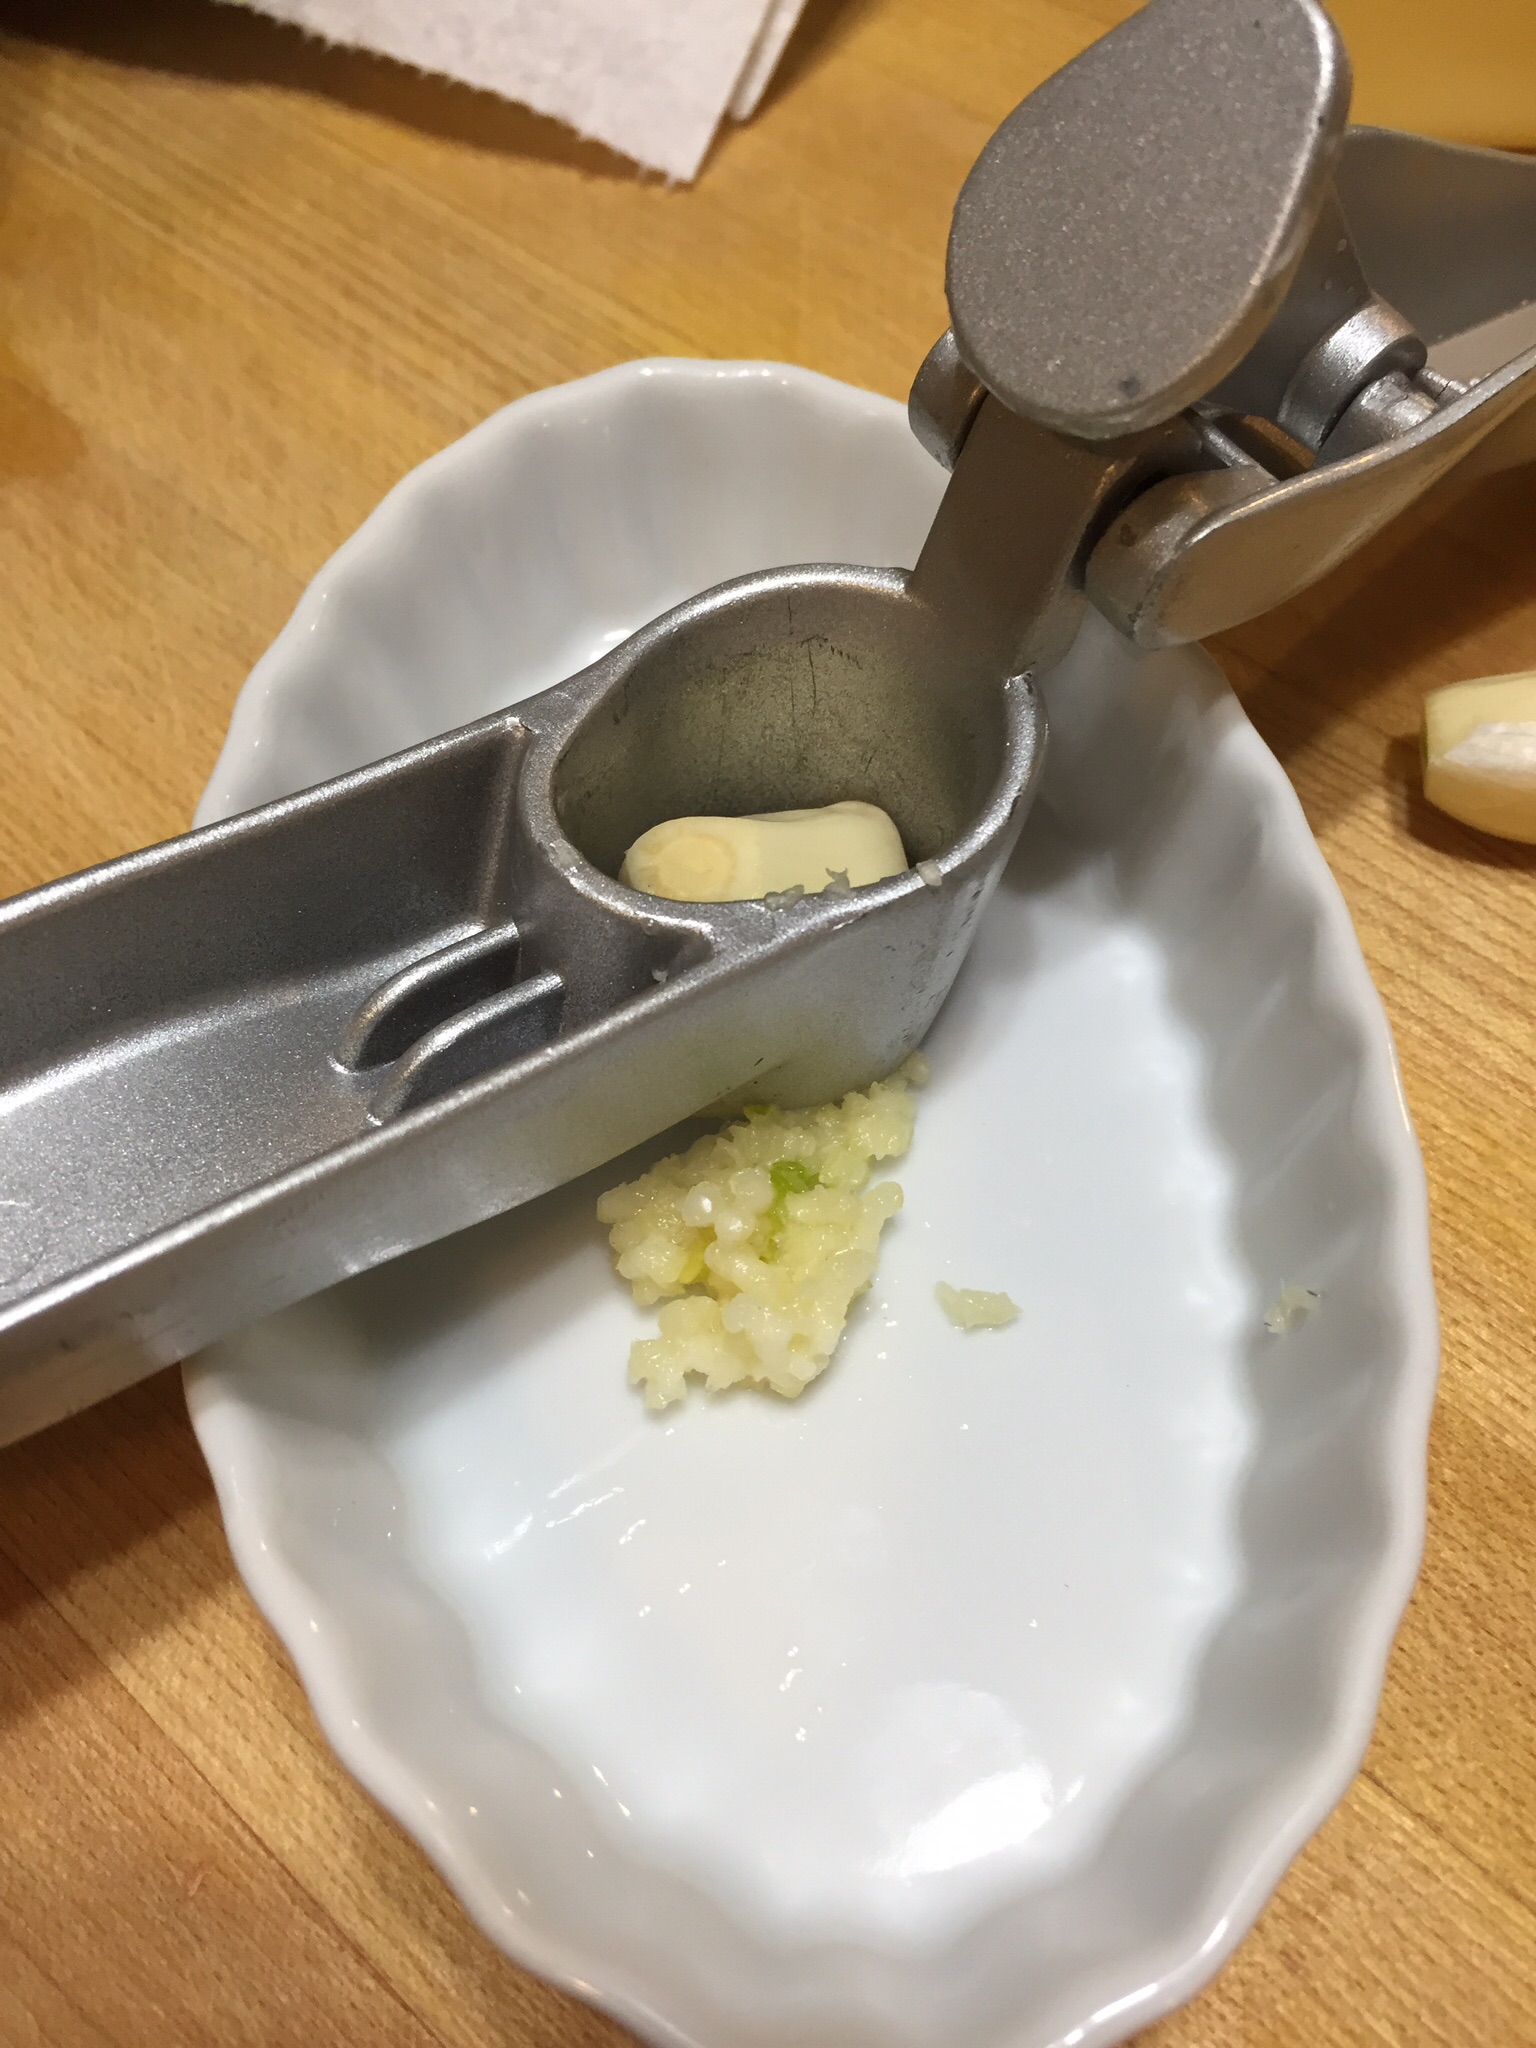
4-6 cloves of garlic sliced

2 T tomato paste

1/4 cup cider vinegar

1 tsp red pepper flakes

2 bay leaves

2 1/2 cups broth (vegetable or chicken)

salt and pepper

image

Preheat the oven to 325.

Heat oil in the Dutch oven over medium high heat.  Salt and pepper the ribs and brown them on all sides.  Remove them to a platter and set aside.

imageimage

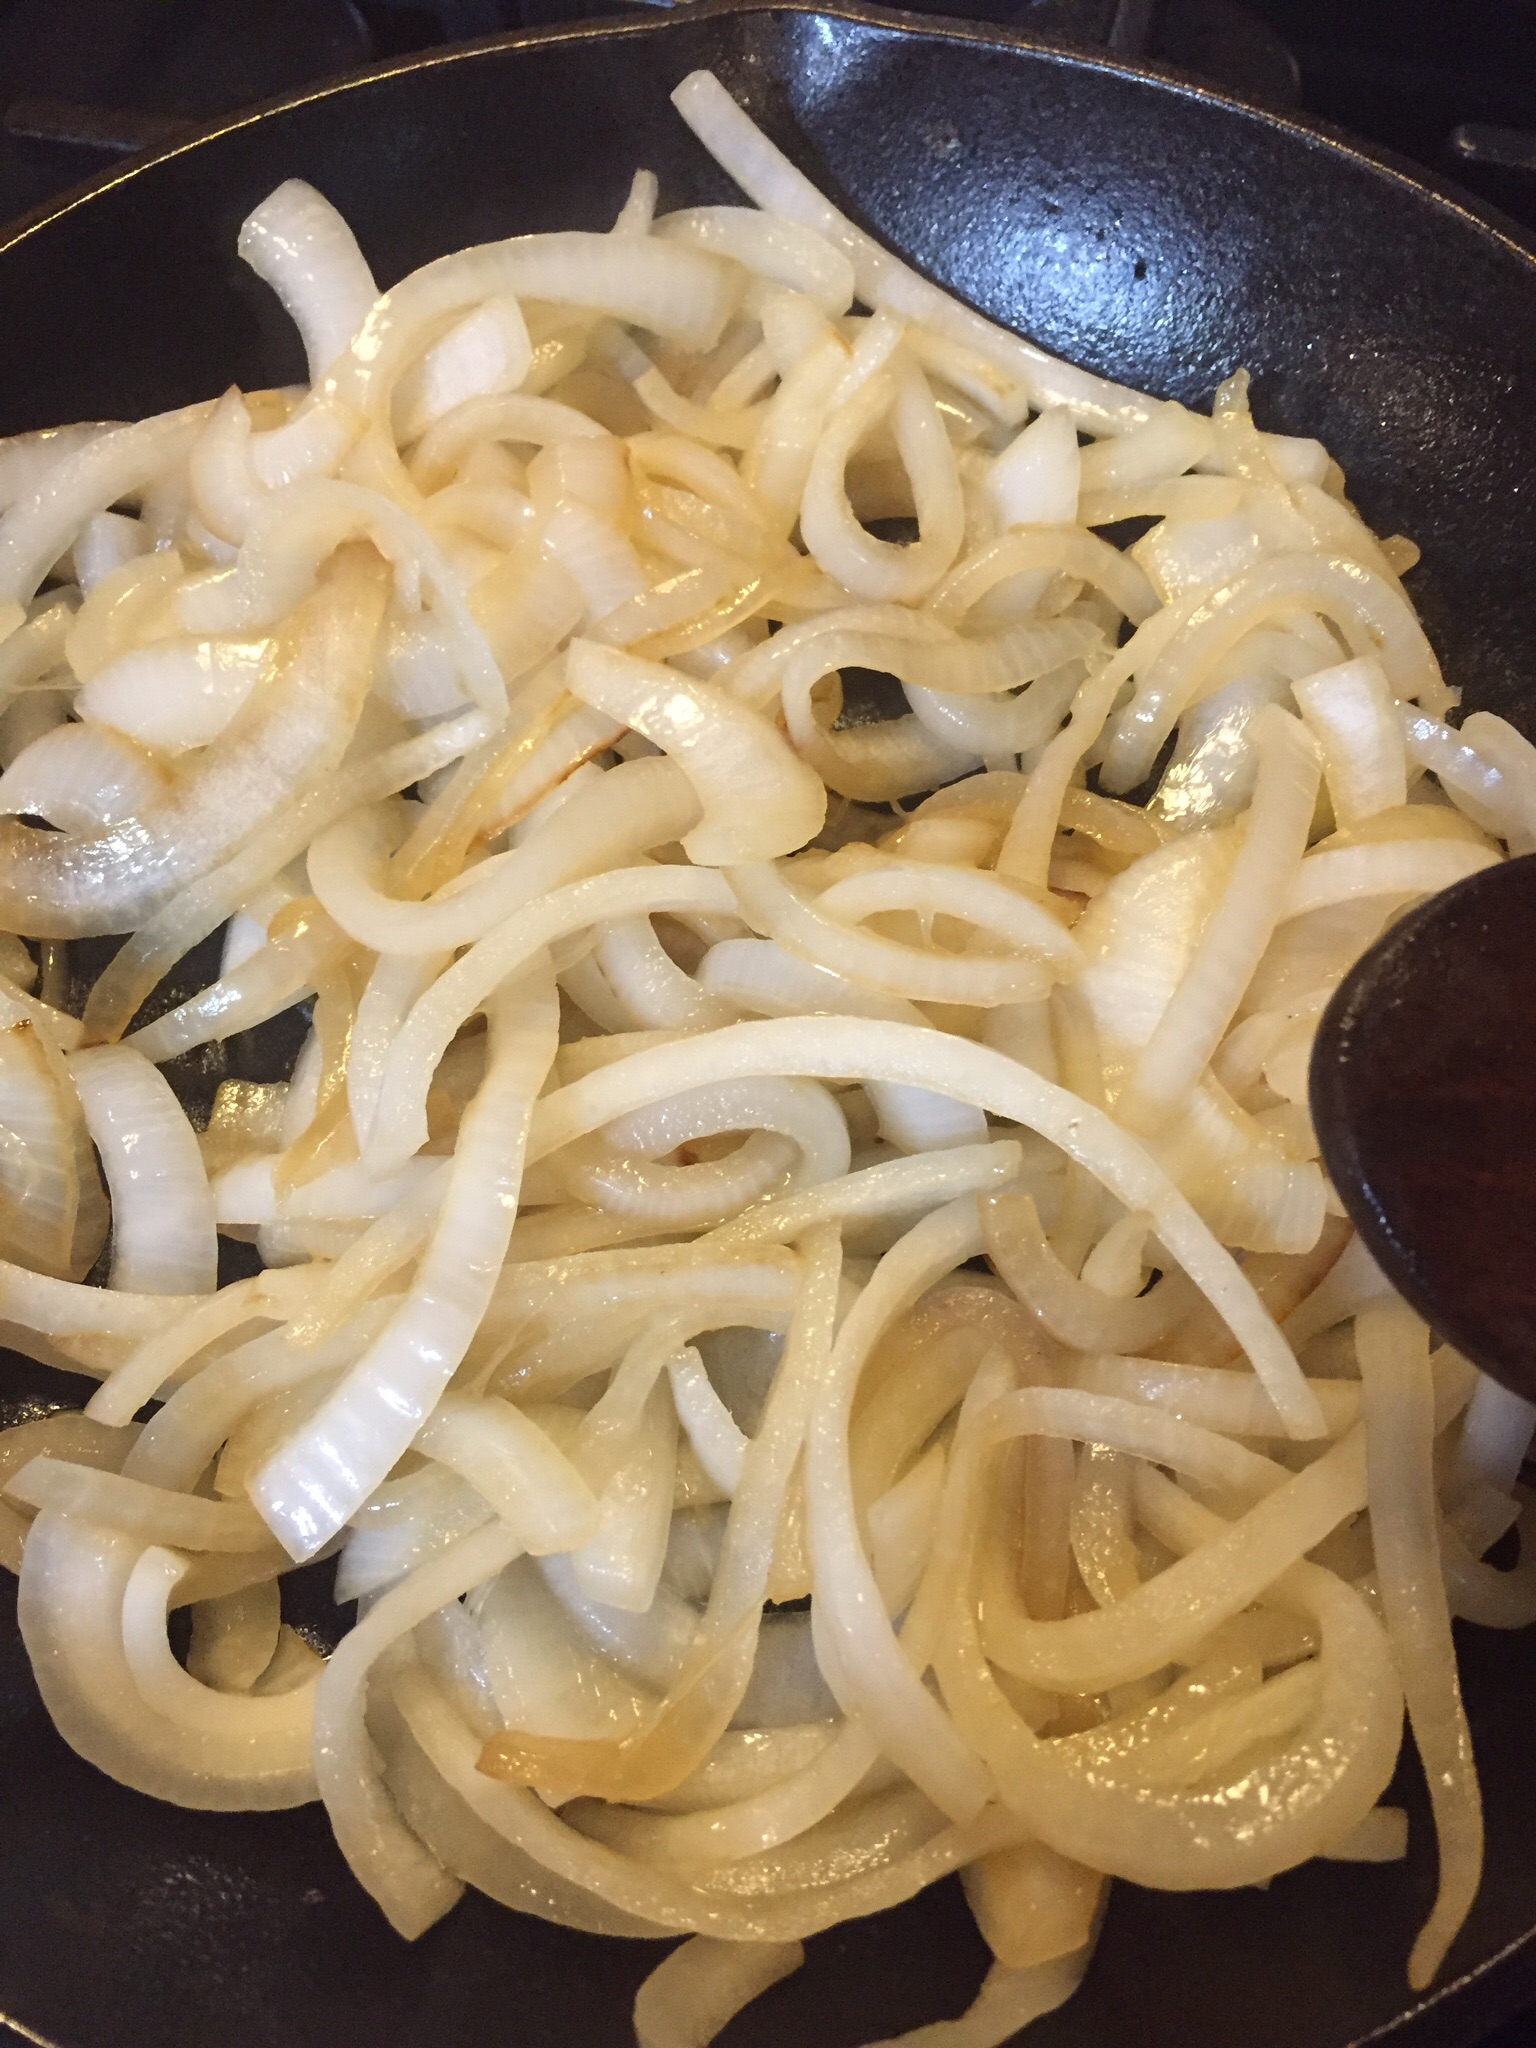
Add the onion, carrots, cabbage and celery to the pan drippings and cook, stirring occasionally, under tender.  About 5 minutes.

image image

Add the garlic and tomato paste.  Stir and cook until the garlic becomes fragrant, about 1 minute.  Deglaze with 1/4 cup cider vinegar.

imageimage

Stir in the broth, pepper flakes and bay leaves.  Return the ribs to the pot and bring to a simmer.  Cover and cook in the oven for 1 1/2 hours.

image

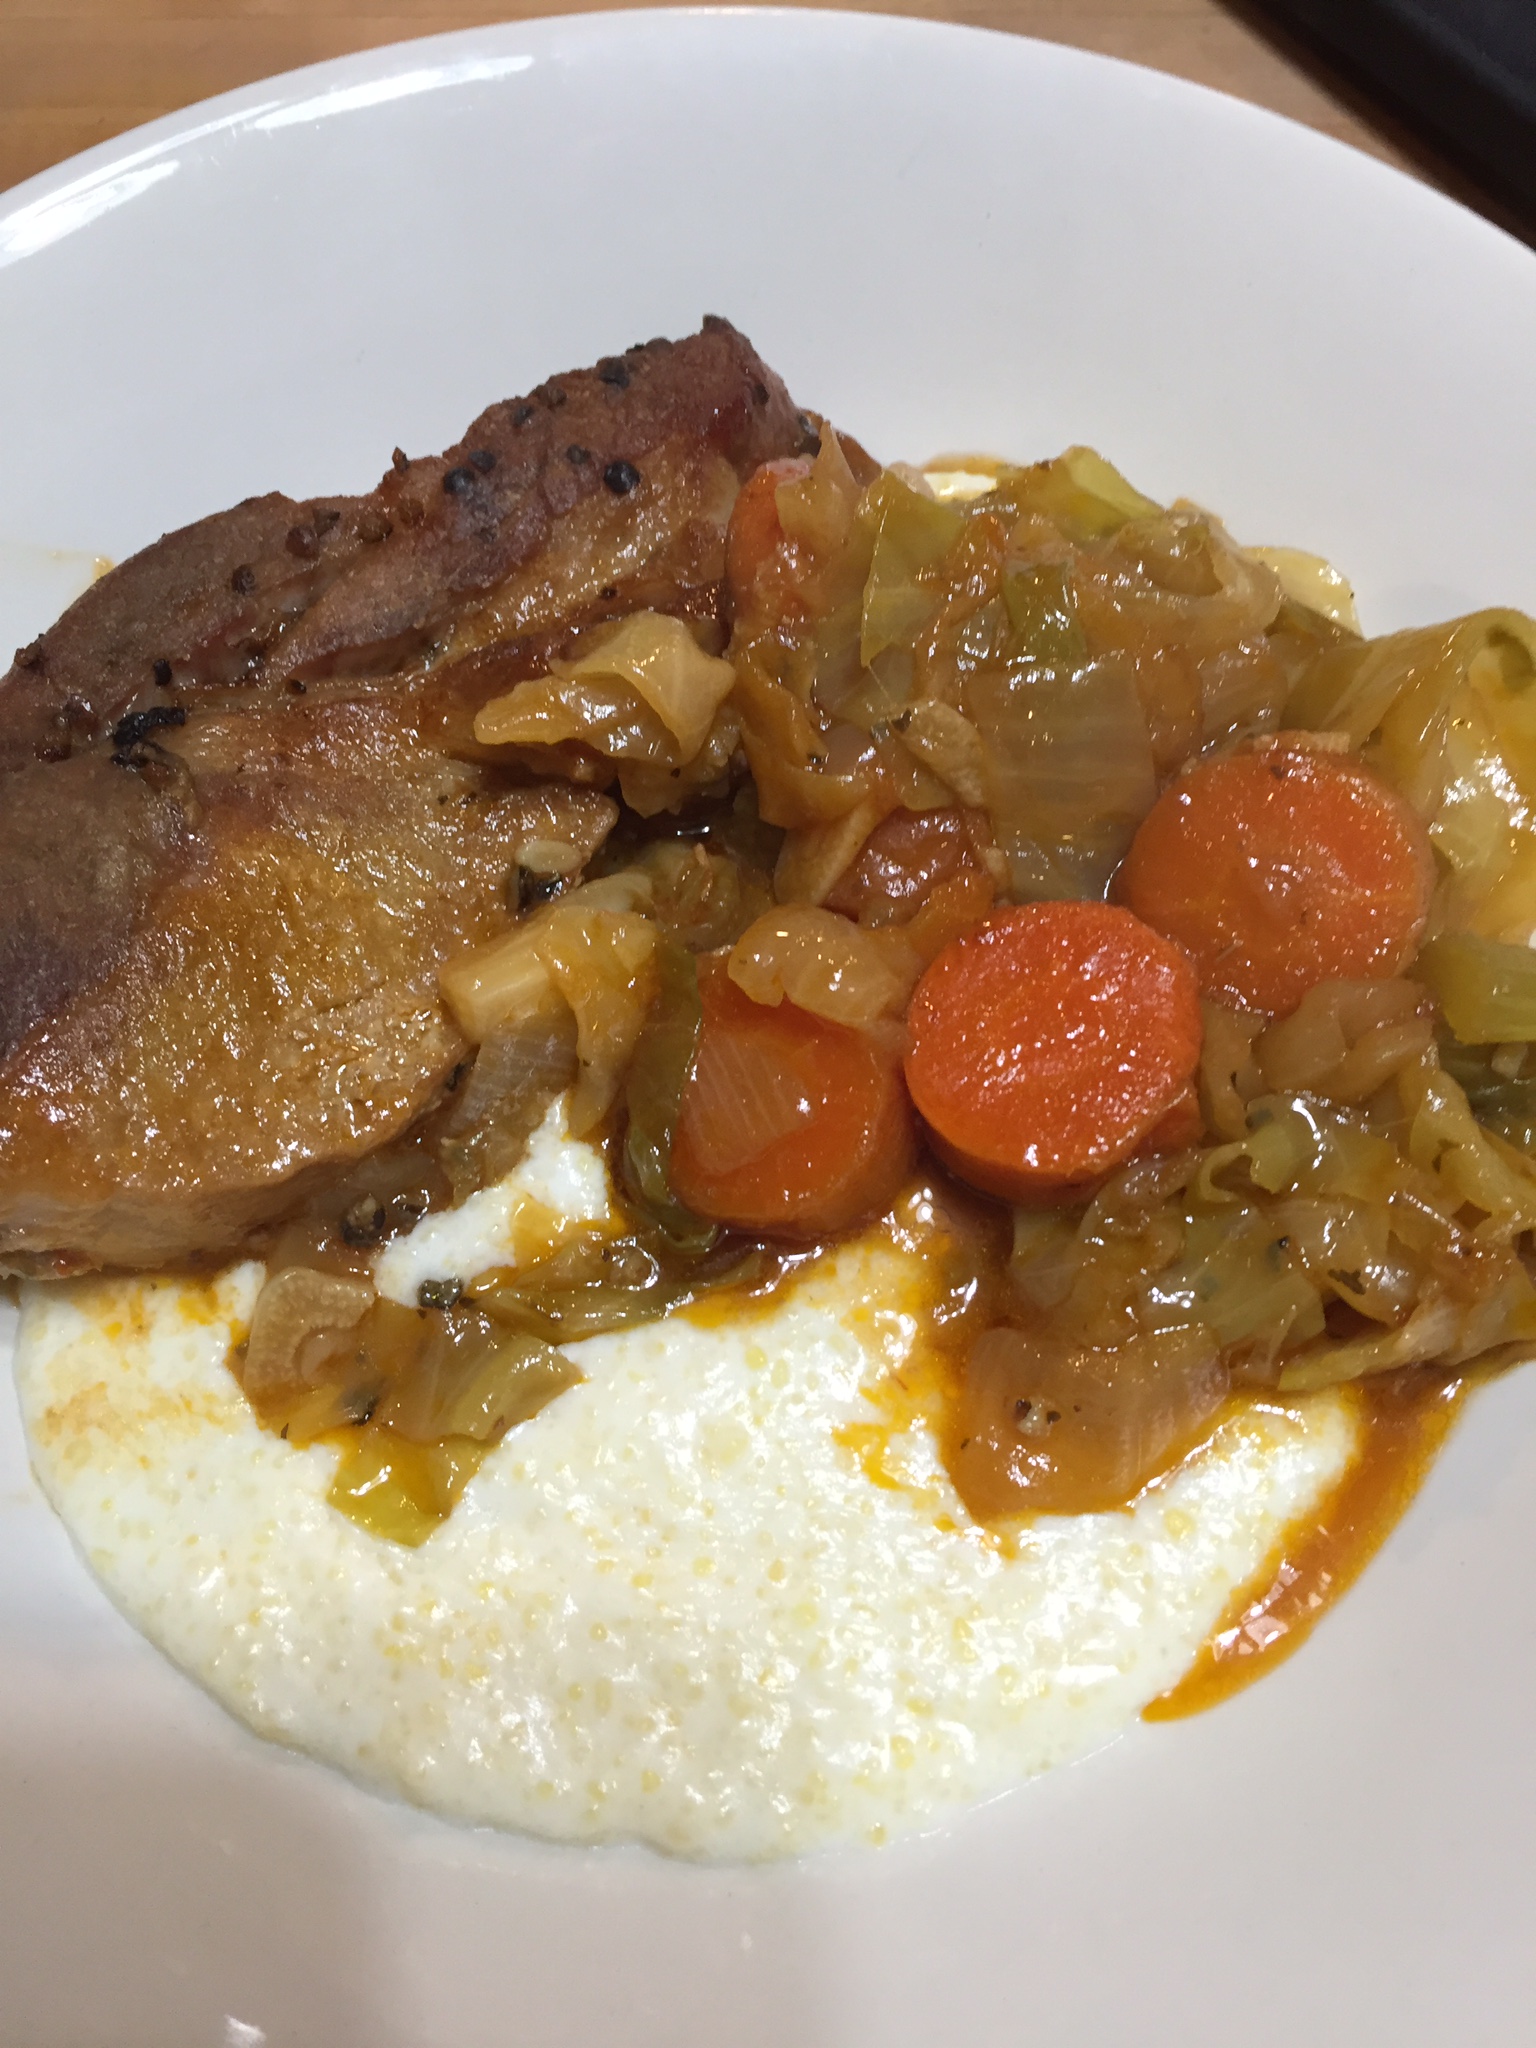
Remove the lid and cook for 30 more minutes allowing some of the liquid to evaporate and the meat to brown.  The meat is very tender and the broth flavorful.  When you plate this ladle some broth over the meat and vegetables.

I served this with a creamy polenta made with milk, half and half, butter, and asiago cheese.  How can that possibly be bad??

image

image image

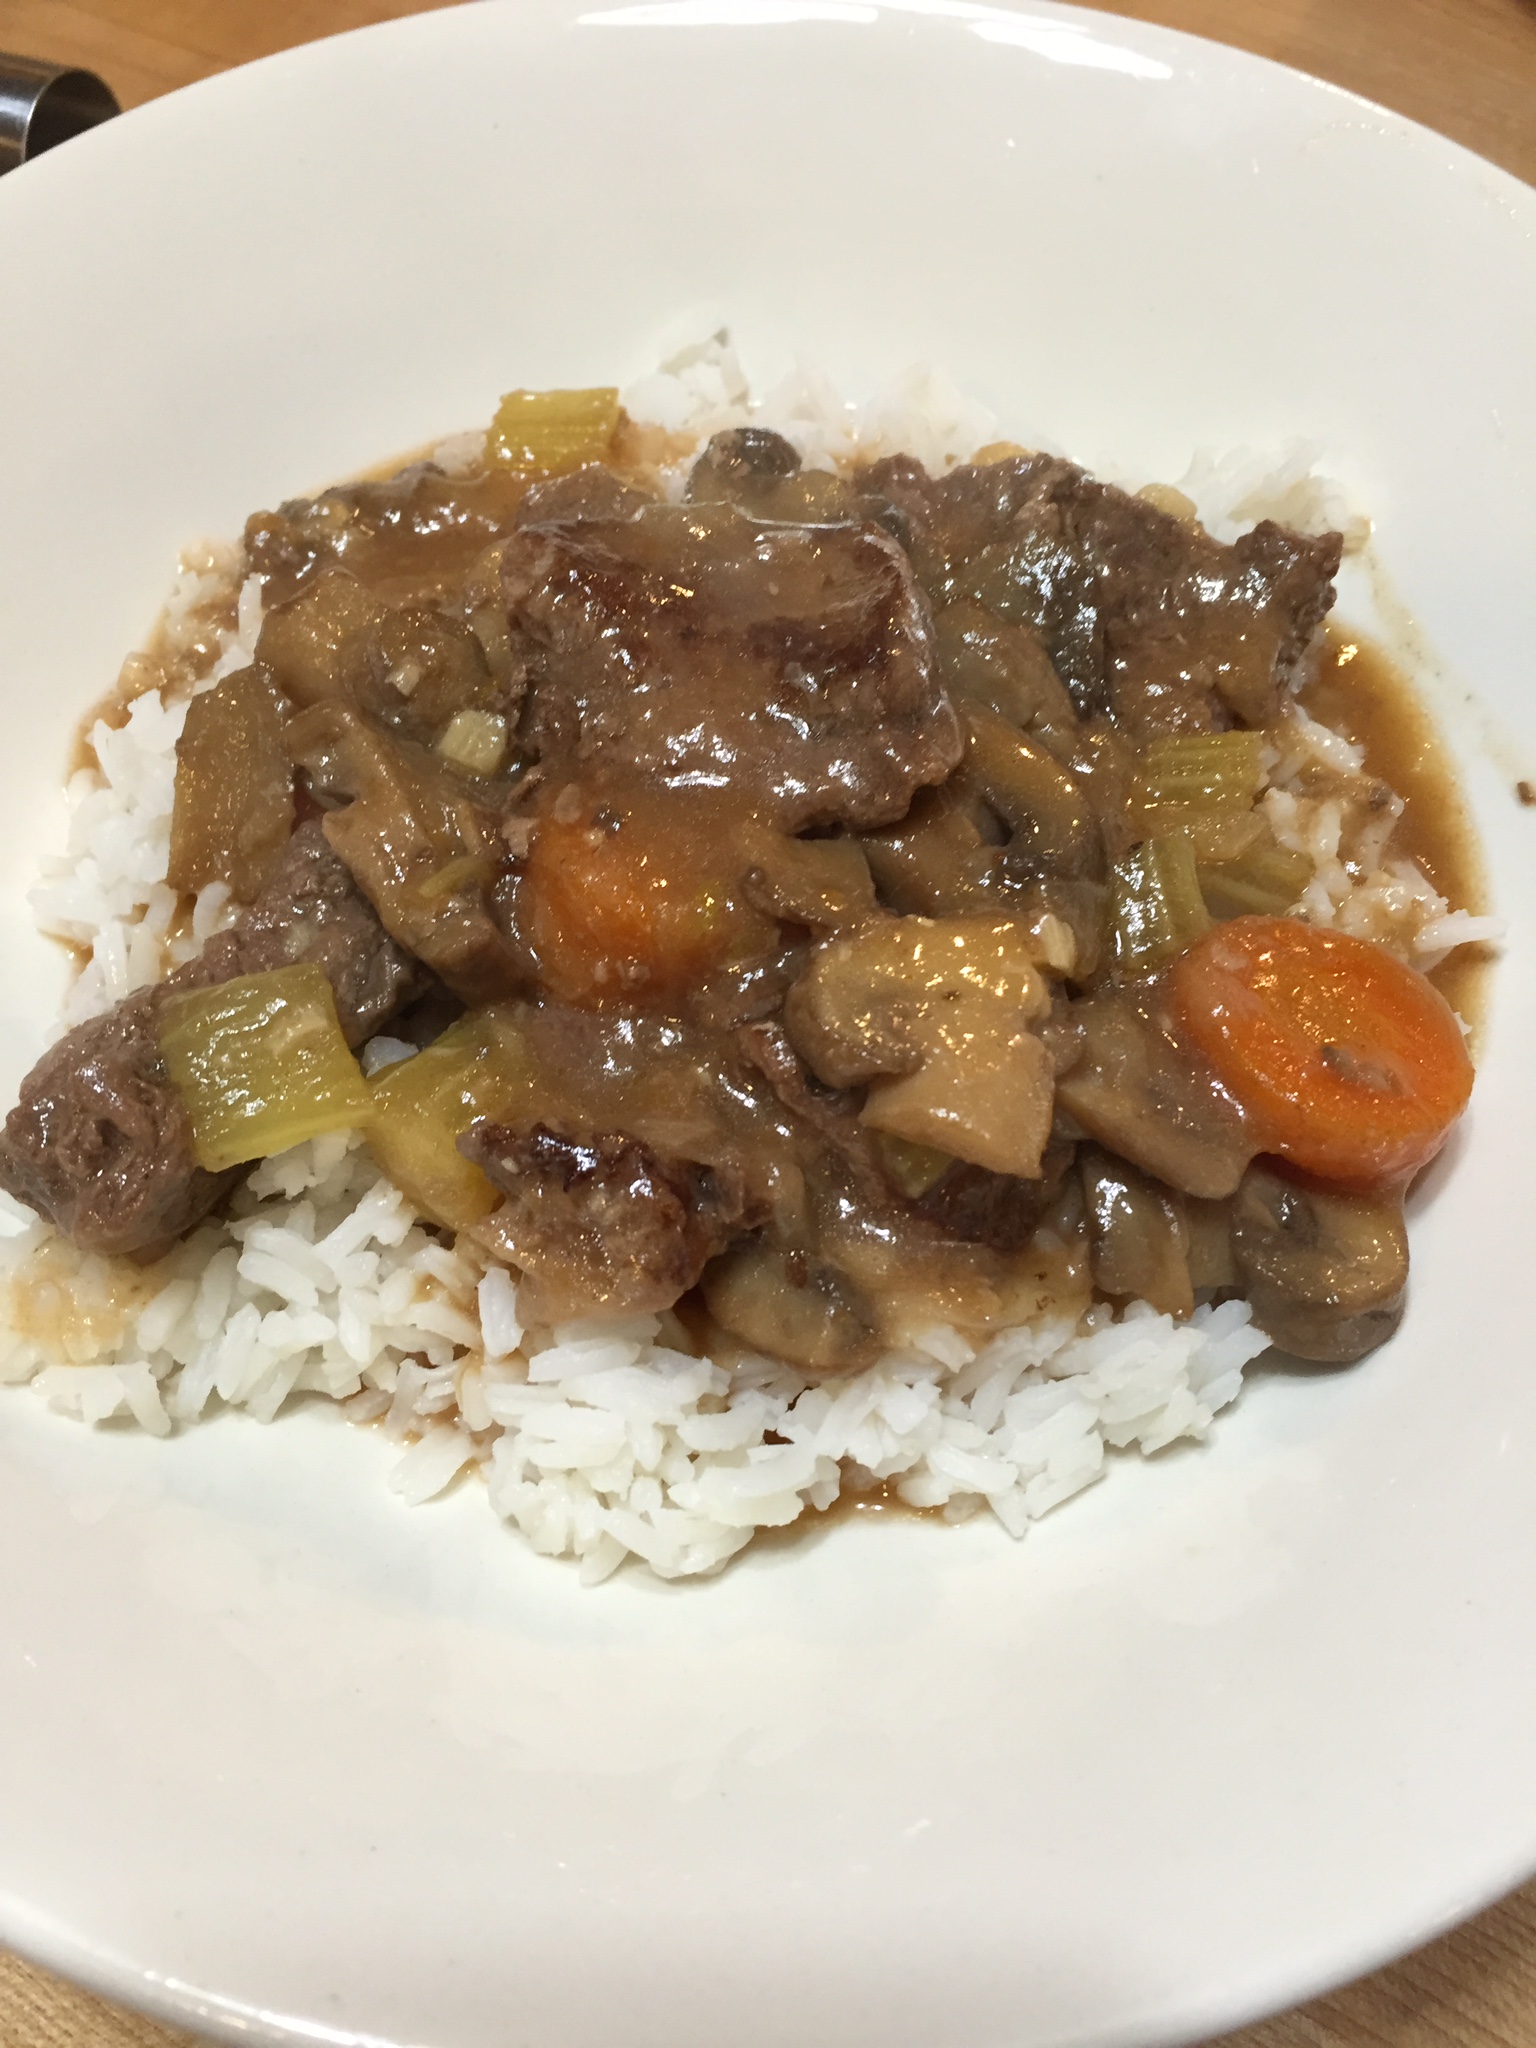
My family of origin would not have served this with polenta.  I’m confident most of my family would not even eat polenta.  If you prefer you could serve this with rice, noodles, or potatoes.  Or just serve it with a salad and some good, crusty bread.  I know my dad would choose potatoes.  I’m grateful that my husband eats almost anything I prepare without complaint.  It’s much more enjoyable trying new things when you have a receptive audience.


Beef Tips and Vegetables in Brown Gravy

image

This is a very simple recipe prepared in a pressure cooker.  A couple years ago an electric pressure cooker was at the top of my Christmas wish list.  For anyone who is a little afraid of using a pressure cooker and has visions of a pressure cooker lid imbedded in the kitchen ceiling, fear not.  They really are very simple and safe to operate.  It’s an appliance I wish I had had when I was still working full time and preparing meals when I got home from work.  Even as a retired person I am not a good advance meal planner.  Five o’clock rolls around and I start thinking about what I’m going to make.  The two primary functions of my microwave are reheating leftovers and defrosting frozen solid meat so I can make dinner.  While it’s not recommended, because of the amount of time necessary to build to full pressure, with a pressure cooker you could actually start with a piece of frozen meat and have a great dinner on the table in less than an hour.  You can brown meat, sauté, simmer and keep your food warm all in one pot.  The pressure cooker makes even inexpensive cuts of meat tender and seems to intensify favors in a very positive way.  Be careful with salt.

I’m hoping that this recipe motivates my good friend who has a spanking new electric pressure cooker (probably still in its original box) to get it out and give it a try.

Ingredients:

1 1/2 to 2 pounds of sirloin steak

2 T olive oil

1 large onion rough chopped

2 carrots sliced

2 stalks of celery rough chopped

1 cup baby bellas

3-4 cloves of garlic sliced

2 cups of beef broth (I use better than bouillon)

1/4 cup brandy

1 T Dijon mustard

1 T tomato paste

salt and pepper to taste

2 T room temperature butter

2 T AP flour

1/4 cup fresh parsley chopped

2 green onions sliced

image

Heat the oil in the pressure cooker over medium high heat.  Cube the beef and sprinkle with salt and pepper.  Add the meat to the pressure cooker in batches and brown.  Don’t crowd the meat or it won’t brown properly.  Remove to a plate and continue until all the meat has been browned.

image image

Add the onion, mushrooms, carrots and celery to the pot.  Cook for 2-3 minutes until tender.

image image

Add the sliced garlic and brandy.  Cook until the brandy comes to a boil.  Add the mustard and tomato paste to the broth.  Return the meat to the pot and pour in the broth.  Lock the lid in place and cook at high pressure for 15 minutes.

Release the pressure naturally.  Remove the lid, always tilting the lid away from you to allow for any steam to escape.  Bring the sauce to a boil.  In a small bowl whisk together the butter and flour to form a paste and stir it into the sauce.

image image

Bring back to a boil.  Simmer for 2 minutes.  Serve over rice or noodles.  Garnish with the parsley and green onions.

imageimage

Enjoy!

NOTE:  I keep a few staples in my freezer that make spur of the moment food prep easier.  Recipes always call for one or two tablespoons of tomato paste.  You can buy tomato paste in tubes but it is more economical to buy the small cans.  Open one end of the can and put it in the freezer for awhile.  Once it’s frozen open the other end of the can and use the lid to push the tomato paste out.  Slice and put each slice into a snack bag.  Store in your freezer.

image image


Vegetable and Bleu Cheese Tart

image

A few Christmases ago my daughter gave me a Nordic Bakery Cookbook by Miisa Mink.  It has some excellent recipes for  pastries and for savory dishes.  We all get tired of making the same meals over and over so tonight I got the book out and decided to make the Vegetable tart.  Just yesterday I bought some excellent buttermilk Bleu cheese at a local market that sells cheeses, meats, great olives, wine and craft beers.  The cheese was perfect for this dish.  Simple ingredients.  Nothing exotic.

Ingredients for the crust:

13 T butter at room temperature

3 1/2 T sour cream or crime fraiche

1 cup AP flour

1 tsp baking powder

pinch of salt

image

Cream the butter and the sour cream or creme fraiche together in a mixing bowl.

image image

Mix dry ingredients in a separate bowl.  Stir into the creamed mixture until a dough forms.  Form dough into a ball, flatten into a disc, and wrap in plastic wrap.  Store in the refrigerator for at least 2 hours or overnight.

image image

Roll out the dough on a lightly floured surface.

image image

Transfer the pastry to a tart pan pressing it into the fluted edges of the pan and neatly cut off the excess pastry.  (I love my tart pan and I rarely use it.  You don’t see how pretty it is until it’s empty.)

image image

Tart Ingredients:

1 1/2 cups broccoli florets

1 1/2 cups cauliflower florets

1 T vegetable oil

1 onion rough diced

1 cup cherry tomatoes halved

2 1/2 oz. Danish Bleu cheese (I used buttermilk Bleu)

3/4 cup grated Cheddar

fresh ground black pepper

image

The Bleu cheese is the star!

Preheat oven to 400.

Cut the florets into chunks.  Boil until they are tender crisp.  Drain well and allow to cool.

image image

Heat the oil in a heavy skillet over medium heat.  Fry the onion until it is soft and golden.  Set aside to cool slightly.

image image

Once the onion has cooled tip the pan over the pastry and spread the onion evenly.  Top with the broccoli, cauliflower and tomatoes.

image image

Sprinkle the cheeses evenly over the top and sprinkle with cracked black pepper.

image

Bake for 25 minutes or until golden brown.

image

It’s beautiful!  And it tastes great!  Serve with a green salad and you have a perfect dinner.

NOTE:  You can substitute other vegetables taking care that they don’t become too watery when cooked.  Served as an appetizer the recipe serves 6; as an entree it serves 4.


Poached Cod with Tomato and White Beans

image

I haven’t been blogging for a few days but I have been cooking.  A couple of nights ago I made poached cod.  We love fish and tomato dishes and this fits the bill for both.  Cod is a mild fish available in most grocery stores.  In the fish counter or the freezer.  Either will work fine for this dish.  Unless I have fish that was just caught, cleaned and ready for cooking I soak my fish in milk for at least 30 minutes.

image

I am convinced that this takes away the fishy smell that turns some people off to eating fish.  Making sure you don’t over cook your fish also keeps the fish odors to a minimum.  I know people who absolutely refuse to cook fish at home because of the smell.  When I make this dish people walking into my house are more likely to say they smell onion and garlic.  Everyone loves the smell of onion and garlic!

Ingredients:

1 cod filet (approximately one pound)

2 T olive oil

1 medium yellow onion diced

3 or 4 cloves of garlic sliced

1 pint diced tomatoes

1 cup chicken broth

1 can tomato sauce

1/4 cup capers drained

1/4 cup kalamata olives sliced

1 can cannelloni beans

salt and pepper to taste

image

Heat the oil in a skillet over medium high heat.  Cook the onions until they are tender but not browned.  Add the garlic and cook for an additional minute until the garlic is fragrant.

image image

Reduce the heat and stir in the tomatoes and the chicken broth.  Add the tomato sauce and simmer uncovered for 10 minutes.

image image

Stir in the capers and olives.  Drain and rinse the beans and add those.  Simmer for another 10 minutes.

image image image

Pat the fish that you’ve soaked in milk dry. Cut it into serving size pieces and immerse the fish in the tomato broth.  Cover the pan and allow it to simmer for 5-10 minutes until the fish is cooked through and flakes.  Remove from the heat.  Serve the fish, along with the broth and beans, over rice.

image

One of my favorite fish dishes.

NOTE:  You could also add the cooked rice to the tomato broth, break up the fish pieces and serve this as a soup.  However you choose to serve it I think you will find it homey and very satisfying.

If you like kicked up favors you could add some red pepper flakes and/or cayenne pepper when you add the olives and capers.

Sweet and Sour Sesame Chicken

image

I called this sweet and sour chicken.  My husband called it sesame chicken.  So there you go.  The chicken is coated in corn starch, dipped in egg and quick fried.  By quick fried I mean crisped up but not cooked through.  Top the chicken with the sauce and finish the dish in the oven.  Very simple.  I usually like stir fries and typically I make them without meat.  But this is my attempt to replicate a dish my husband frequently chooses when we go out for Chinese.  Which is not very often.  Largely because where we live we cannot readily access any ethnic restaurants.  Actually we cannot readily access ANY restaurants.  And also because when I make it at home I know that we are getting healthy, quality ingredients.  I’m not sure what this would be called on the Chinese restaurant menu.  But on our menu it is now sweet and sour sesame chicken.  When I make this next I will double the sauce recipe.  I would put half on the chicken and reduce the second half and serve it on the side.

Ingredients:

Boneless, skinless chicken breast cubed

(I used approximately 1 1/2#s)

1/2 cup corn starch

2 eggs whisked

1 cup peanut or canola oil

1/2 cup rice wine vinegar

1/2 cup pineapple juice

4 T ketchup (I use only Brooks Tangy)

2 T soy sauce

1/2 cup granulated sugar

2 cloves garlic grated

1 inch fresh ginger grated

sesame seeds, green onions, and toasted sesame oil for garnish

image

Combine the vinegar, ketchup, juice, soy sauce, sugar, garlic and ginger and whisk together.

image image

Set the sauce aside while you prepare your chicken.  Preheat the oven to 325.  Heat the oil in a heavy fry pan or Dutch oven.

Cube the chicken.  Put the cornstarch into a zip lock bag, add the chicken and toss to coat.

image image

Whisk the eggs and dip the cornstarch coated chicken into the egg and then drop in the oil for quick fry.

image image

Turn the chicken pieces once and then remove to a platter covered with paper towel to absorb any oil.  Transfer the chicken to an oven safe casserole dish and pour the sauce over the chicken.

image image

Bake for one hour turning the chicken pieces after 30 minutes.  Remove from the oven and garnish with sesame seeds, sesame oil and green onions.

image image

Serve over rice with broccoli or vegetable of your choice.

NOTE:  The chicken was tender and tasty but, as I noted above, it needed more sauce.  A reduction served on the side would have been a good addition.  We also had soy sauce at the table.  I think the sauce recipe would also work well for a stir fry with or without meat.


Ravioli with Tomato and Garlic Gravy

image

Today was ravioli day.  Making homemade pasta is fun and rewarding and homemade tastes so much better.  Years ago I was a guest in the home of a first generation Italian family in Toronto.  Not being Italian I was unfamiliar with the number of courses that constituted a typical Italian meal.  We all sat around a table in a small dining room where the table and the fabric upholstered seats were all covered in heavy plastic.  The first course consisted of antipasto, a beautiful salad and lots of crusty bread.  The leftovers were cleared from the table and the homemade pasta arrived.  Spaghetti with a meat sauce.  And more bread.  It was wonderful.  I cleaned my plate and felt very satisfied and pretty full.  The table was cleared and in came the fried chicken, mashed potatoes, green beans and more bread.  It was all I could do to eat a few more bites and listened to everyone say, “What’s the matter?  You don’t like the chicken?”  Who knew the pasta was an appetizer.  But I’m a quick study.  I learned to take much smaller portions.  And to never wear a skirt when the chairs are covered in plastic.

Today our ravioli was the entree.

The first step is making the pasta dough.

Ingredients:

2 cups of AP flour

2 large eggs

image

I used a food processor.  Put the flour in and pulse it a few times. Whisk the eggs and slowly add them in with the processor running on low.

image image

The dough should come together in a ball.  If it looks like small pebbles add 1 tsp of water at a time.  If it is too wet and the dough is sticking to the sides add flour 1 T at a time.  Once the dough has come together in a ball remove it to a lightly floured work surface and knead it by hand until the dough is smooth, a couple minutes.  Cover the dough with plastic wrap and allow it to rest for at least 15 minutes.

image image

While the dough is resting prepare the filling.

Ingredients:

2 T olive oil

2-3 cloves of garlic minced

1/2 cup sweet onion in a fine dice

1 cup mushrooms diced

2 cups fresh spinach chopped

1/2 cup sun dried tomatoes diced

1 1/2 cups grated Asiago and Paramesan cheese

image

image image

In a heavy skillet heat the olive oil over medium high heat and sauté the garlic, onion and mushroom just until tender and fragrant.  Add the spinach and stir until wilted.  Remove from the heat.

image image

Stir in the diced sun dried tomatoes and the cheeses and your filling is ready to go.

image image

Divide the dough into six pieces.  Flatten into a disk and run through the pasta machine rollers.  Continue folding and running through the rollers until the dough is thin and shiny.  If, at any time, the dough is too sticky dust it lightly with flour.

image

Stretch the dough over the ravioli form.   Fill each indentation with about 1-2 tsp of filling.  Do not over fill.

image image

Put a second piece of dough over the filling and run a rolling pin over the top.  Invert and remove the ravioli.

image image

Cover the ravioli with a clean dish towel and prepare the sauce.

Ingredients:

2 T olive oil

7-8 cloves of garlic chopped

28 oz can crushed tomatoes

1 pint diced tomatoes

1/2 cup chopped sun dried tomatoes

salt to taste

fresh basil

image

In a Dutch oven heat the olive oil and sauté the garlic until fragrant and tender.  Don’t brown the garlic.  Stir in the diced tomatoes and sun dried tomatoes.

image image

Stir in crushed tomatoes and basil.  Reduce heat and simmer.

image

Bring a pot of salted water to a boil and cook the ravioli until tender.  Approximately 5 minutes.

image

Use a slotted spoon to remove the ravioli to a serving dish.  Ladle sauce over the pasta and serve with grated cheese.

image

Enjoy!

NOTE:  You can fill your ravioli with a meat or a cheese filling.  You are only limited by your imagination.  I made 48 ravioli and froze half of them.  I put them in the freezer on a pizza tray and, once frozen, dropped them in a freezer bag for another day.  You don’t really need a ravioli form but I do think you need a pasta maker to roll the dough out properly.  I had extra dough and made linguini with it.

image image


Matzo Balls with Chicken Soup

image

This post is more about the matzo balls and less about the soup.  I make a decent chicken soup.  I fill a heavy kettle with about 6 to 8 cups of water and add a whole chicken cut up, several carrots, stalks of celery and a large sweet onion.  And salt of course.  I bring the pot to a boil, skim the top occasionally, and simmer for a couple of hours.  I take the breast piece out after about 30 minutes and set that meat aside to add back to the soup before serving.

My mother-in-law made the most beautiful chicken soup.  Her broth was a perfect golden color and was so clear.  It was amazing.  I wish I had pictures of her chicken soup.  Maybe it was the Kosher chickens she used.  Maybe it was because she’d been cooking it up 70 plus years and practice makes perfect.  (She lived to nearly 102.)   I wish I had paid more attention.  I wish I had learned how to make her chicken soup.  I wish I had learned her matzo ball recipe as well.  They were light and airy and took on the flavor of the broth.

It’s all about the matzo ball.  When my sister-in-law calls me, a picture of a giant matzo ball from a Jewish deli in the Chicago area comes up on my phone.

Matzo is an unleavened bread, much like a cracker, traditionally eaten during the Jewish celebration of Passover.  Matzo meal is made by finely grinding the matzo bread into a breadcrumb consistency.  And matzo balls are made using matzo meal.

Ingredients:

1 1/4 cups matzo meal

2 tsp kosher salt

1/2 tsp garlic powder

1/2 tsp baking soda

1/2 tsp baking powder

5 large eggs, 3 separated

1/4 cup chicken broth or water

1/4 cup schmaltz melted

image

Separate three of the eggs and whisk together two whole eggs and three egg yolks.

image

image

Beat the egg whites until peaks form and set aside.  Whisk together all of the dry ingredients.  Add the egg yolk mixture, broth, and melted schmaltz to the dry ingredients and stir to combine.

image image

Stir in about 1/2 of the egg whites.  Gently fold in the remaining egg whites until the whites are no longer visible.

image image

Cover the bowl with plastic wrap and refrigerate for 30 minutes or more.  Scoop up about a tablespoon of the matzo and gently form into balls.  Do not overhandle.  If you find the matzo sticking to your fingers dip your fingers into a bowl of water with a little canola or olive oil.  This recipe makes 12-14 matzo balls.

image

Bring your broth to a boil and gently drop in the matzo balls,  Turn the heat down to a simmer, cover the pot and cook for 20-25 minutes.  Stir occasionally.

image image

Serve  with broth and enjoy!  It’s all about the  matzo ball.

image

NOTE:  Schmaltz is chicken fat.  My daughter brought some to use on our turkey when she came from Chicago for Thanksgiving.  There was leftover schmaltz so I used my cookie scoop, made schmaltz balls and froze them.  You can google schmaltz and make your own if you don’t have a deli nearby that carries it.  Or you can substitute canola oil in this recipe.

If your parent or grandparent or aunt or uncle makes a dish that you adore eating, pay attention.  Ask them to show you how to make it.  Write it down.  Make a video.  They will be so proud and happy that you asked.  And one day, when they are no longer with us, you will be able to replicate that favorite dish.

Stuffed Peppers

image

Stuffed peppers are a perfect winter supper.  A meal in themselves.  Just add a salad and some good crusty bread and serve.   If you look up recipes for stuffed peppers there are all sorts of ethnic variations.  A Spanish stuffed pepper with Manchego cheese, cod and a béchamel sauce. An Indian stuffed pepper with meat, potato, onion, turmeric and coriander.  A Mexican pepper stuffed with cheese, covered in an egg batter and deep fried.  A Finnish stuffed pepper with rice and lamb,  finished with some heavy cream.   The pepper itself is the vehicle and almost any combination of protein, carb, and seasoning can be stuffed inside.  Today I made my peppers with lots of tomato, rice and ground pork.

Ingredients:

5-6 red, yellow or orange peppers

1 pound ground pork (or pork sausage)

2 pints of tomatoes

1 cup beef or chicken broth

2 cups rice (cooked)

1 cup red onion diced

1 cup celery diced

tops of peppers diced

2 T olive oil

4-5 cloves of garlic minced

1/2 lemon juiced

1 T oregano

1/2 tsp cayenne pepper (or more to taste)

1 cup grated Parmesan or Asiago cheese

1/2  cup fresh parsley

image

Preheat your oven to 375.

Cut the tops off of the peppers and reserve to use in the filling.  Bring a pot of salted water to a boil and cook the peppers for 5-6 minutes until tender.  Drain on a clean kitchen towel and set aside.

image image


image

Dice the pepper caps, onion, and celery.  Heat 2 T of olive oil in a heavy skillet and sauté the vegetables over medium heat until tender.  Add the garlic and cook another minute.

image image

Set aside 1/2 of the vegetable mixture to use for the sauce.  Add the ground meat to the skillet and cook until the meat is no longer pink.  After the meat has cooked I put it in a strainer to drain off the fat and then return it to the skillet.

image image

Add one pint of tomatoes, 1/2 cup of broth, and oregano and cayenne to the meat mixture.  Add salt and pepper to taste.

image

Transfer the meat mixture to a large bowl.  (Or if you are into less dishes use the kettle you parboiled the peppers in.)  Add the 2 cups of rice, 1 cup of cheese, and parsley and stir to combine.  If you feel the mixture needs more moisture add a little more broth.  Set aside while you make the gravy.

image image

In the skillet combine the reserved vegetables, one pint of tomatoes, 1/2 cup of broth, lemon juice, and salt and pepper to taste.  Bring to a boil and simmer until the sauce is reduced and thickens.  Tranfer the sauce to a food processor or blender and purée.

image image image

Now it’s time to assemble the peppers.  Fill each pepper with the meat and rice mixture and stand up in a casserole dish.  Once you’ve filled the peppers pour the gravy over the top and bake for 45 minutes.

image

Serve with  extra grated cheese and some good bread.  Enjoy!

image image

NOTE:  Cooking is limited only by one’s imagination.  This recipe is a perfect example of an opportunity to substitute ingredients based on your family’s personal tastes.  Beef, lamb, turkey or pork.  Rice, quinoa, potato or orzo.  Parsley, basil, cilantro or mint.


Country Style Pork Ribs and Cabbage

image

I think this is kind of a comfort dish.  Something your mom or grandma would have fixed for supper.  My grandmother (Mummu) used to make a boiled dinner which was very similar in taste except she would add potatoes and carrots.  There is definitely  nothing gourmet or exotic about boiled dinner but it’s a hearty meal.   I generally make country ribs with some kind of barbeque sauce and I might serve them with some boiled, buttered cabbage and red skin potatoes.  But I decided to use my slow cooker aka crockpot and let this go all day.  A slow cooker going always makes the house smell good to me, especially when I have sauerkraut or cabbage cooking.

Ingredients:

2 pounds or so of pork country ribs

1 medium head green cabbage

1 large white onion

1 or 2 tart, firm apples (I used honey crisp but granny smith is best)

1/2 cup cider vinegar

2 T brown sugar

1 cup chicken broth

olive oil for sautéing onions and searing ribs

garlic powder

salt and coarse black pepper

image

Core and slice  the cabbage and slice the onion.

image image

Peel, core and slice your apple(s).

image

Heat some olive oil, about a tablespoon, in a heavy skillet and saute the onions until they are tender and golden.

image image

While the onions are cooking put the cabbage and apple in the slow cooker.

image

Generously season both sides of the ribs with salt, pepper and garlic powder.  Add the onion to the slow cooker and sear both sides of the seasoned ribs in the same skillet.  Add a little more olive oil if necessary.

image image

Put the ribs in the slow cooker atop the cabbage, apples and onions.

image

Deglaze your skillet with the cider vinegar scraping up any browned bits.  Add the brown sugar and broth to the skillet.  Remove from the heat and pour over the ribs in the slow cooker.  Set the slow cooker on low and let it do the rest of the work for you.  I let it cook for approximately 8 hours.  The pork was fall off the bones tender and the cabbage was perfect.

I served it with sweet potatoes whipped up with a little cream cheese, brown sugar and a shake of cinnamon.

image

I loved it!  My husband got out the bottle of steak sauce.  He likes things a little more kicked up.  So next time I think I’ll go back to saucing the ribs and boiling the cabbage.

NOTE:  You could also add carrots and potatoes to the slow cooker and have your entire supper in one pot.  More like my grandmother’s boiled dinner.  The slow cooker will look like it’s too full but the cabbage cooks down significantly.

Shrimp Scampi with Homemade Fettuccine

image

Sunday my friend and I had a great time making homemade pasta together.  Tonight I used some of the pasta and made shrimp scampi for dinner.  Lots of garlic, oil and butter.  Probably not high on the healthy, low calorie meal pyramid.  Definitely not a dish I grew up eating.  As I think about it, I don’t recall ever eating shrimp or other shellfish as a child.  We ate a lot of fresh water fish but no shellfish or ocean fish except an occasional cod filet at a Friday fish fry.  I remember one time when my parents went out to dinner for what must have been a special occasion.  One of them had ordered lobster for dinner and they brought home the lobster shell to show us.  I remember being fascinated and a little repulsed and wondered how someone could possibly eat that creature!

Scampi is an easy dish to prepare and it doesn’t take a lot of time.  Even if you didn’t make your own pasta I hope you’ll try this.

Ingredients:

1 pound of uncooked shrimp, peeled and deveined

1/4 cup olive oil

5 T unsalted butter

4 cloves of garlic, pressed or minced

2 shallots finedly diced

juice and zest of one lemon

1/4 cup of minced parsley

1/2 cup white wine (or chicken broth)

red pepper flakes

salt to taste

pasta of your choosing

fresh grated asiago or parmesan cheese for serving

imageimage

This dish comes together pretty quickly so prepping all the ingredients before hand is important.  Press or mince the garlic and dice the shallots.

image image

Juice and zest the lemon.  Mince the parsley.

imageimage

Put a pot of salted water on the stove and bring it to a boil for cooking your pasta.  Heat the olive oil in a heavy skillet over medium high heat.  When the oil starts to shimmer cook your shrimp.   Cook in batches to avoid crowding them in your pan.  Cook the shrimp until they start to turn pink, then turn them.  Once cooked, they only take a minute, set them aside on a plate.

image image

image

Add the garlic, shallots, and red pepper flake to the oil.  Cook for 1 minute.  Stir in the white wine or broth.  Simmer for 2 minutes.

image image

Add the butter until it melts into the garlic and shallot oil.

image

Once the butter has melted stir in the parsley, lemon juice and zest, and return the shrimp to the skillet.  Remove from the heat and set aside until the pasta has finished cooking.

image

Cook the pasta until it is al dente.  Reserve some of the pasta water before draining in a colander.

image

Return the pasta to the kettle or put it into a large serving bowl.  Add the shrimp scampi to the pasta and gently toss.  If additional liquid is necessary add in some of the reserved pasta water.  Serve immediately with some fresh grated cheese.

image

Serve with a salad and a nice glass of wine.  If you’d prefer skip the pasta and serve the scampi with a baked potato and a vegetable.

NOTE:  I cooked the shrimp in a cast iron pan and there was a lot of oil splatter on my stove.  I’m not a big fan of cleaning greasy messes so next time I will do the scampi in my dutch oven.  A deeper dish will help to minimize the splatter.  It’s also important to pat the shrimp dry with paper towel before frying.